Jupyter Notebooks is a great environment for creating “code heavy” blog posts. Maybe you didn’t even plan to write a blog post, but you’ve done some interesting experiments in a notebook and you realize afterwards that you have results worth sharing. Either way, you’ll want some way to get your notebook onto your blog.
fast_template and nbdev are set up to handle Jupyter Notebooks nicely. Jupyter Notebooks and GitHub Pages already have some support for exporting notebooks to markdown; but I suggest you use fast_template and nbdev, with the process described in this post, because otherwise you won’t get useful features such as:
- Support for pasting images directly into your notebook
- Input and output cells clearly displayed with appropriate styles
- The ability to hide some cells from the markdown output.
This whole post was created using this method. You can see the source notebook here.
Writing your notebook
Your markdown cells, code cells, and all outputs will appear in your exported blog post. The only thing that won’t be shown is interactive outputs (e.g. ipywidgets, bokeh plots, etc), or cells you explicitly hide using the #hide marker discussed below.
When you write your notebook, just write whatever you want your audience to see. Since most writing platforms make it much harder to include code and outputs, many of us are in a habit of including less real examples than we should. So try to get into a new habit of including lots of examples as you write.
Often you’ll want to hide boilerplate such as import statements. Add #hide to the top of any cell to make it not show up in output.
Jupyter displays the result of the last line of a cell, so there’s no need to include print(). (And including extra code that isn’t needed means there’s more cognitive overhead for the reader; so don’t include code that you don’t really need!)
1+12It works not just for text, but also for images. For instance, here’s an example of the flip_lr data augmentation using fastai.vision:
Image.open('../fast.ai/images/fast_template/image2.png').flip_lr()
plt.plot([1,2]);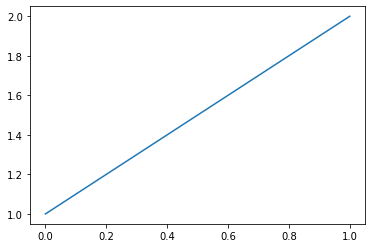
pd.DataFrame({'a':[1,2], 'b':[3,4]})| a | b | |
|---|---|---|
| 0 | 1 | 3 |
| 1 | 2 | 4 |
You can also paste images, such as screenshots, directly into a markdown cell in Jupyter. This creates a file embedded in the notebook that Jupyter calls an “attachment”. Or you can use Markdown to refer to an image on the internet by its URL.

Exporting to markdown
Before you export to markdown, you first need to make sure your notebook is saved, so press s or click File➡Save. Then close the browser tab with the open notebook. This is important, because when we export to markdown any attachments will be exported to files, and the notebook will be updated to refer to those external files. Therefore, the notebook itself will change; if you leave it open, you may accidentally end up overwriting the updated notebook.
You’ll need nbdev installed; if you haven’t already, then install it with:
pip install nbdevThen, in your terminal, cd to the folder containing your notebook, and type (assuming your notebook is called name.ipynb):
nbdev_nb2md name.ipynbYou’ll see that a file name.md and folder name_files have been created (where “name” is replaced by your notebook file name). One problem is that the markdown exporter assumes your images will be in name_files, but on your blog they’ll be in /images/name_files. So we need to do a search and replace to fix this in the markdown file. We can do this automatically with python. Create a file called upd_md.py with the following contents:
import fileinput,re
for f in fileinput.input(inplace=True):
    print(re.sub(r'^(!.*]\()(\w+_files/)', r'\1/images/\2', f), end='')
Then, in the terminal, run (assuming that upd_md.py and your markdown doc are in the same folder):
python upd_md.py name.mdThis will modify your markdown doc inplace, so it will have the correct /images/ prefix on each image reference.
Finally, copy name_files to the images folder in your blog repo, and name.md to your _posts folder, and rename name.md to have the required YEAR-MONTH-DAY-name.md format. Commit and push this to GitHub, and you should see your post!