Introduction
Large language models make it remarkably easy to generate code. Ask ChatGPT or Claude to build an application, and you’ll receive hundreds of lines of working code in seconds. But this creates a problem: you get code you don’t understand, and when you need to modify it, fix a bug, or add a feature, you’re stuck.
Solveit solve.it.com takes a different approach. Rather than generating large blocks of code, it works with you interactively to build solutions piece by piece. You write one or two lines at a time, understand what they do, then move to the next step. The AI sees your full working context and suggests what comes next based on what you’re actually building.
This method may sometimes be slower initially, but produces something more valuable: working code that you understand. Code you can modify, extend, and maintain. Code that becomes part of your expanding skill set rather than a black box you’re afraid to touch.
This document covers the features of the Solveit platform, built specifically to support this interactive, incremental approach to development. You can read it end-to-end, or use it as a reference guide when you’re using the platform.
Alternatively, you can watch the video that this article is based on here, to see the features in action (fun fact: this article was created using Solveit, using an approach similar to our article Let’s Build the GPT Tokenizer):
Dashboard & Setup
Dashboard
When you log in to SolveIt, you land on the dashboard. The key thing here is My instances.
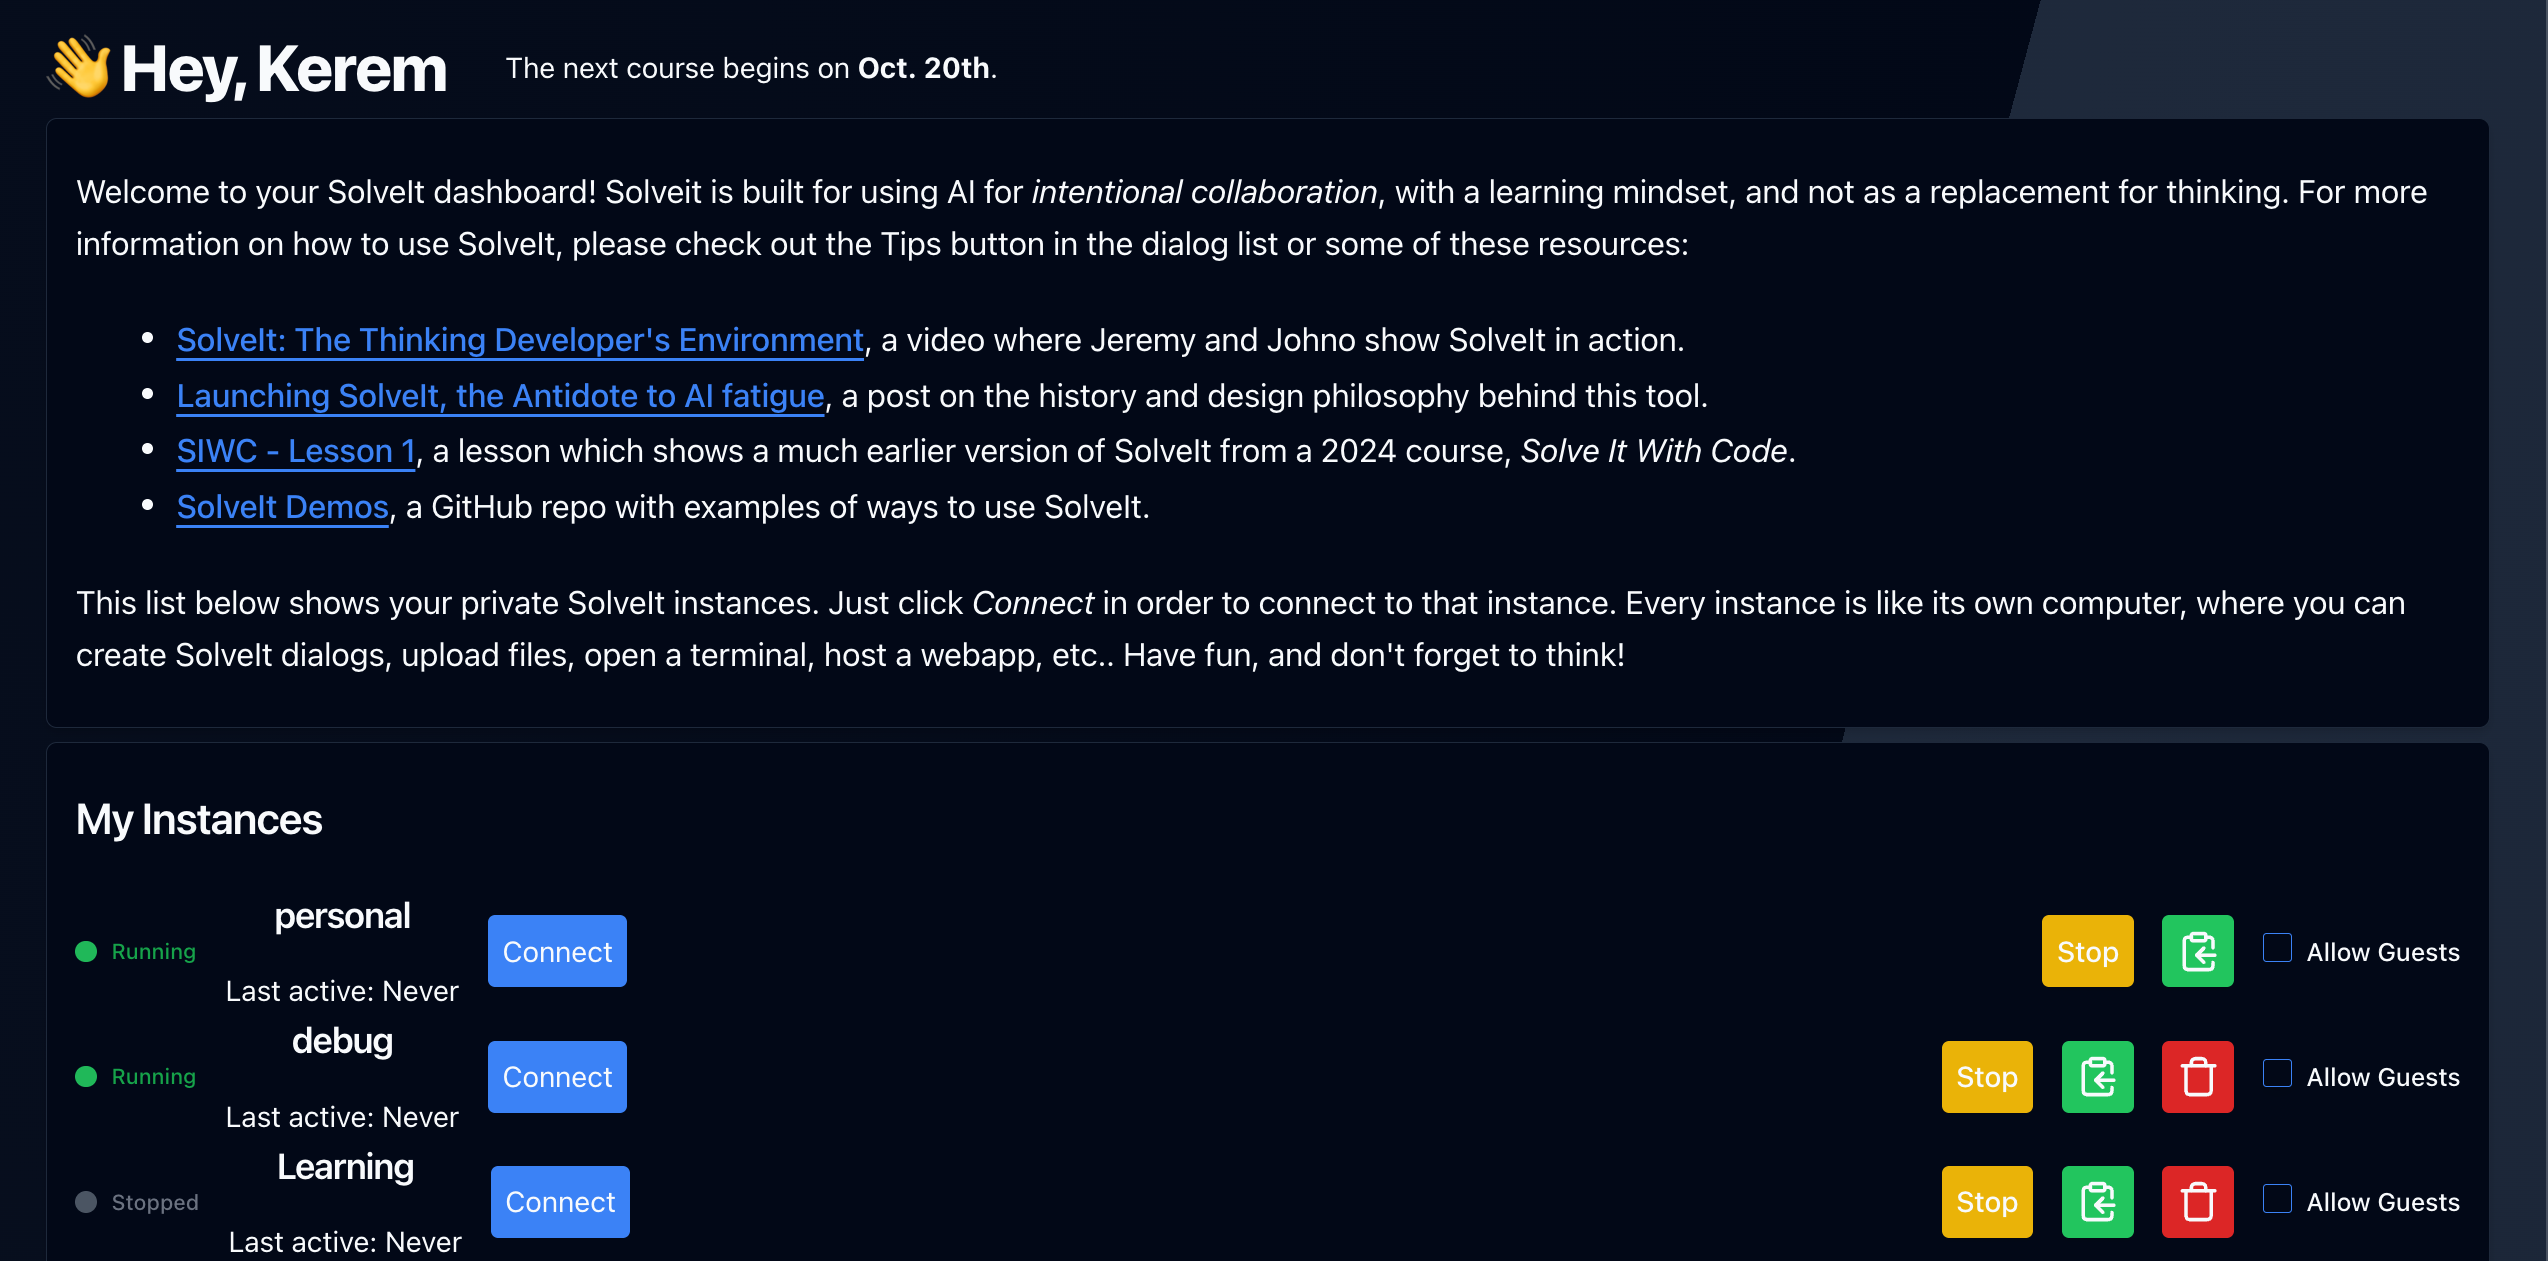
An instance is your personal machine on which SolveIt runs. It’s a full virtual private server where you can install software, store files, and host applications. You can create multiple instances to keep different environments isolated.
To start working, click Connect next to an instance which will take you to it’s private link. The dashboard tracks your running kernels and active sessions across all instances.
Instances
An instance is your personal machine in the cloud - a complete virtual private server with its own file system, installed software, secrets, and the ability to host applications.
You can create multiple instances to keep different environments isolated. Maybe one for a course, another for a personal project, and a third for experiments.
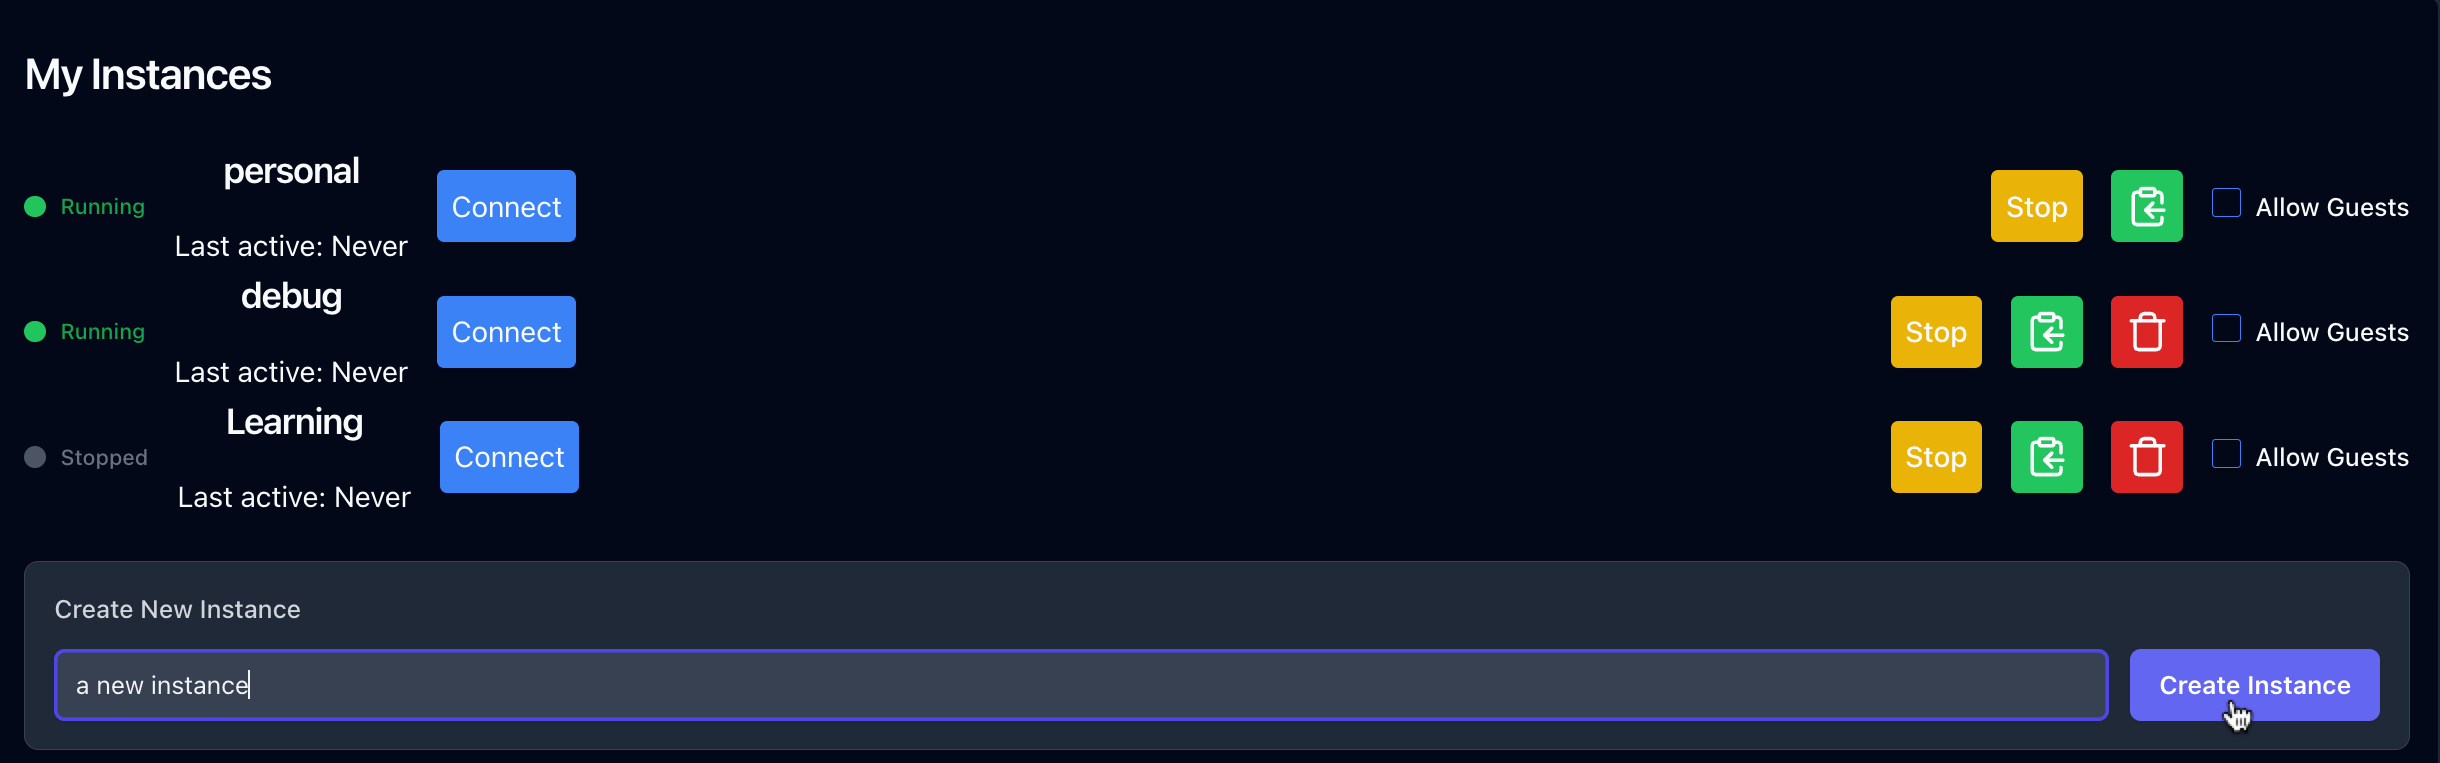
To create an instance, type a name in the input box and click “Create Instance”. Each instance is a full Unix box where you can install packages, clone repos, and work as you would on any remote server.
Private URLs
Each instance has a private URL - your secure access point to the SolveIt interface, dialogs, and files.
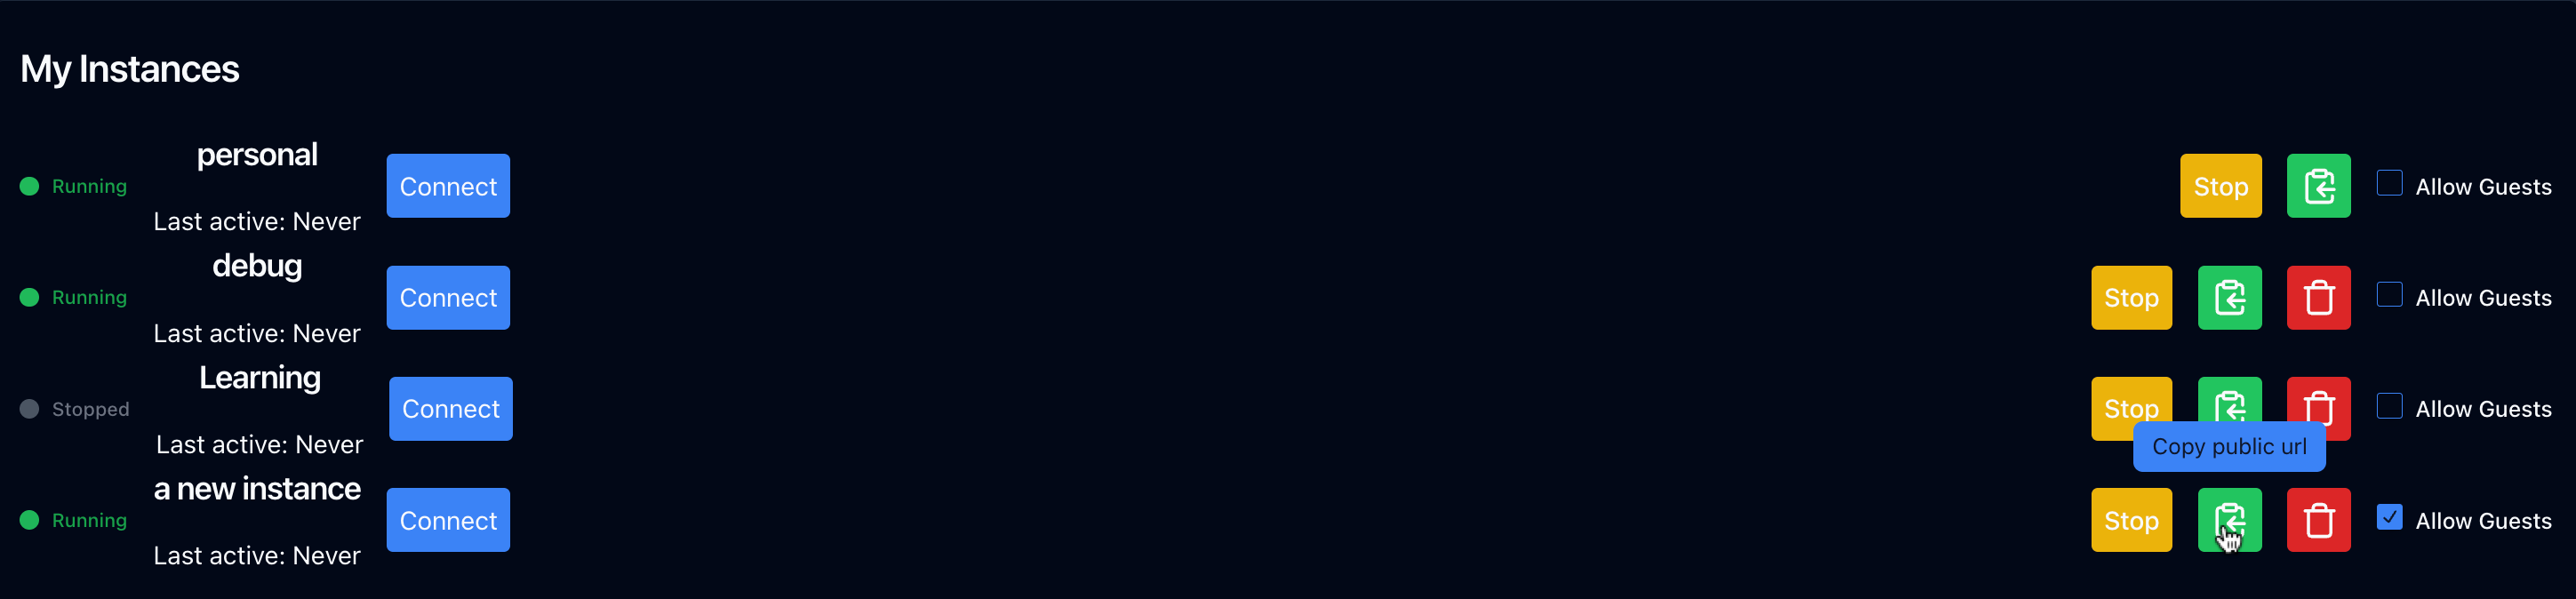
Instance list showing the “Allow Guests” checkbox for sharing access
By default, your private URL only works from the browser session where you logged in. This keeps your instance secure even if someone gets the URL.
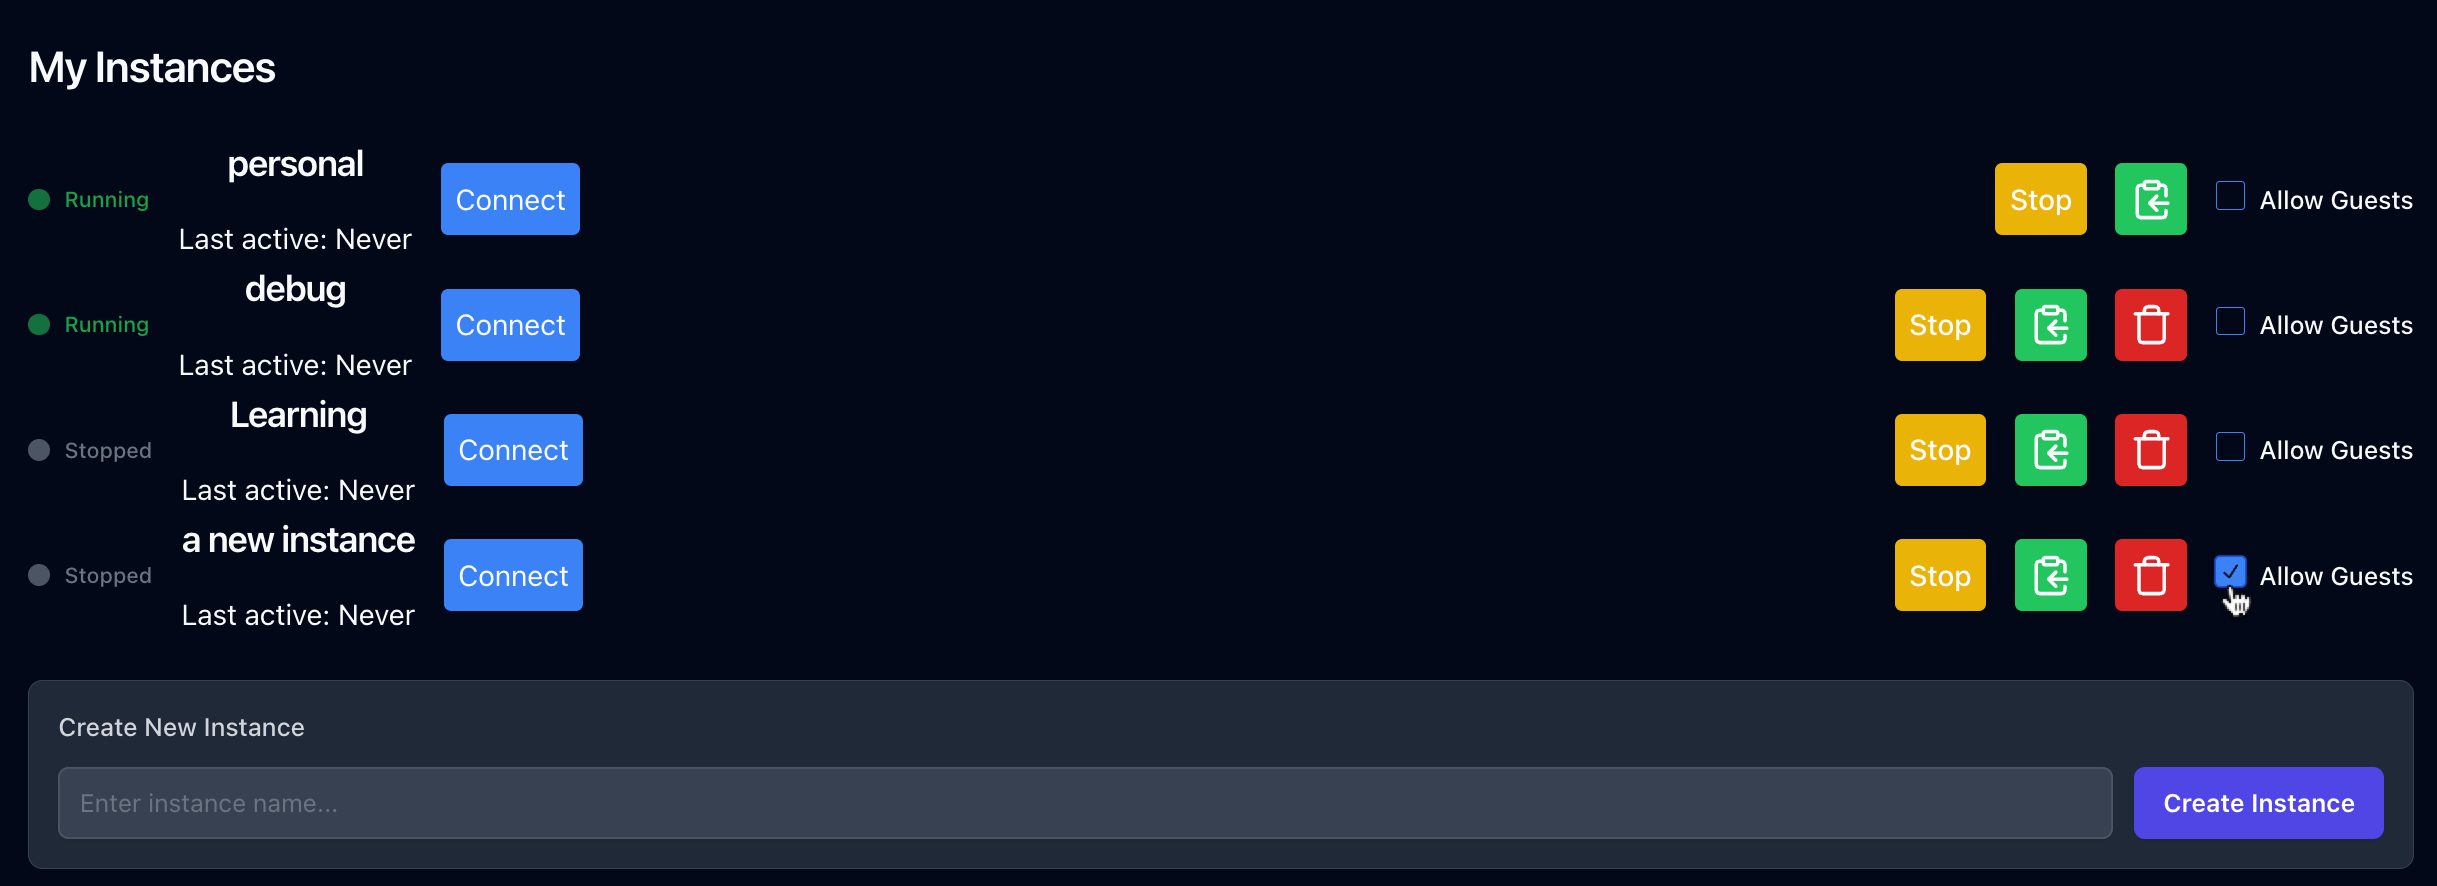
To share access with others, check the “Allow Guests” box for that instance, Stop the instance, and then start it again. Now anyone with the private URL can access your instance - they can see files, edit dialogs, and run code. Only enable this for instances without sensitive information, and only when you need to share.
To revoke access, uncheck “Allow Guests”, and stop and start the instance again. The URL stays the same, but only your browser session can use it.
Public URLs
You can copy the public URL from the dashboard by clicking the green button with the arrow icon.
While your private URL is for accessing the SolveIt interface, the public URL is for sharing applications you build.
When you run a web server on port 8000 inside your instance, that application becomes accessible via the public URL. Anyone with that link can use your app - they don’t see your code or dialogs, just whatever you’re serving.
You can build a web app, dashboard, API, or any service and instantly make it available to others. We’ll cover this in detail in the Hosting section later.
The public URL only exposes what you serve on port 8000. Your files, dialogs, and instance configuration remain private.
Dialogs & Basic Interface
Dialogs
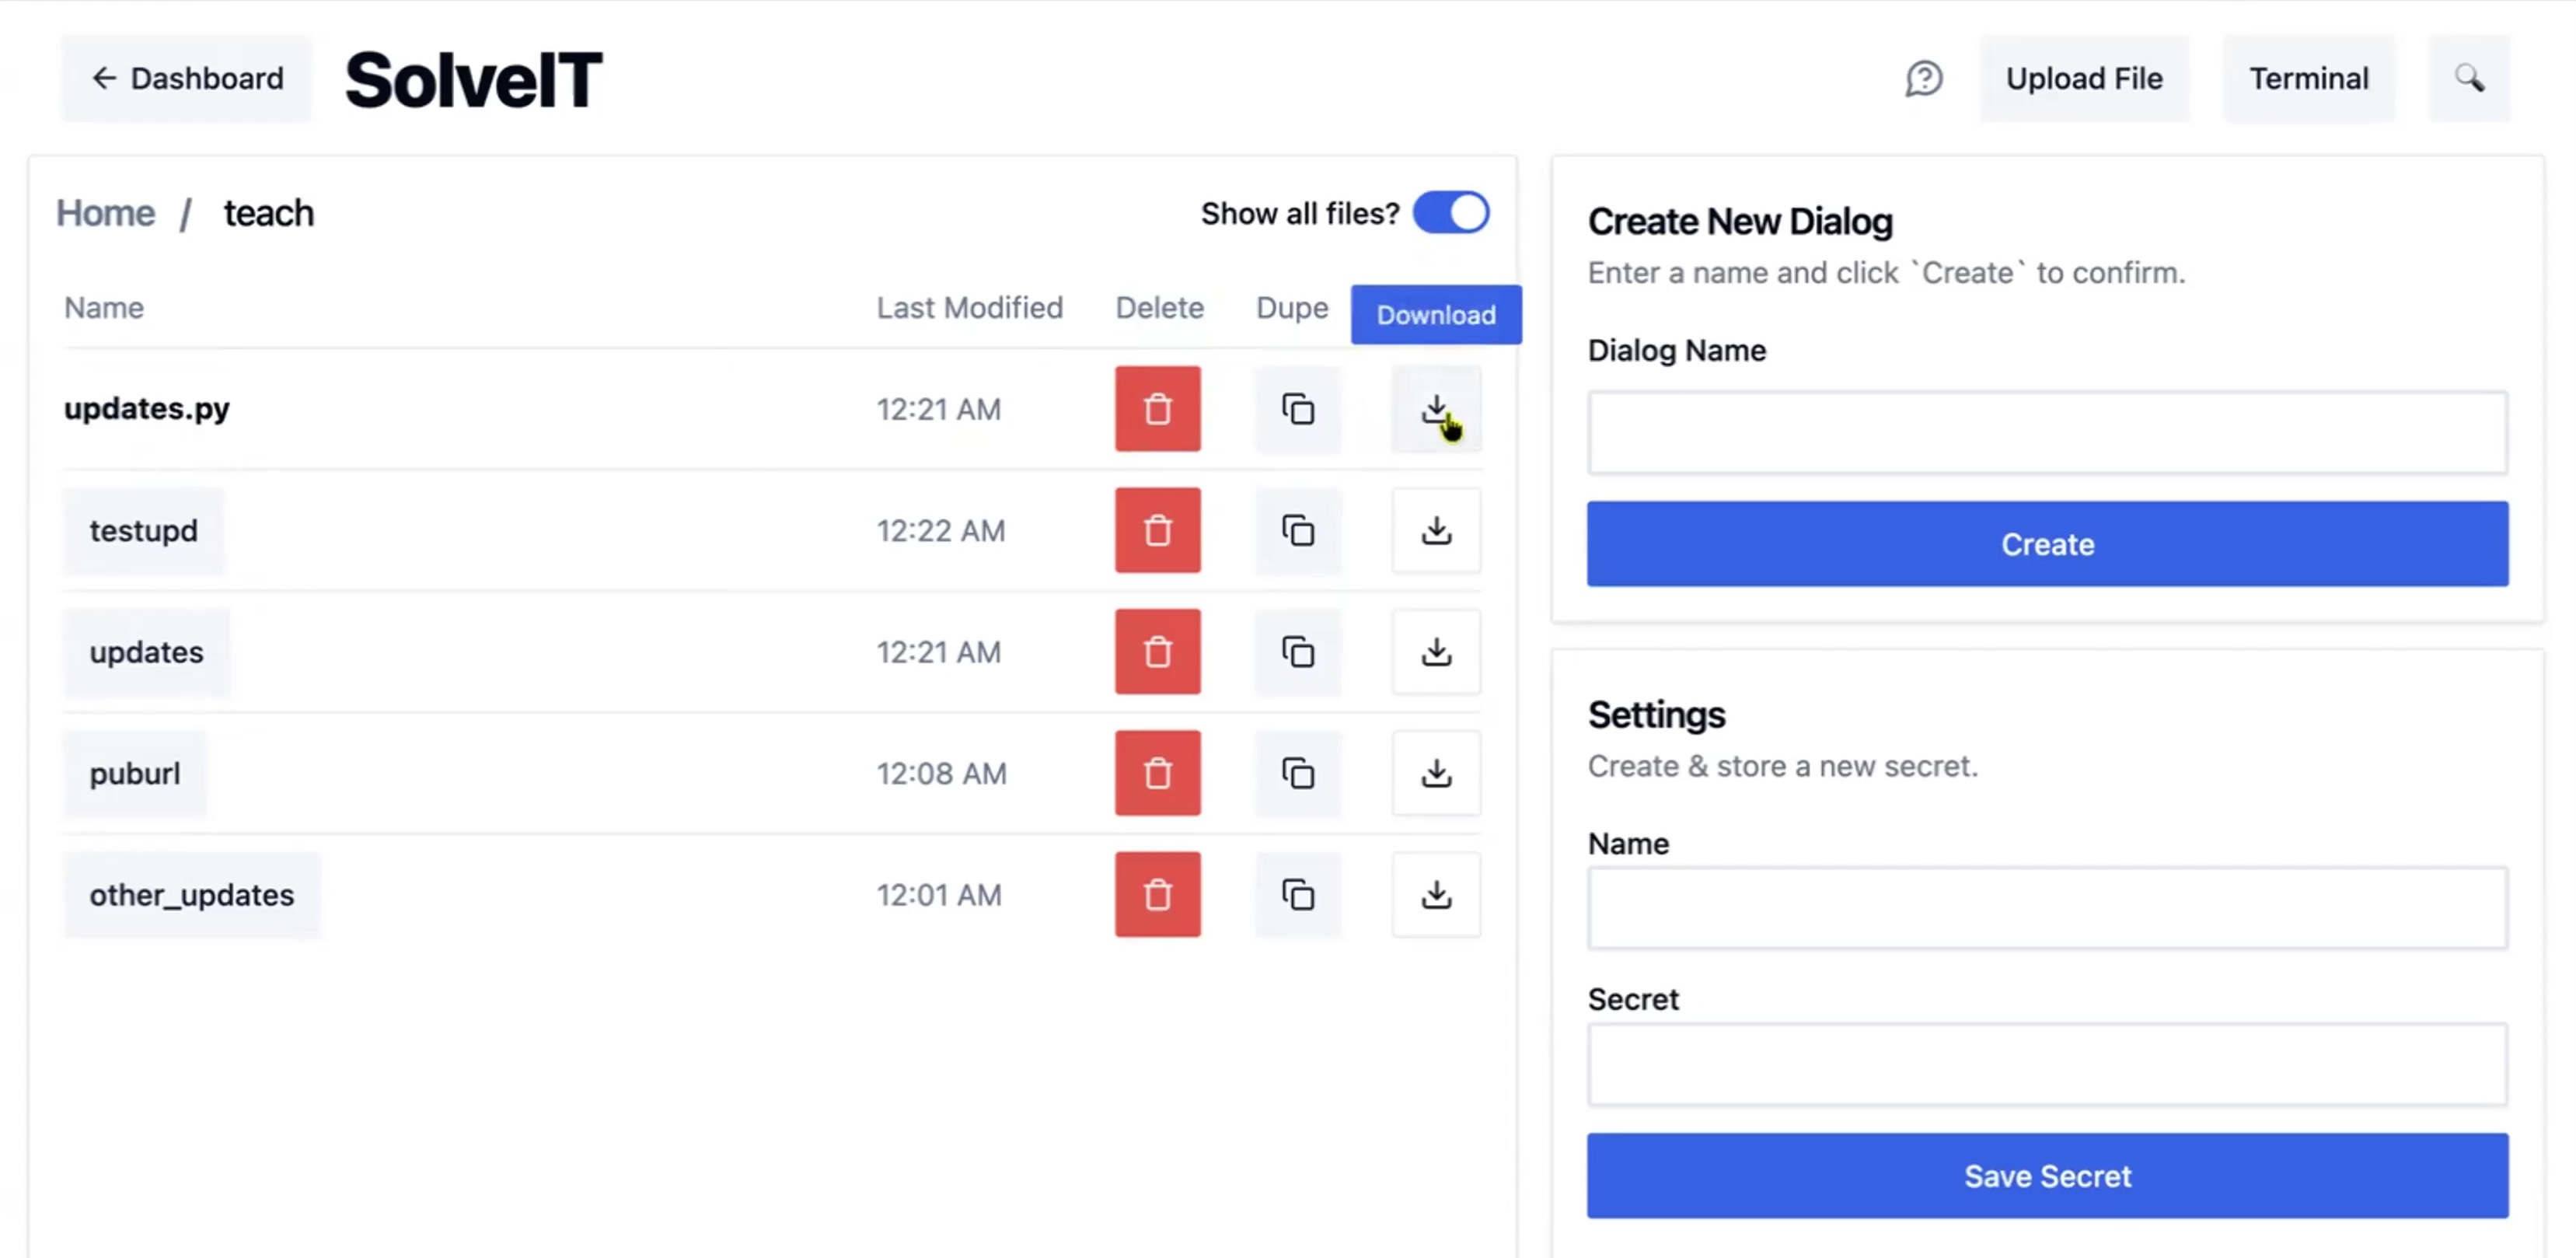
Once you click into an instance, you’ll see your list of dialogs and folders. By default, SolveIt shows your dialogs. Click “show all files” to see everything in your instance’s directory.
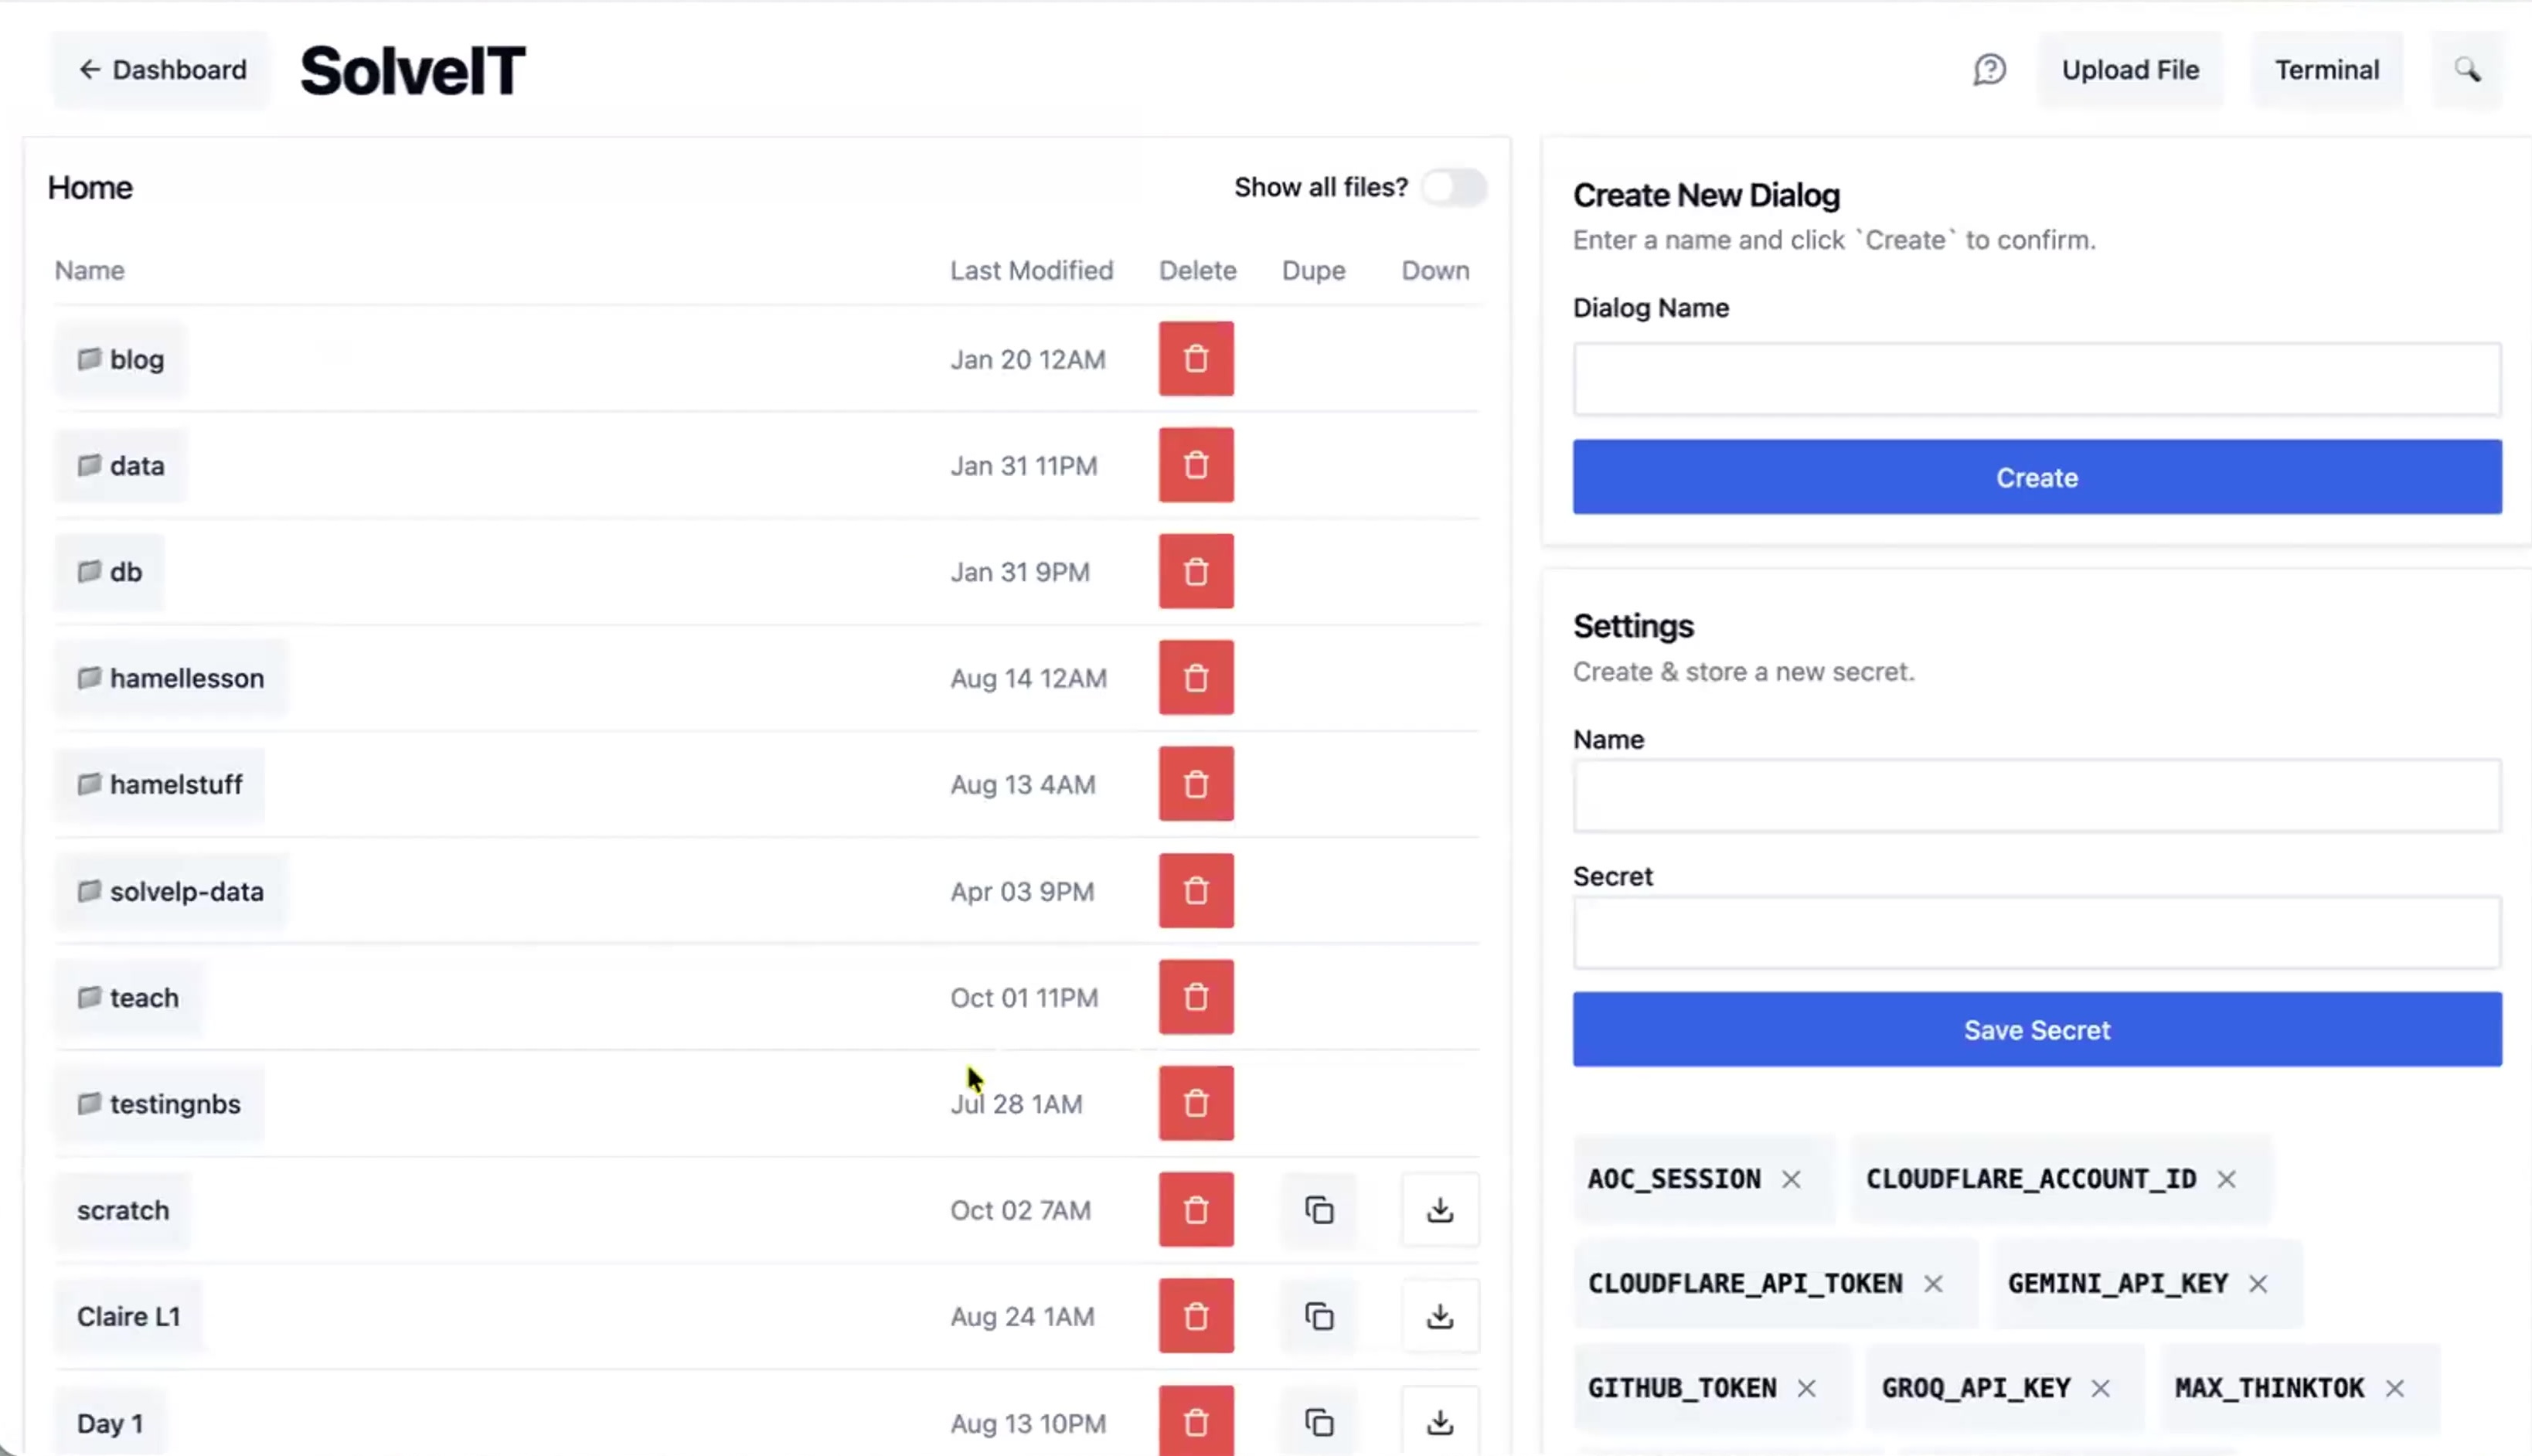
A dialog is a saved workspace where you make notes, write code, and chat with AI. Everything stays there until you delete it.
A dialog is a conversation between three parties: you and yourself (notes), you and the computer (code), and you and the AI (prompts). All three live together in the same place.
You can organize dialogs into folders to keep different projects separate.
Message Types
Everything inside a dialog is a message. There are three main types: code, note, and prompt. (There’s also raw, but you’ll rarely need it.)
Code messages run Python in your instance’s persistent interpreter. Output appears below the code.
Note messages are markdown-formatted text for documentation, explanations, or organizing your thoughts. They support headings, lists, links, images, and LaTeX math.
Prompt messages are for talking to the AI. The AI sees your entire dialog (unless you’ve hidden messages) and responds based on that context.
All three types live together in one dialog. You can write a note explaining a problem, ask the AI for help, execute the code it suggests, and document what you learned - all in one continuous workspace.
Editing Features
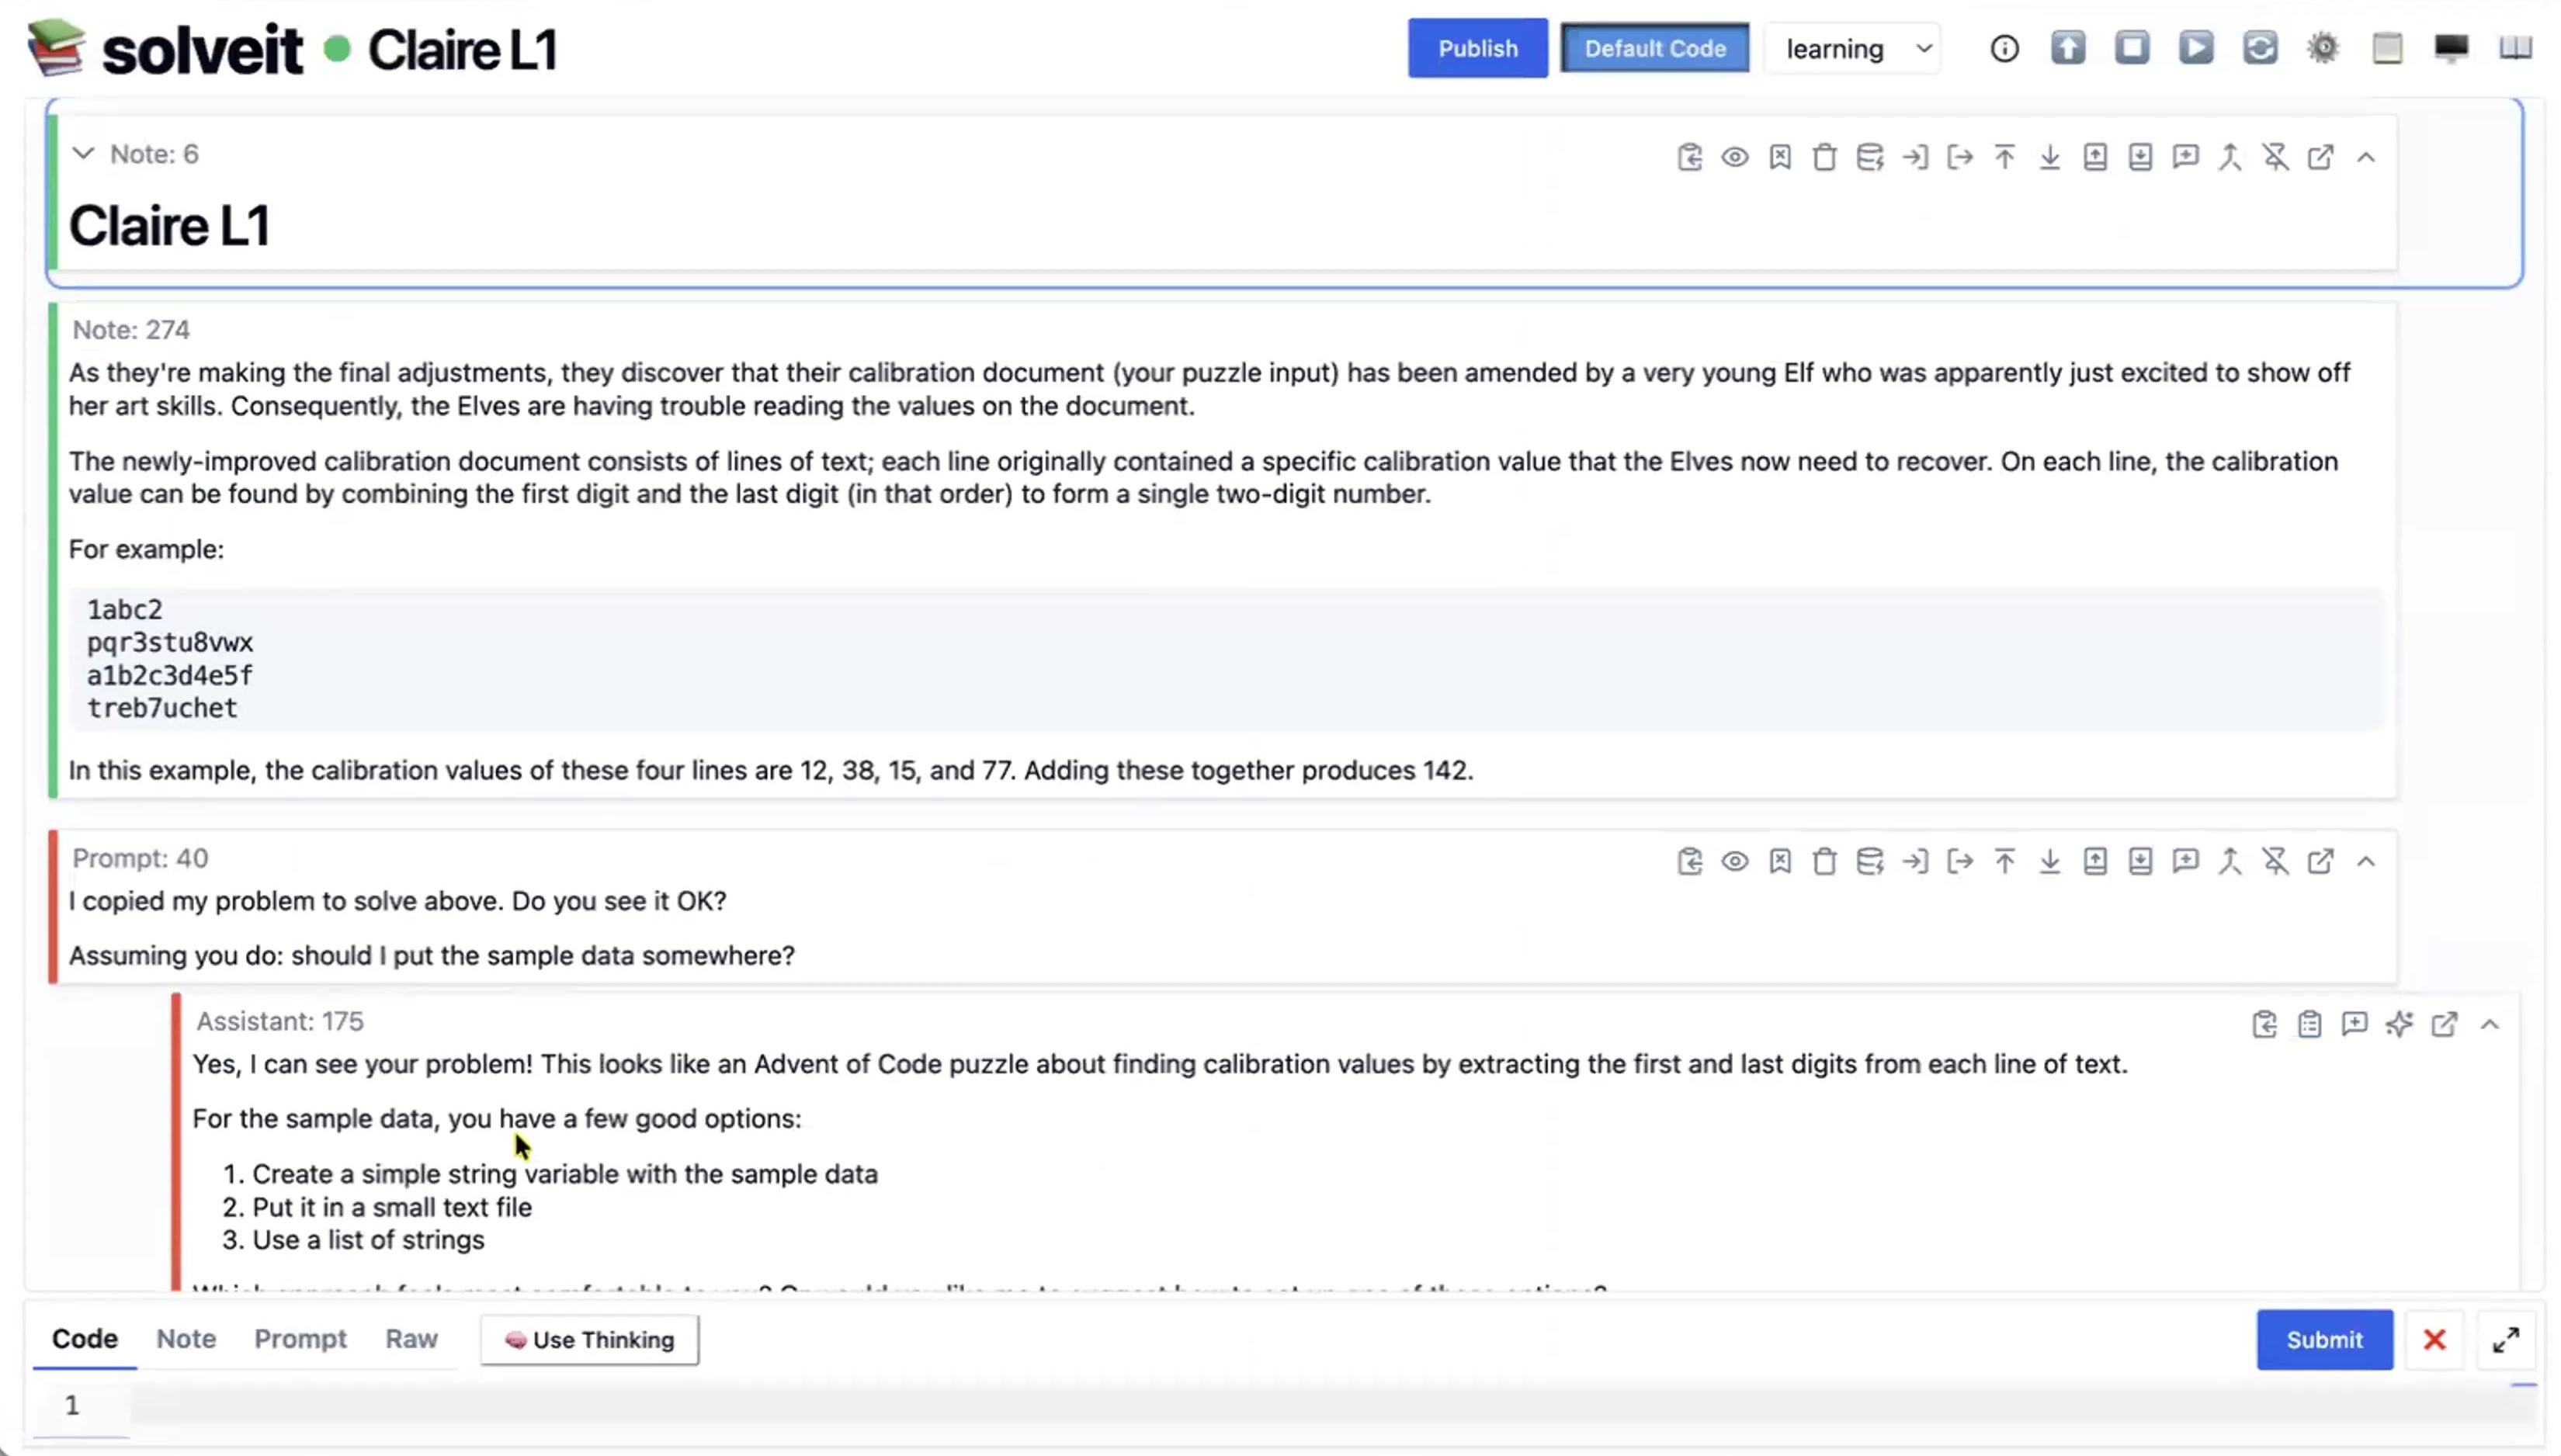
VS Code Editor
To edit a message, click on its content or hit Enter when it’s selected (you’ll see a blue border around selected messages). This opens the editor.
The editor is Monaco - the same editor that powers VS Code. You get syntax highlighting, intelligent indentation, multiple cursors, find and replace, and all the other features you’d expect from a real code editor.
If you need more room, maximize the editor to take up the full screen. This is useful when working on longer code or detailed notes.
Selection Mode & Keyboard Shortcuts
SolveIt is designed to be keyboard-driven. When you’re not editing a message (the state we call “Selection Mode”), you can navigate and operate on messages using keyboard shortcuts.
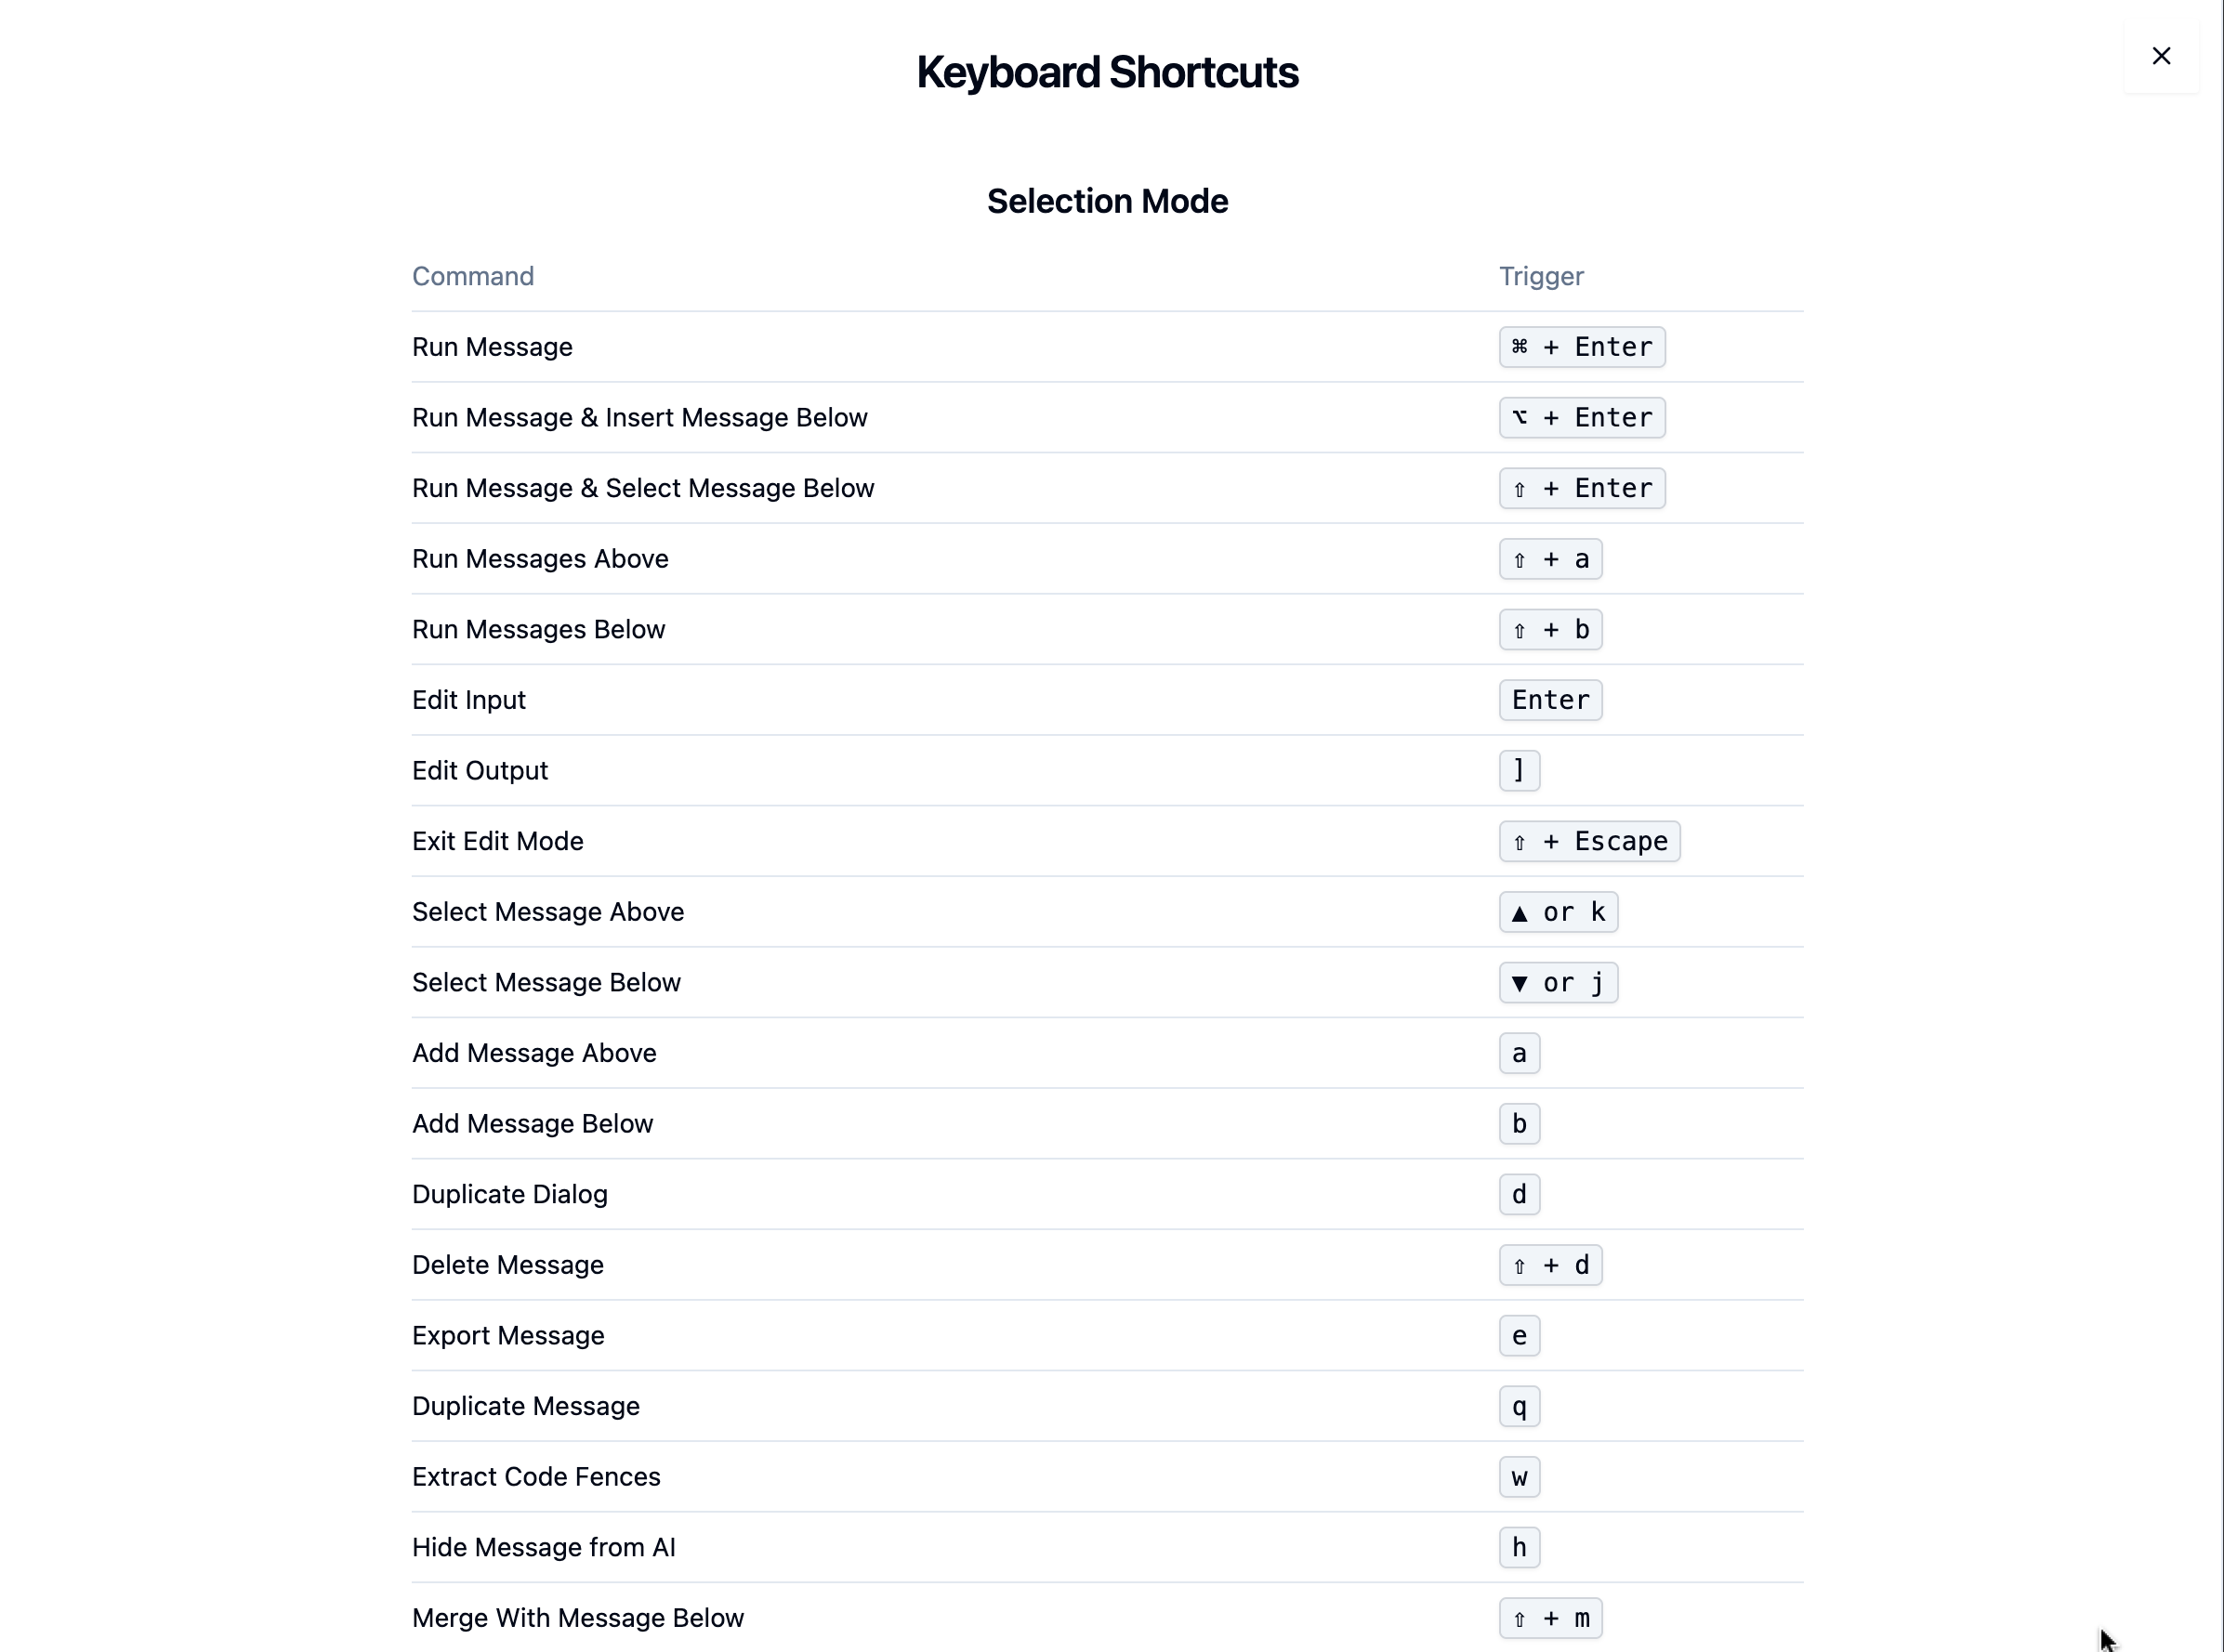
Click “list of keyboard shortcuts” to see all available commands. The essential ones: Fn+Left/Right jumps to top or bottom. A and B add messages above or below. X, C, V work like you’d expect for cut, copy, paste. Cmd+Shift+J/K/L switches between code, note, and prompt mode. Enter edits a message, Cmd+Enter runs it.
If you’ve used Jupyter notebooks, the selection shortcuts will feel familiar. If you’ve used VS Code, the editor shortcuts will be familiar. Learn these shortcuts - they dramatically speed up your workflow.
Real-time Collaboration
You can share your dialog URL with someone else and edit it simultaneously. Changes appear on both screens in real time.
In this example, one person added a code cell while another was splitting notes. Both changes showed up instantly for both users.
This is useful for getting help, pair programming, teaching, or team collaboration.
Remember: this requires sharing your private URL, so only do this with people you trust or on instances without sensitive information.
Markdown Headings
To organize your dialogs, turn any note into a heading by pressing a number key (1-6) in selection mode. Press 2 for a level-2 heading, 3 for level-3, and so on.
This adds standard markdown syntax (## Heading). Headings create structure that unlocks other features:
Symbol Browser
The Symbol Browser (Ctrl+Shift+V) is your navigation hub. It shows headings, variables, and functions.
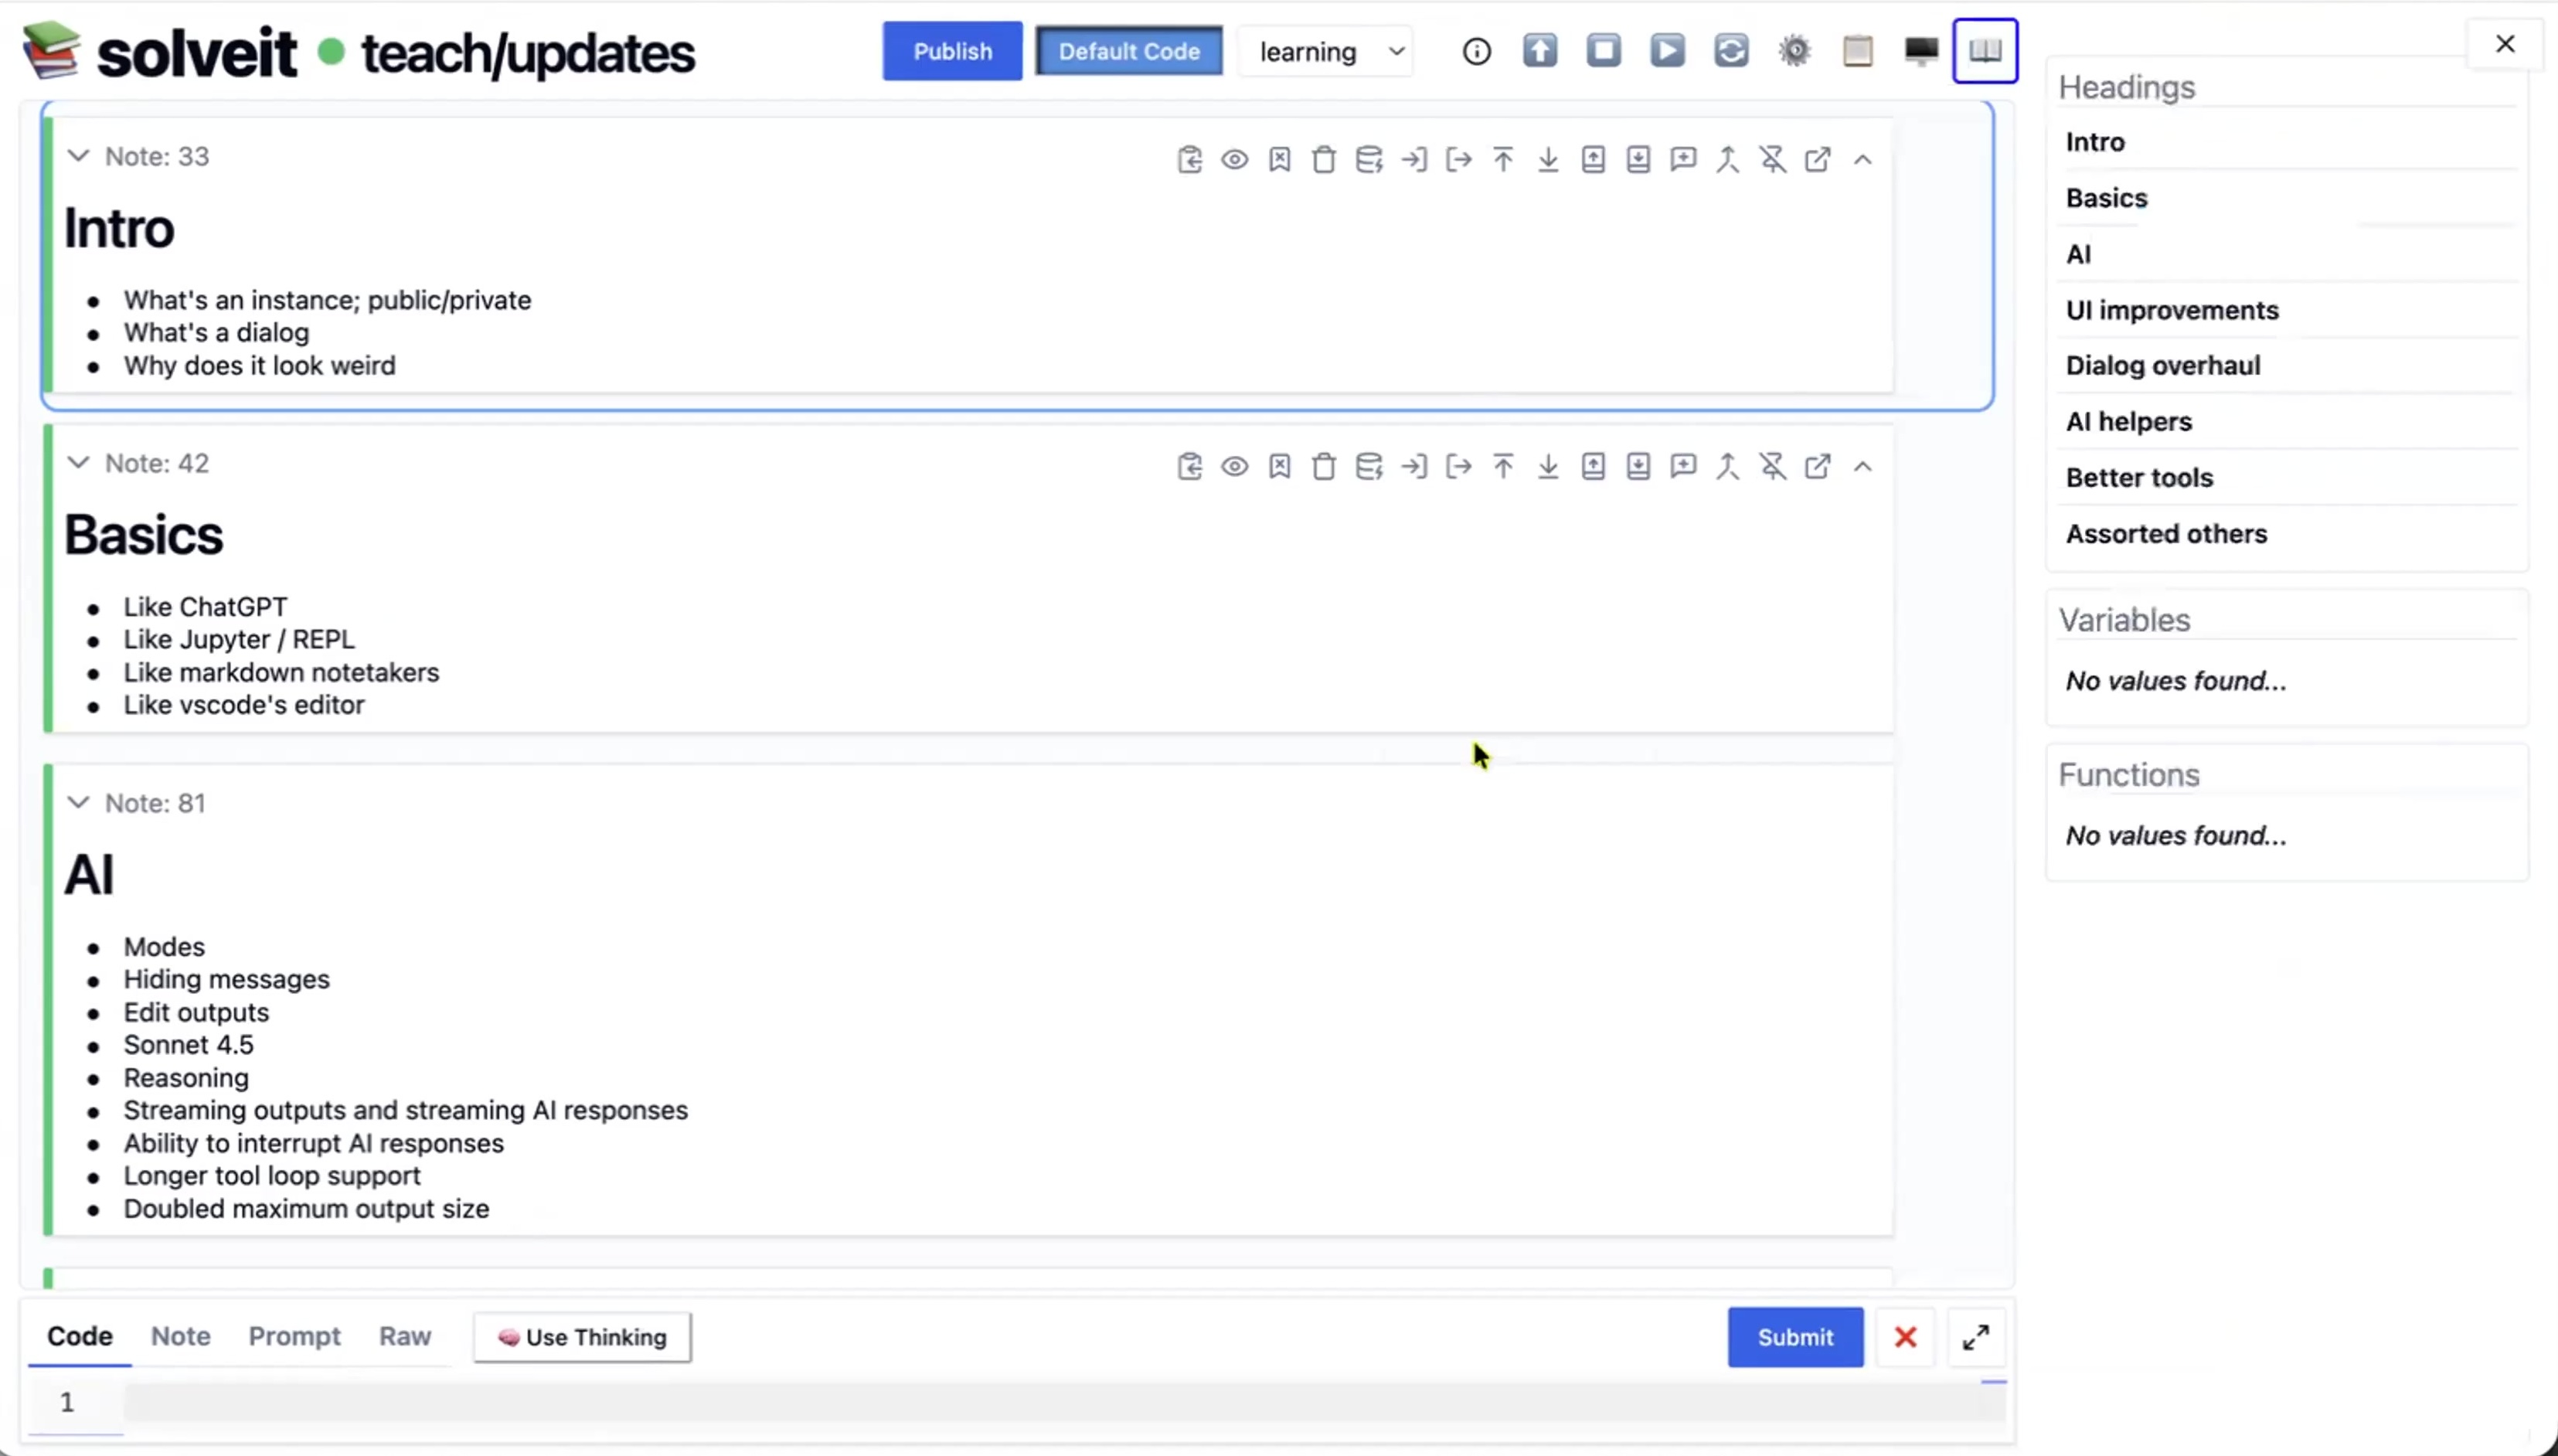
The Headings section gives you an outline. Click any heading to jump to that section.
The Variables section shows all Python variables in your kernel with their current values. It’s live - as you run code that creates or modifies variables, they appear or update immediately. Restart your kernel, the list clears. Click a variable name to jump to where it was defined.
The Functions section works the same way - lists all functions and lets you jump to their definitions.
The Symbol Browser stays in sync with code execution. Define a new variable or function, it shows up immediately. This makes it easy to trace back through your work and understand the current state of your Python environment.
Mixed Message Types
In many tools, you’re in one mode at a time. ChatGPT is for chatting with AI. Cursor is for editing code. Jupyter is for running code. You’re constantly switching between different environments.
SolveIt intentionally mixes everything together. You can create a dialog that’s just prompt messages - pure AI conversation. Or just code messages - pure Python execution. Or just notes - pure documentation. But the power comes from mixing them.
Here’s a typical pattern: write a note explaining what you’re trying to accomplish. Ask the AI for help with a prompt. The AI suggests some code. You copy that into a code message and run it. You see the output. You add a note about what worked or didn’t. You ask another question. The cycle continues.
The AI isn’t in isolation either - it can see everything that you see in your dialog. When you ask it a question, it sees your notes, your code, your outputs, your previous prompts. You’re sharing context with it, just like when you’re pair programming with another person.
This is very different from tools where the AI only sees the immediate conversation, or where your notes and code live in separate places. Everything is one continuous conversation between you, the computer, and the AI.
Collapsible Sections
Markdown headings create collapsible sections. A little arrow appears next to each heading - click it to collapse everything under that heading.

When collapsed, you see a token count. The heading message contains 6 tokens, the collapsed content underneath has 723 more.
Use collapsing to keep long dialogs manageable, or organize project phases.
Navigate with Left arrow (start of section) and Right arrow (end of section). Cut (X) a collapsed section and you cut the whole thing.
Note: All messages are visible to the AI unless they are hidden even when collapsed.
Cut/Copy/Paste
Messages are first-class objects you can cut, copy, and paste. Select a message and press X to cut it (delete with the ability to paste elsewhere). Press C to copy, V to paste.
This works with collapsed sections too. Collapse a heading section, press X or C, and you’ve cut / copied the entire section. Navigate somewhere else and press V to paste it.
This makes reorganizing dialogs fast. Move completed work to the bottom, reorder steps, duplicate sections to try variations, or copy useful code between dialogs.
The clipboard is standard - you can even copy from one dialog and paste into another.
Combined with collapsible sections, this lets you treat your dialog like an outline editor. Structure your work, then reorganize as you go.
AI Interaction
ChatGPT-like Interaction & Streaming
You can use SolveIt like ChatGPT.
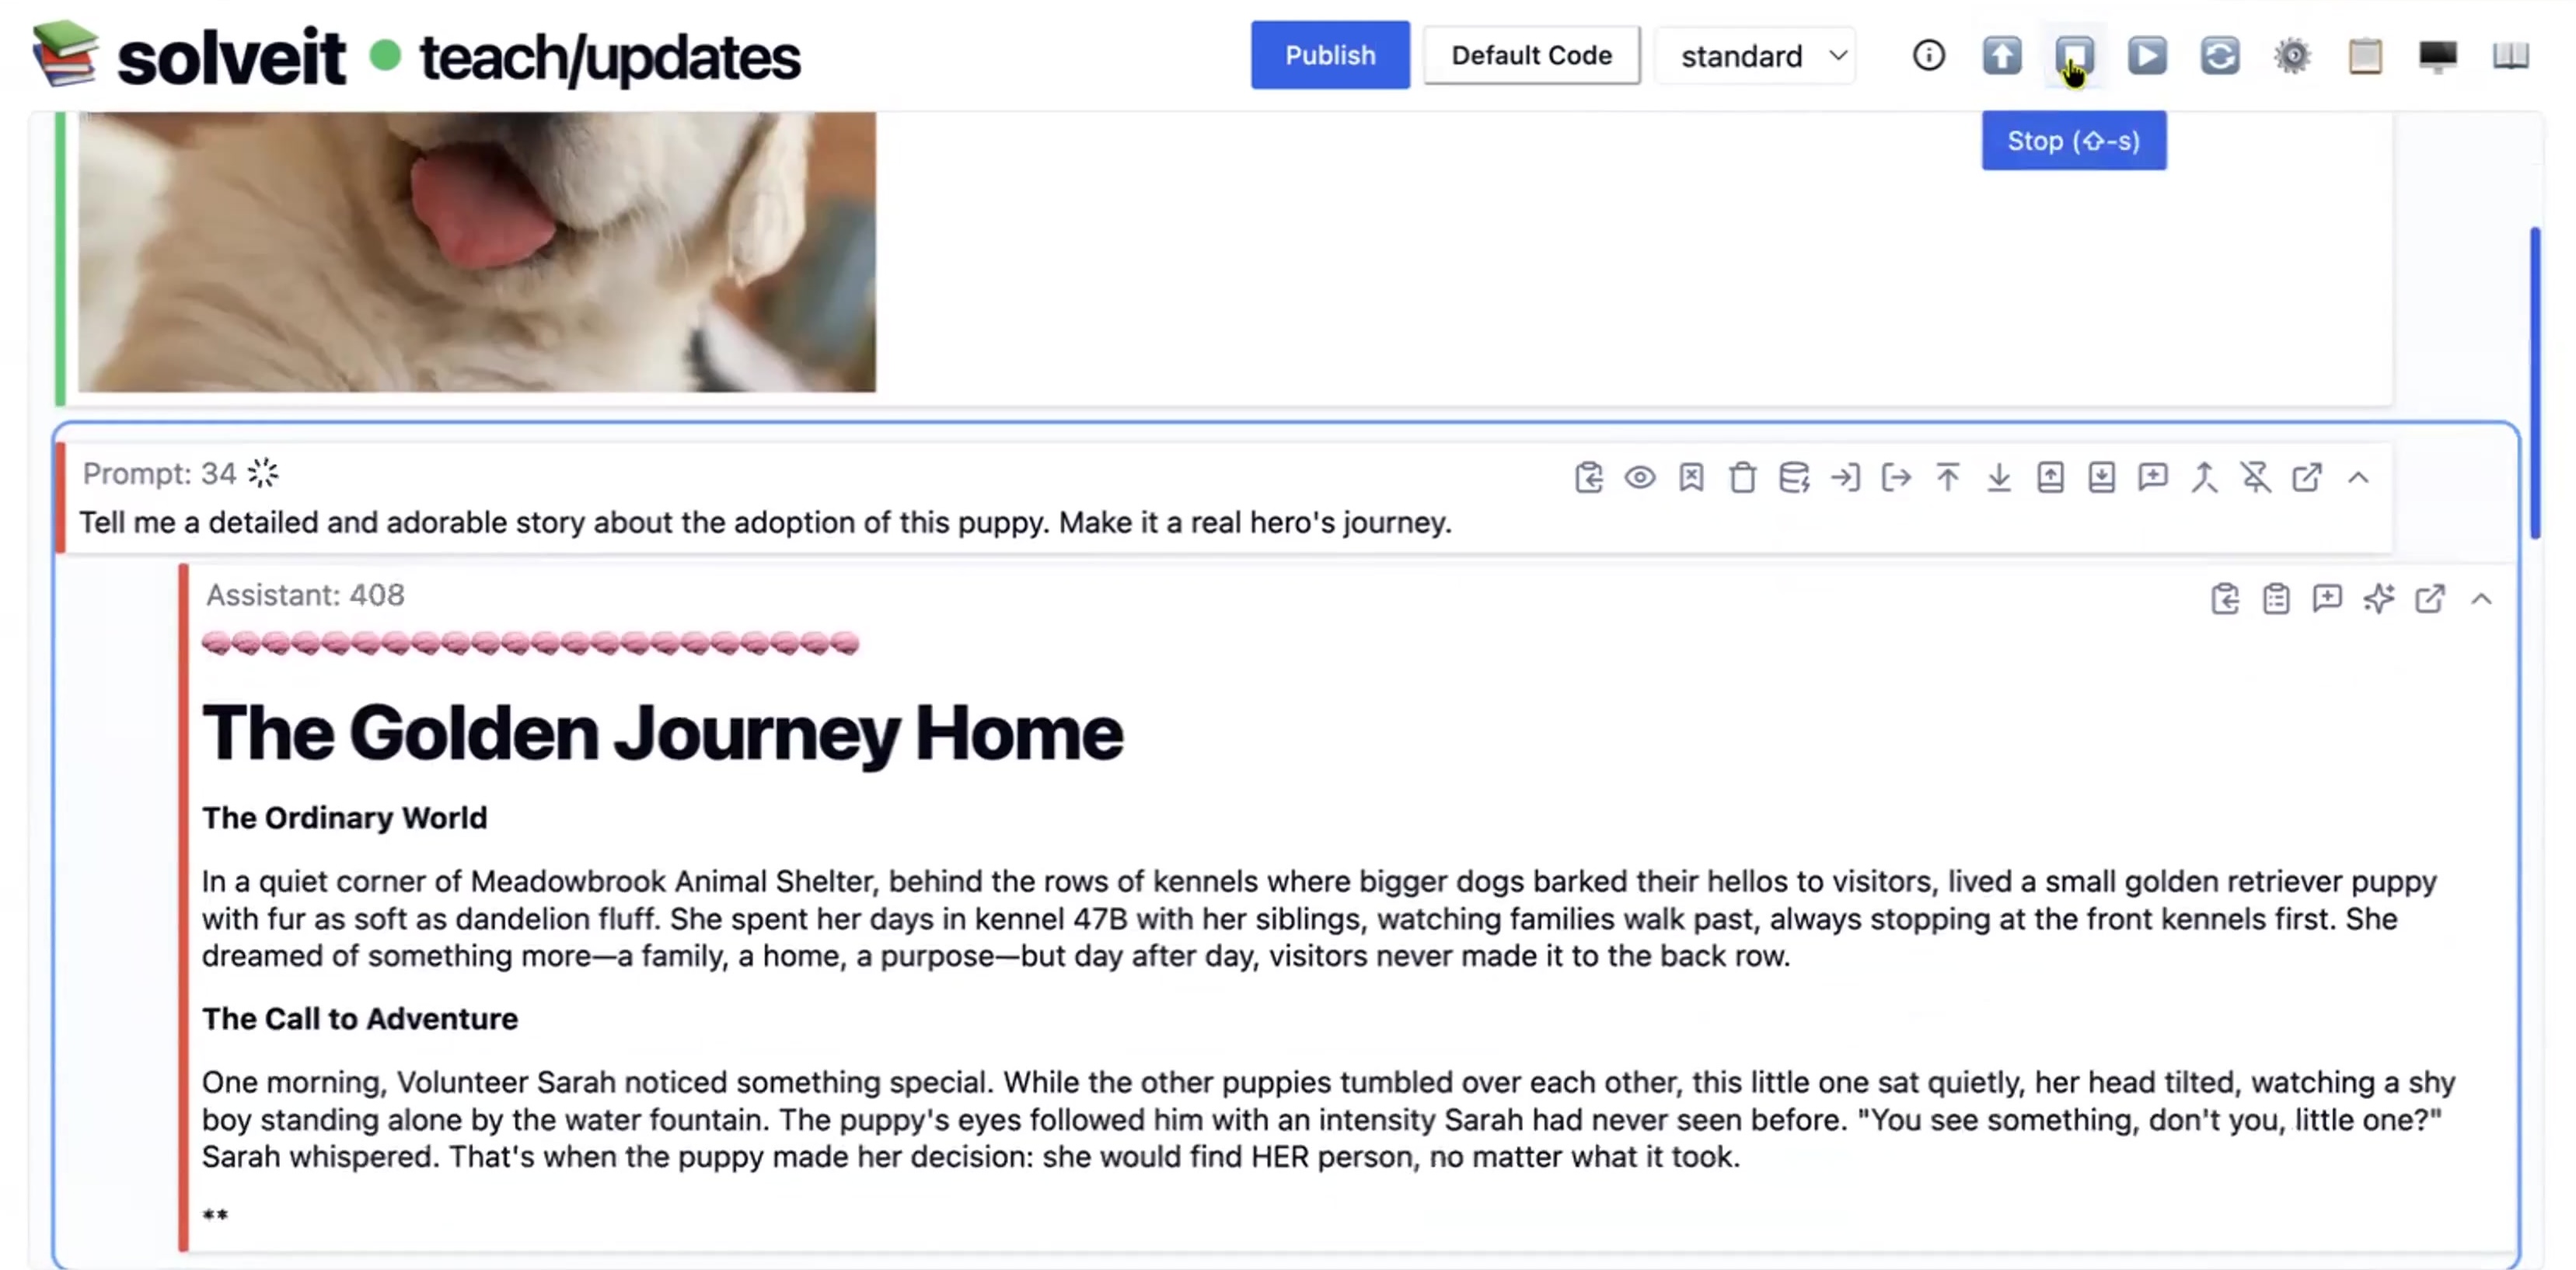
To talk to the AI, switch to prompt mode by pressing Cmd+Shift+L (or Ctrl+Shift+L) or clicking the prompt button in the editor toolbar. Once in prompt mode, type your question and hit Cmd+Enter to send it.
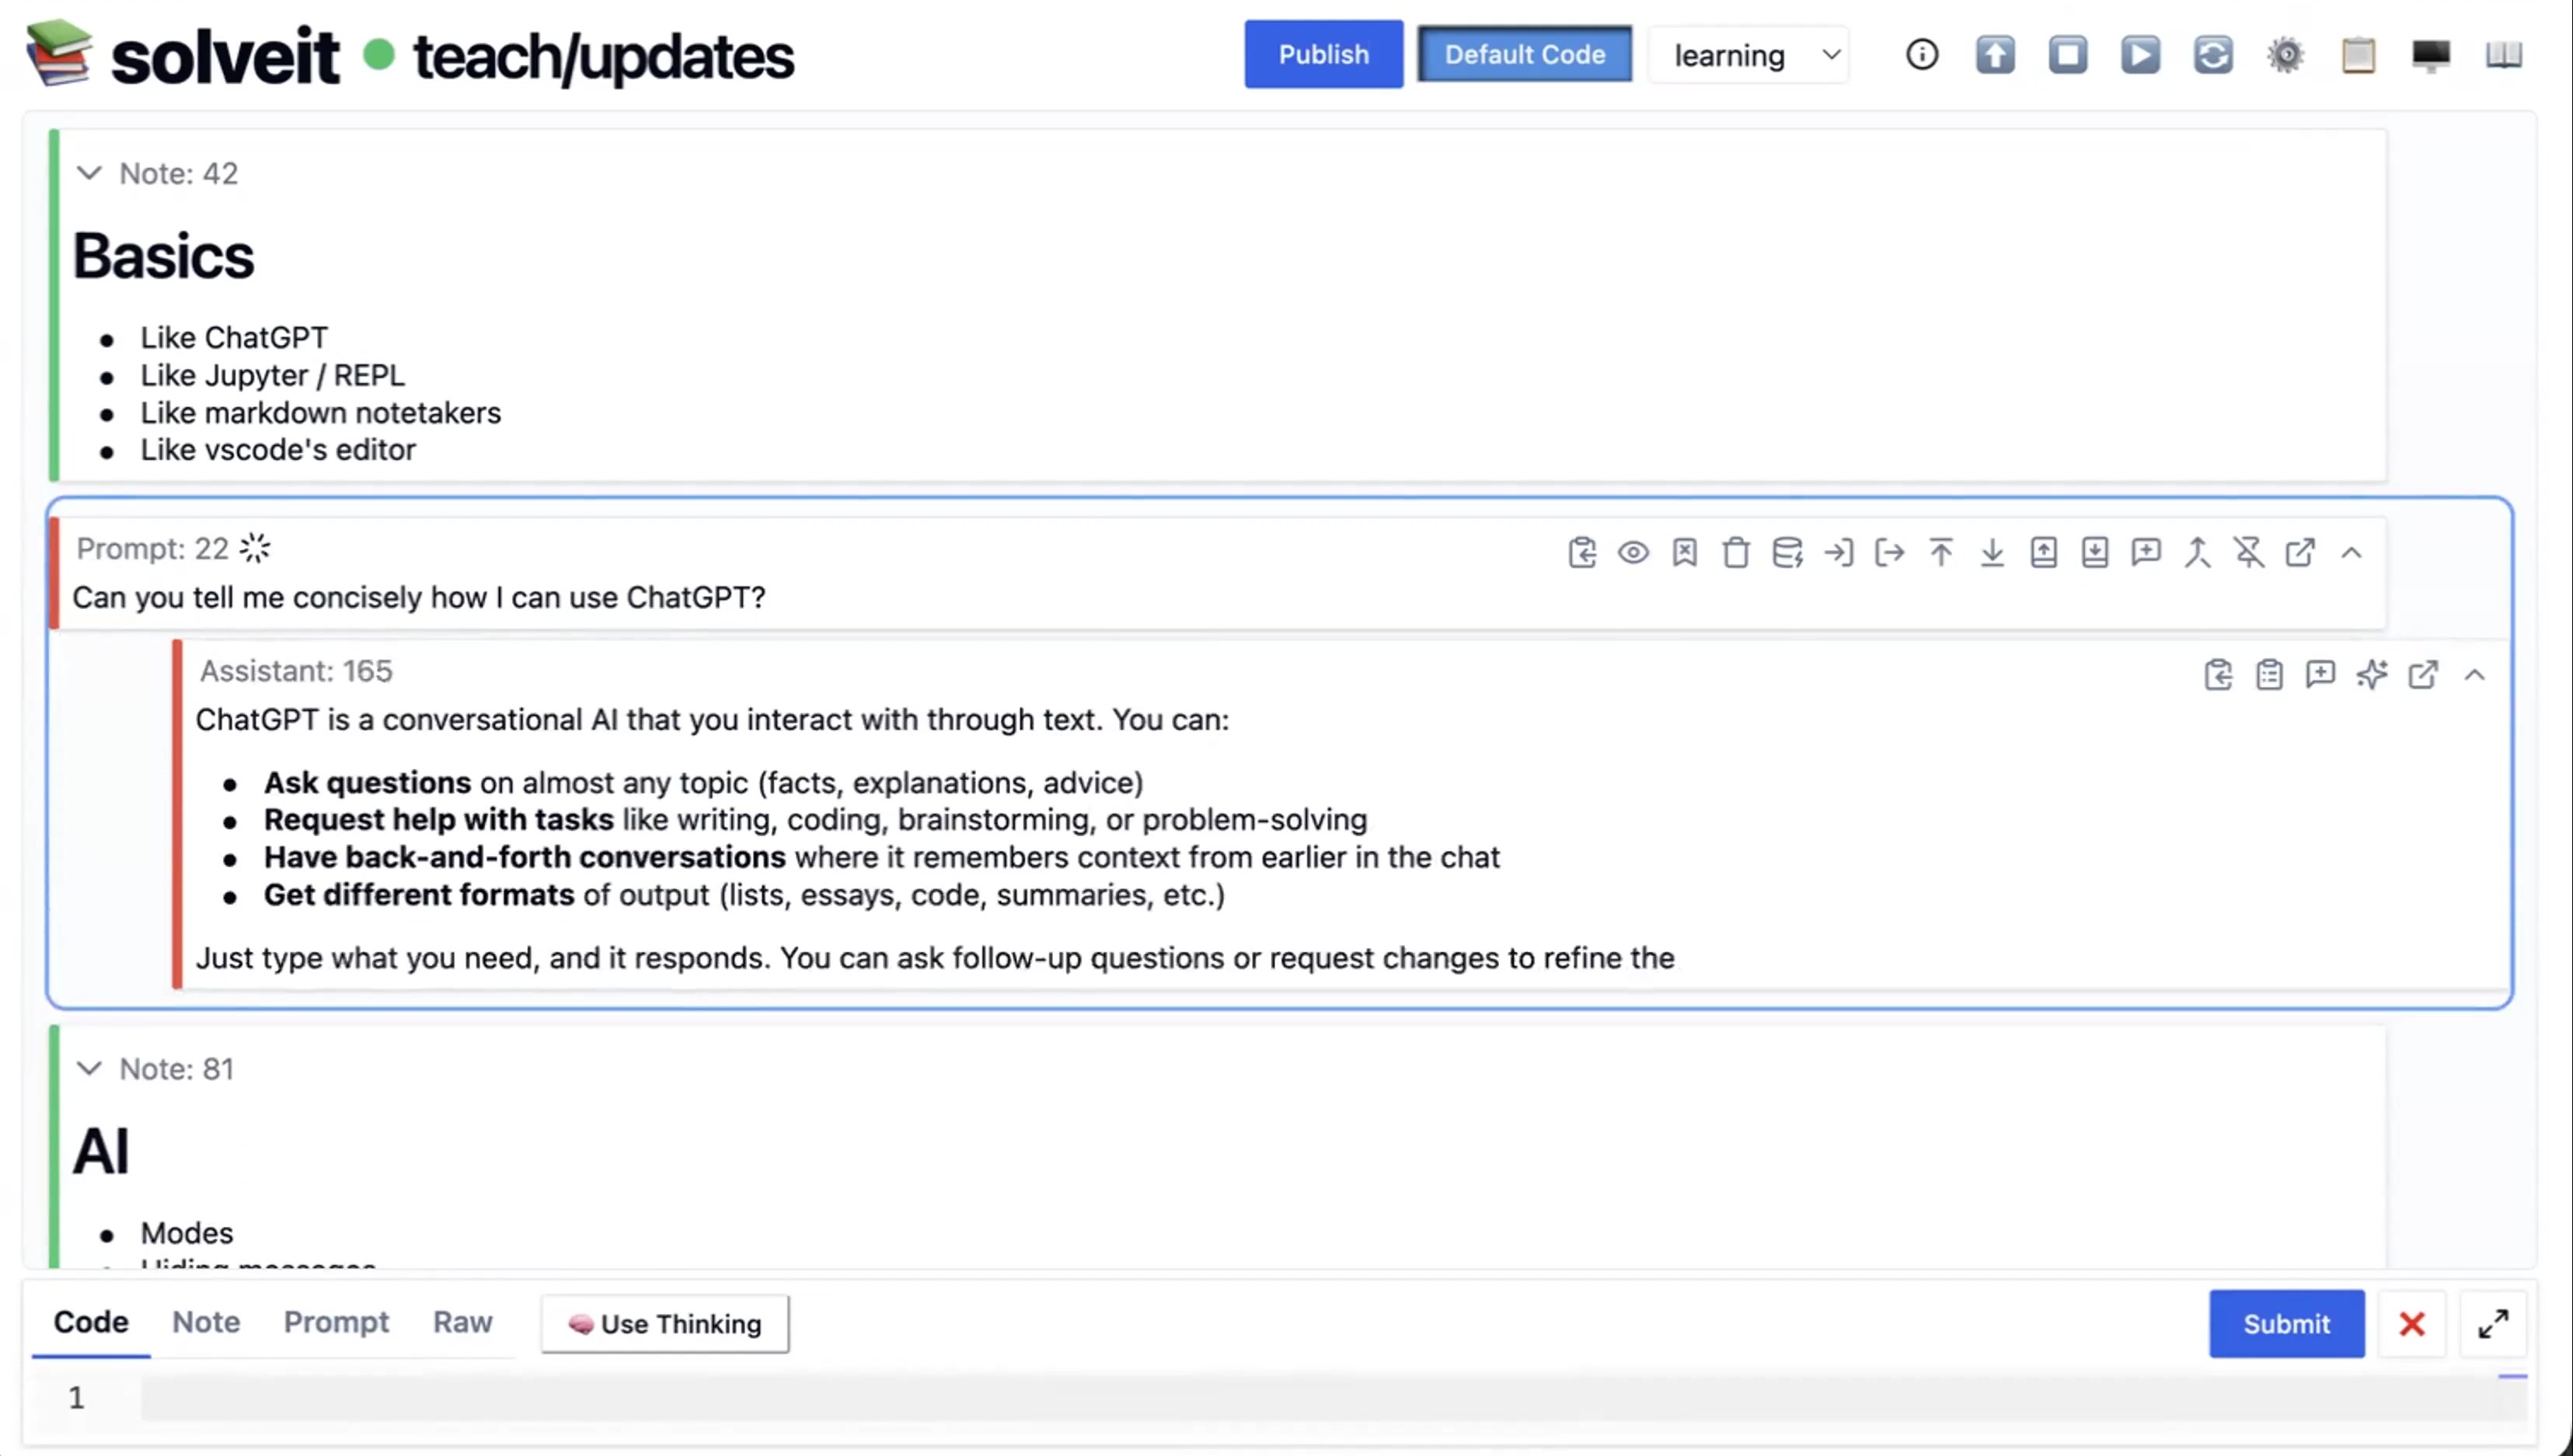
The AI responds with streaming output - you see it being generated in real time. You can stop generation at any time with Shift+S (or click the Stop button). This is useful when the AI goes in the wrong direction, gives you enough information, or starts repeating itself.
The partial response stays in your dialog. Edit it if needed, or delete it and try again with a better prompt.
After the AI responds, you don’t immediately get another prompt box. The default behavior (Cmd+Enter) encourages you to think about the response or run some code before asking the next question.
For rapid back-and-forth conversation like ChatGPT, use Alt+Enter (or Option+Enter) when you submit. The AI responds, and as soon as it finishes, a new prompt box appears immediately. You can keep asking questions in quick succession.
Use Cmd+Enter for thoughtful progress; Alt+Enter for rapid conversation.
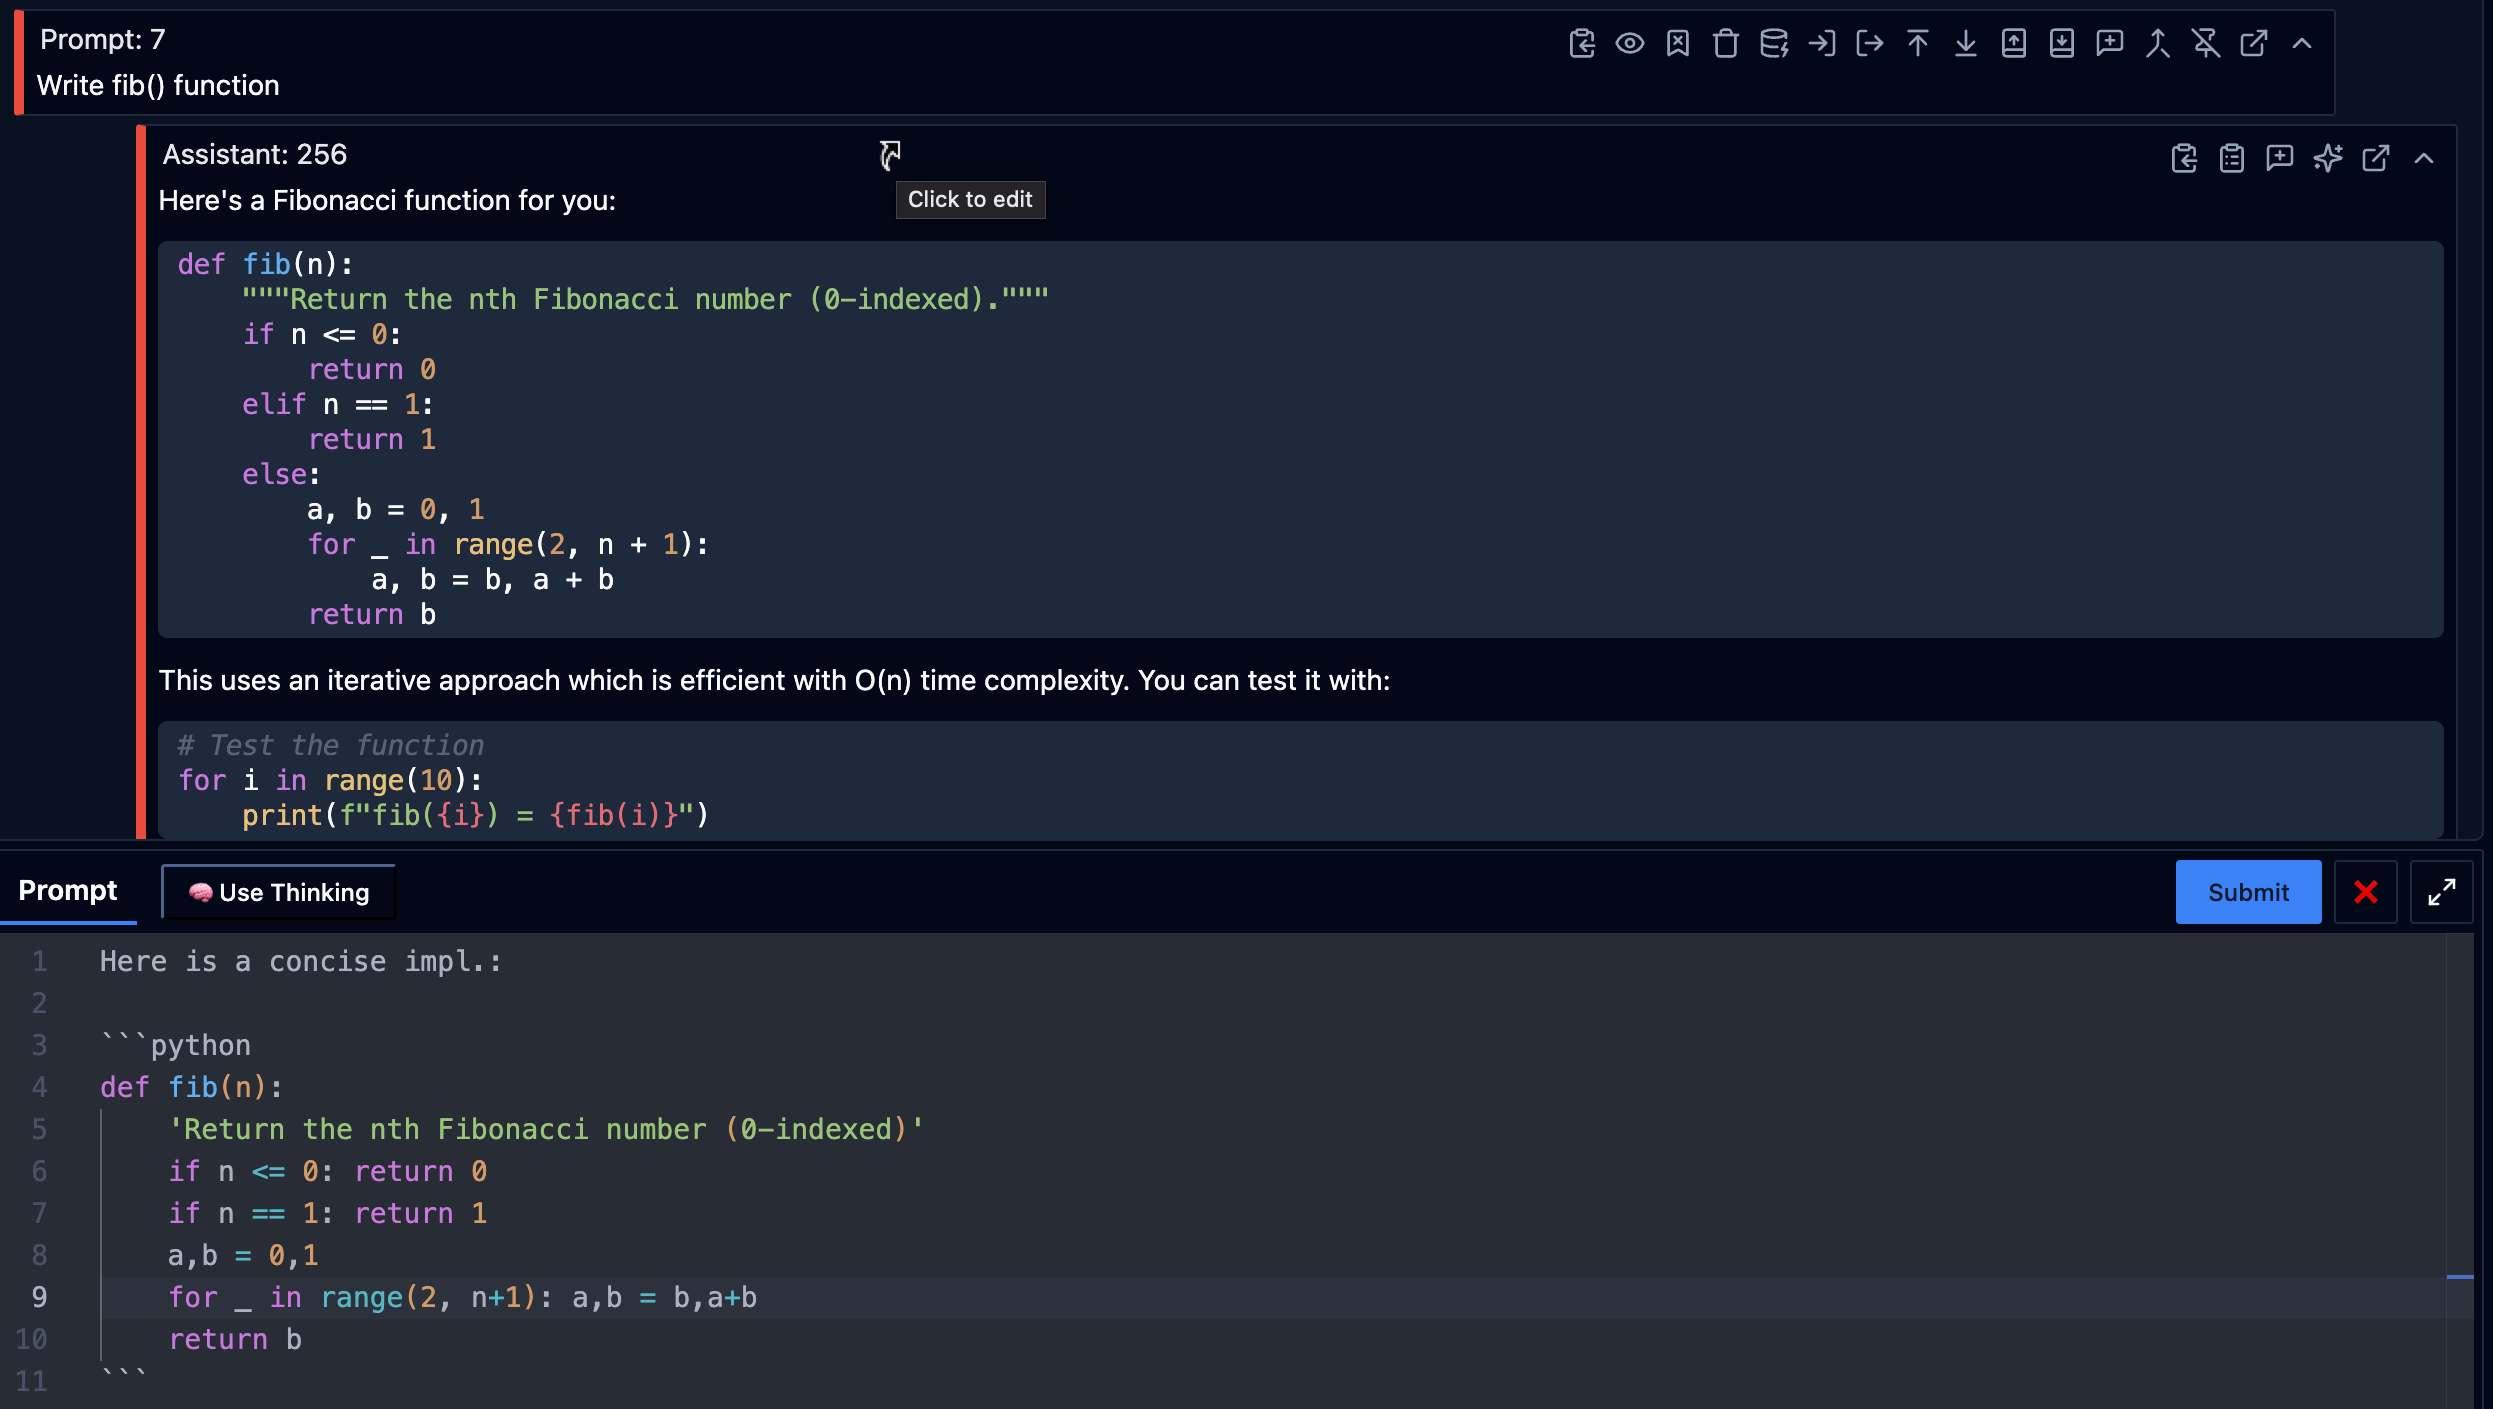
Code Block Extraction
When the AI gives you code in a prompt response, you often want to run it. Instead of copying and pasting, you can extract fenced code blocks (W).

W (split to code) takes fenced code blocks from the AI’s response and creates executable code messages. If there are multiple code blocks, it creates multiple code messages.
This makes the workflow smooth: ask the AI for code, press W, press Cmd+Enter to run. Three keystrokes from question to executed code.
Thinking Mode
For simple questions, standard responses work fine. For complex reasoning or tricky problems, use Thinking Mode.
Toggle it with the “Use thinking” button (or Cmd+Shift+D inside the editor). When enabled, the AI takes longer but does more reasoning. You’ll see a brain icon while it’s thinking.
Strategy: start without thinking mode. If the answer isn’t good enough, turn it on and try again.
Quick AI Continuation
Sometimes you want the AI to continue without typing a new prompt - for example, after running code to show the AI the output.
Use Cmd+Shift+. to insert and execute an empty prompt immediately. Use Cmd+Shift+/ to do the same with thinking enabled. The AI sees your latest work and responds based on that context.
Default Code Toggle
SolveIt encourages you to write your own code rather than having the AI do it for you. This keeps you engaged and learning.
The “Default Code” toggle supports this. When on (the default), SolveIt automatically switches you back to code mode after the AI responds to a prompt.
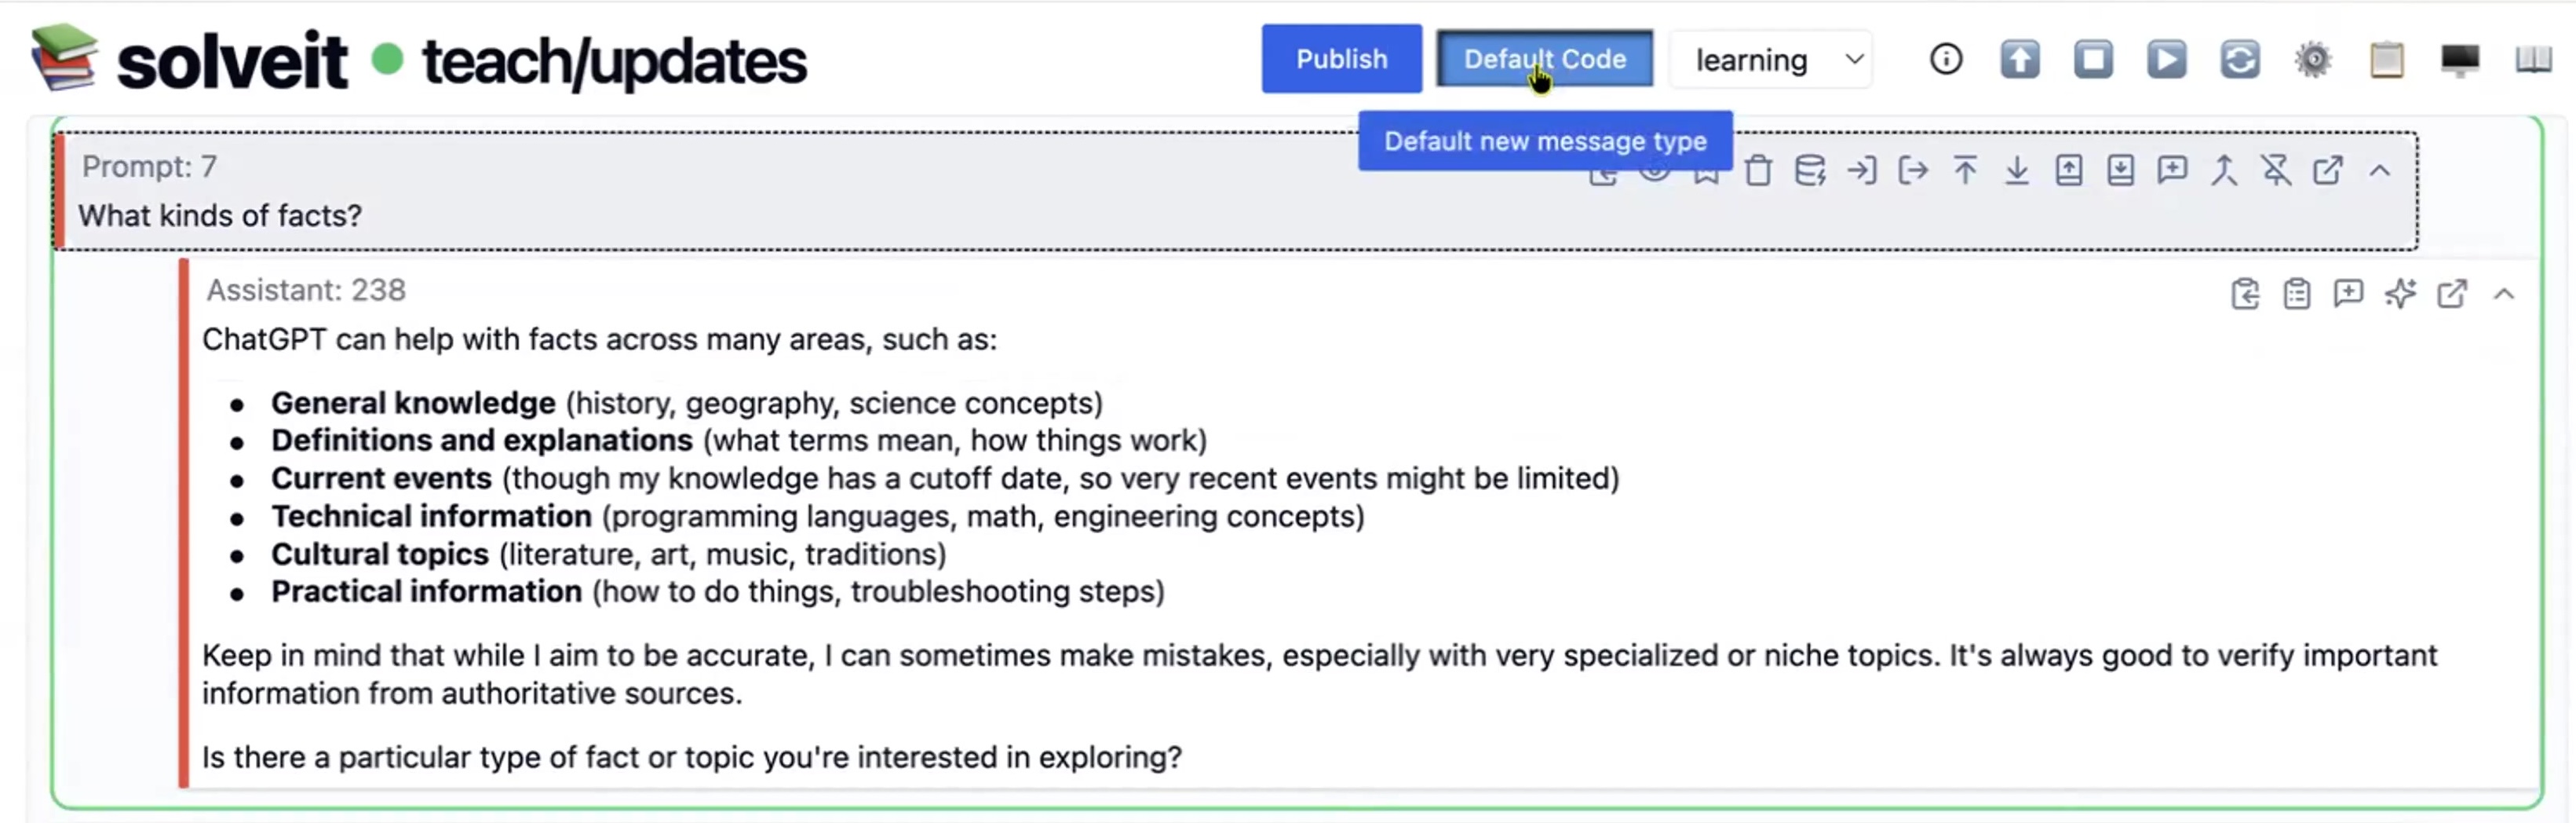
What happens: you ask a question in prompt mode, the AI responds, then the next message you create is automatically code. You’re encouraged to implement what you learned rather than immediately asking another question.
Turn Default Code off and the message type stays the same. If you were in prompt mode, the next message is also prompt mode.
For learning and coding work, leave it on. For rapid questions or non-coding tasks, turn it off. You can toggle it anytime.
Token Counting
SolveIt shows how much context each message and section contains, measured in tokens (On average a word is about 1.3 tokens). You’ll see token counts in message details and next to collapsed sections (heading tokens + hidden content tokens).

This matters because language models have context limits. Understanding token usage helps you stay aware of what the AI can see. The counting helps you understand your dialog’s scale. A collapsed section showing “+723 tokens” means there’s substantial content hidden there.
Non-linear Editing
Unlike traditional chat interfaces where messages are immutable once sent, SolveIt allows you to edit any message at any time, including AI responses.
Press n when a prompt message is selected to quickly edit the AI’s response. This lets you correct errors, refine code, or adjust explanations before continuing work.
You can also edit your own prompts retroactively. If a question was unclear, edit it to be more precise. Delete messages that took unproductive paths.
This makes dialogs living documents that you refine over time rather than append-only logs. Explore ideas, make corrections, and reorganize to show only the useful parts.
The AI always sees the current state of your dialog, not the edit history.
Context Management
The AI sees your entire dialog as context when responding to prompts. But language models have token limits, so SolveIt manages what gets included.
Automatic message discarding: When your dialog exceeds the context limit, messages are discarded starting from the top. Recent messages stay, older ones drop out. This happens automatically - you don’t lose the messages, they just aren’t sent to the AI.
Hidden messages (H): Press H to toggle the eye icon on a prompt message. Hidden messages stay in your dialog but are excluded from AI context. Useful for keeping failed experiments or unproductive conversations visible to you without confusing future AI responses.
Pinned messages (P): Press P to pin a message. Pinned messages are always included in AI context, even if they’re old enough that they’d normally be discarded. Use this for important context - key instructions, data definitions, or critical background information the AI needs to see every time.

Note: Pinned messages don’t appear when you export or publish a dialog. They’re for runtime context management only.
The combination gives you control: let old messages drop naturally, hide unproductive paths with H, and keep essential context with P.
Code Execution
Kernels
A kernel is a running Python interpreter that maintains state. When you execute code in a dialog, it runs in that dialog’s kernel.
Variables persist between code cells. Define x = 5 in one cell, and x is still there when you run another cell. This is how Jupyter notebooks work, and SolveIt follows the same model.
Each dialog has its own kernel. Variables in one dialog don’t affect another. This isolation lets you work on multiple projects simultaneously without conflicts.
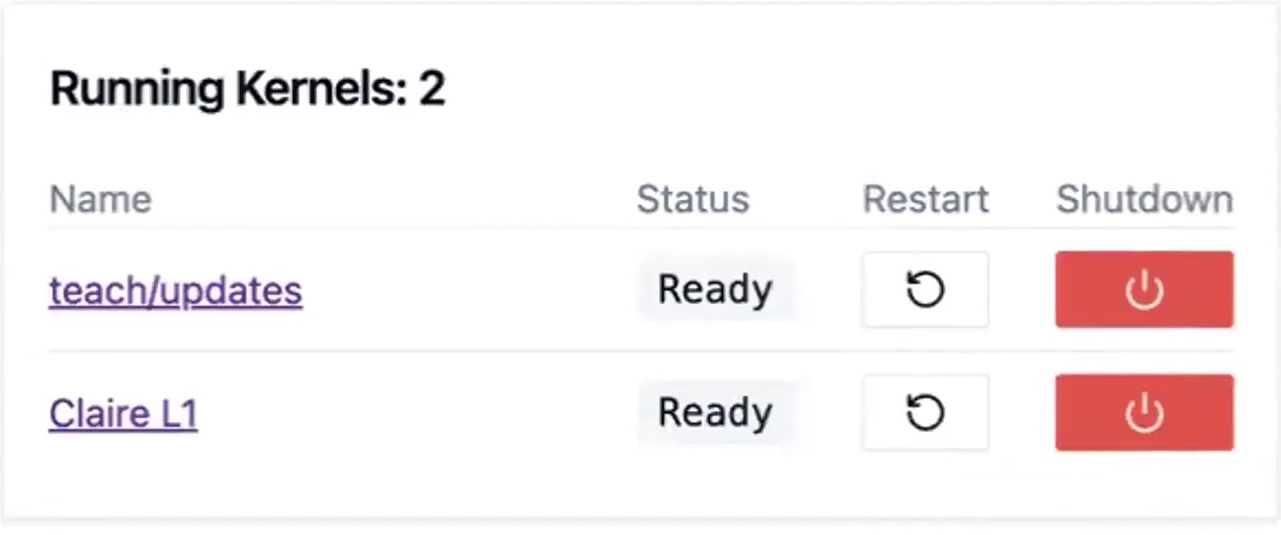
The kernel keeps running when you navigate away from a dialog using browser navigation or simply closing the tab or window. To stop the kernel, click the top-left SolveIt icon in the dialog which will take you back to the dialog list, or manually stop it using the “Shutdown” button.
Restart Kernel
Sometimes you need a fresh start. Maybe variables are in a messy state, imports got confused, or you want to verify your code runs from scratch.
Click “Restart” or use Shift+R to restart your kernel. This clears all imports and variables, and resets the Python interpreter to a clean state. Your code and notes stay exactly as they are. Only the running Python environment resets. After restarting, your Symbol Browser shows no variables or functions until you run cells again. This confirms the kernel is fresh.
A common pattern: develop and iterate freely, then restart the kernel and run all cells (r) top-to-bottom to make sure everything works in sequence.
The kernel restart is per-dialog. Restarting one dialog’s kernel doesn’t affect others.
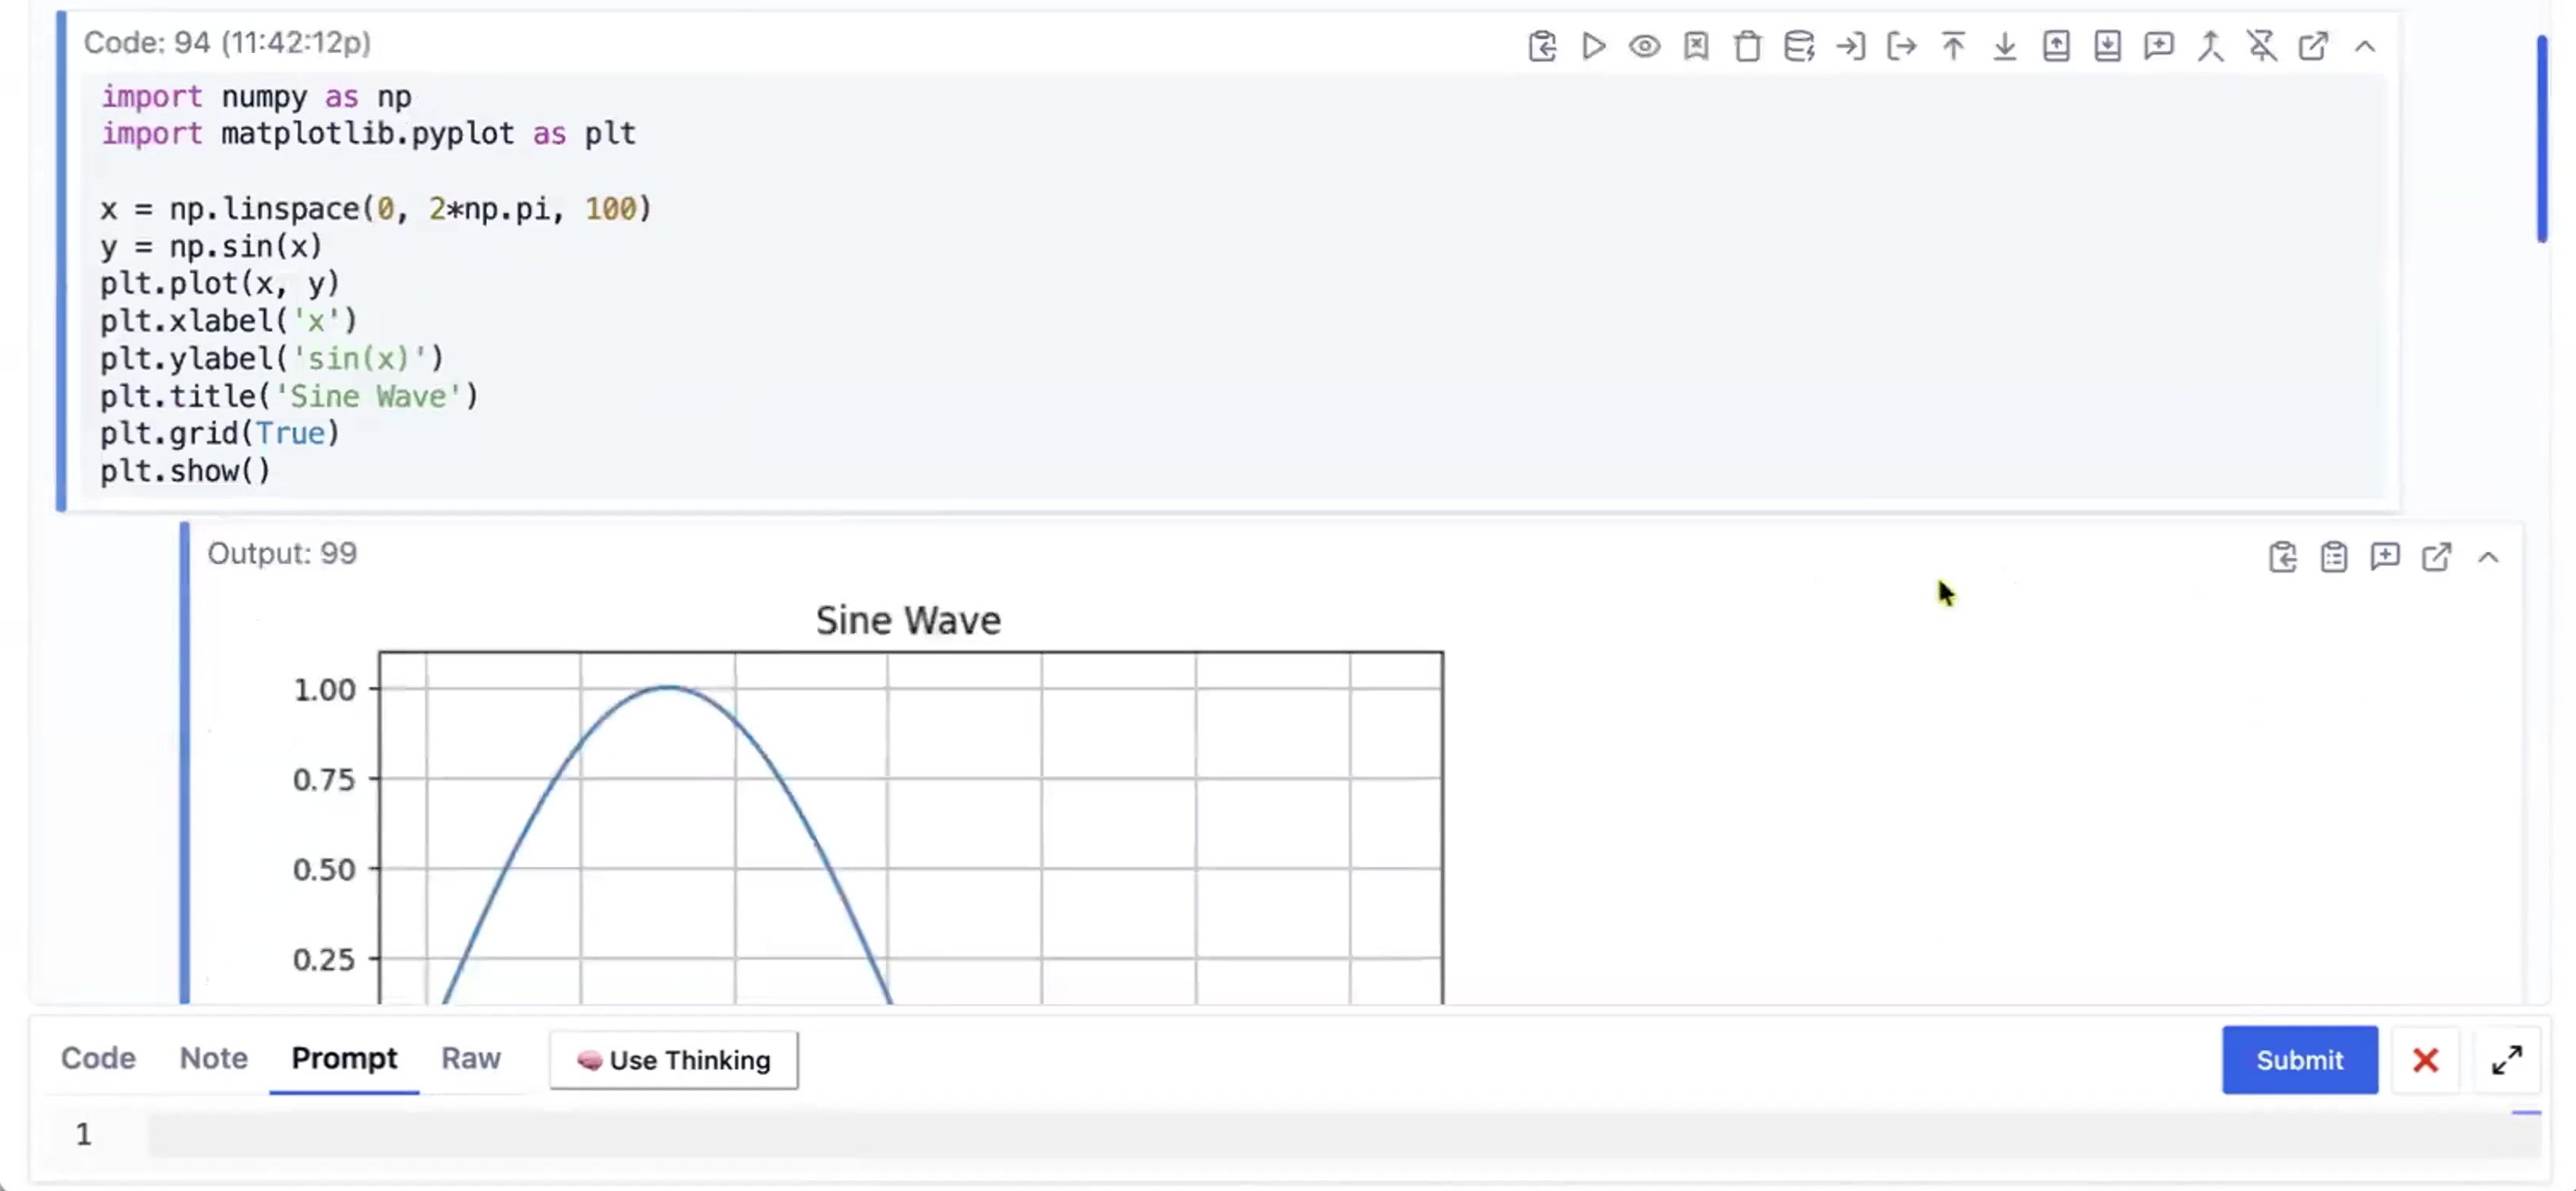
Code Output
Run a code cell with Cmd+Enter (or click the run button). The output appears directly below the code.
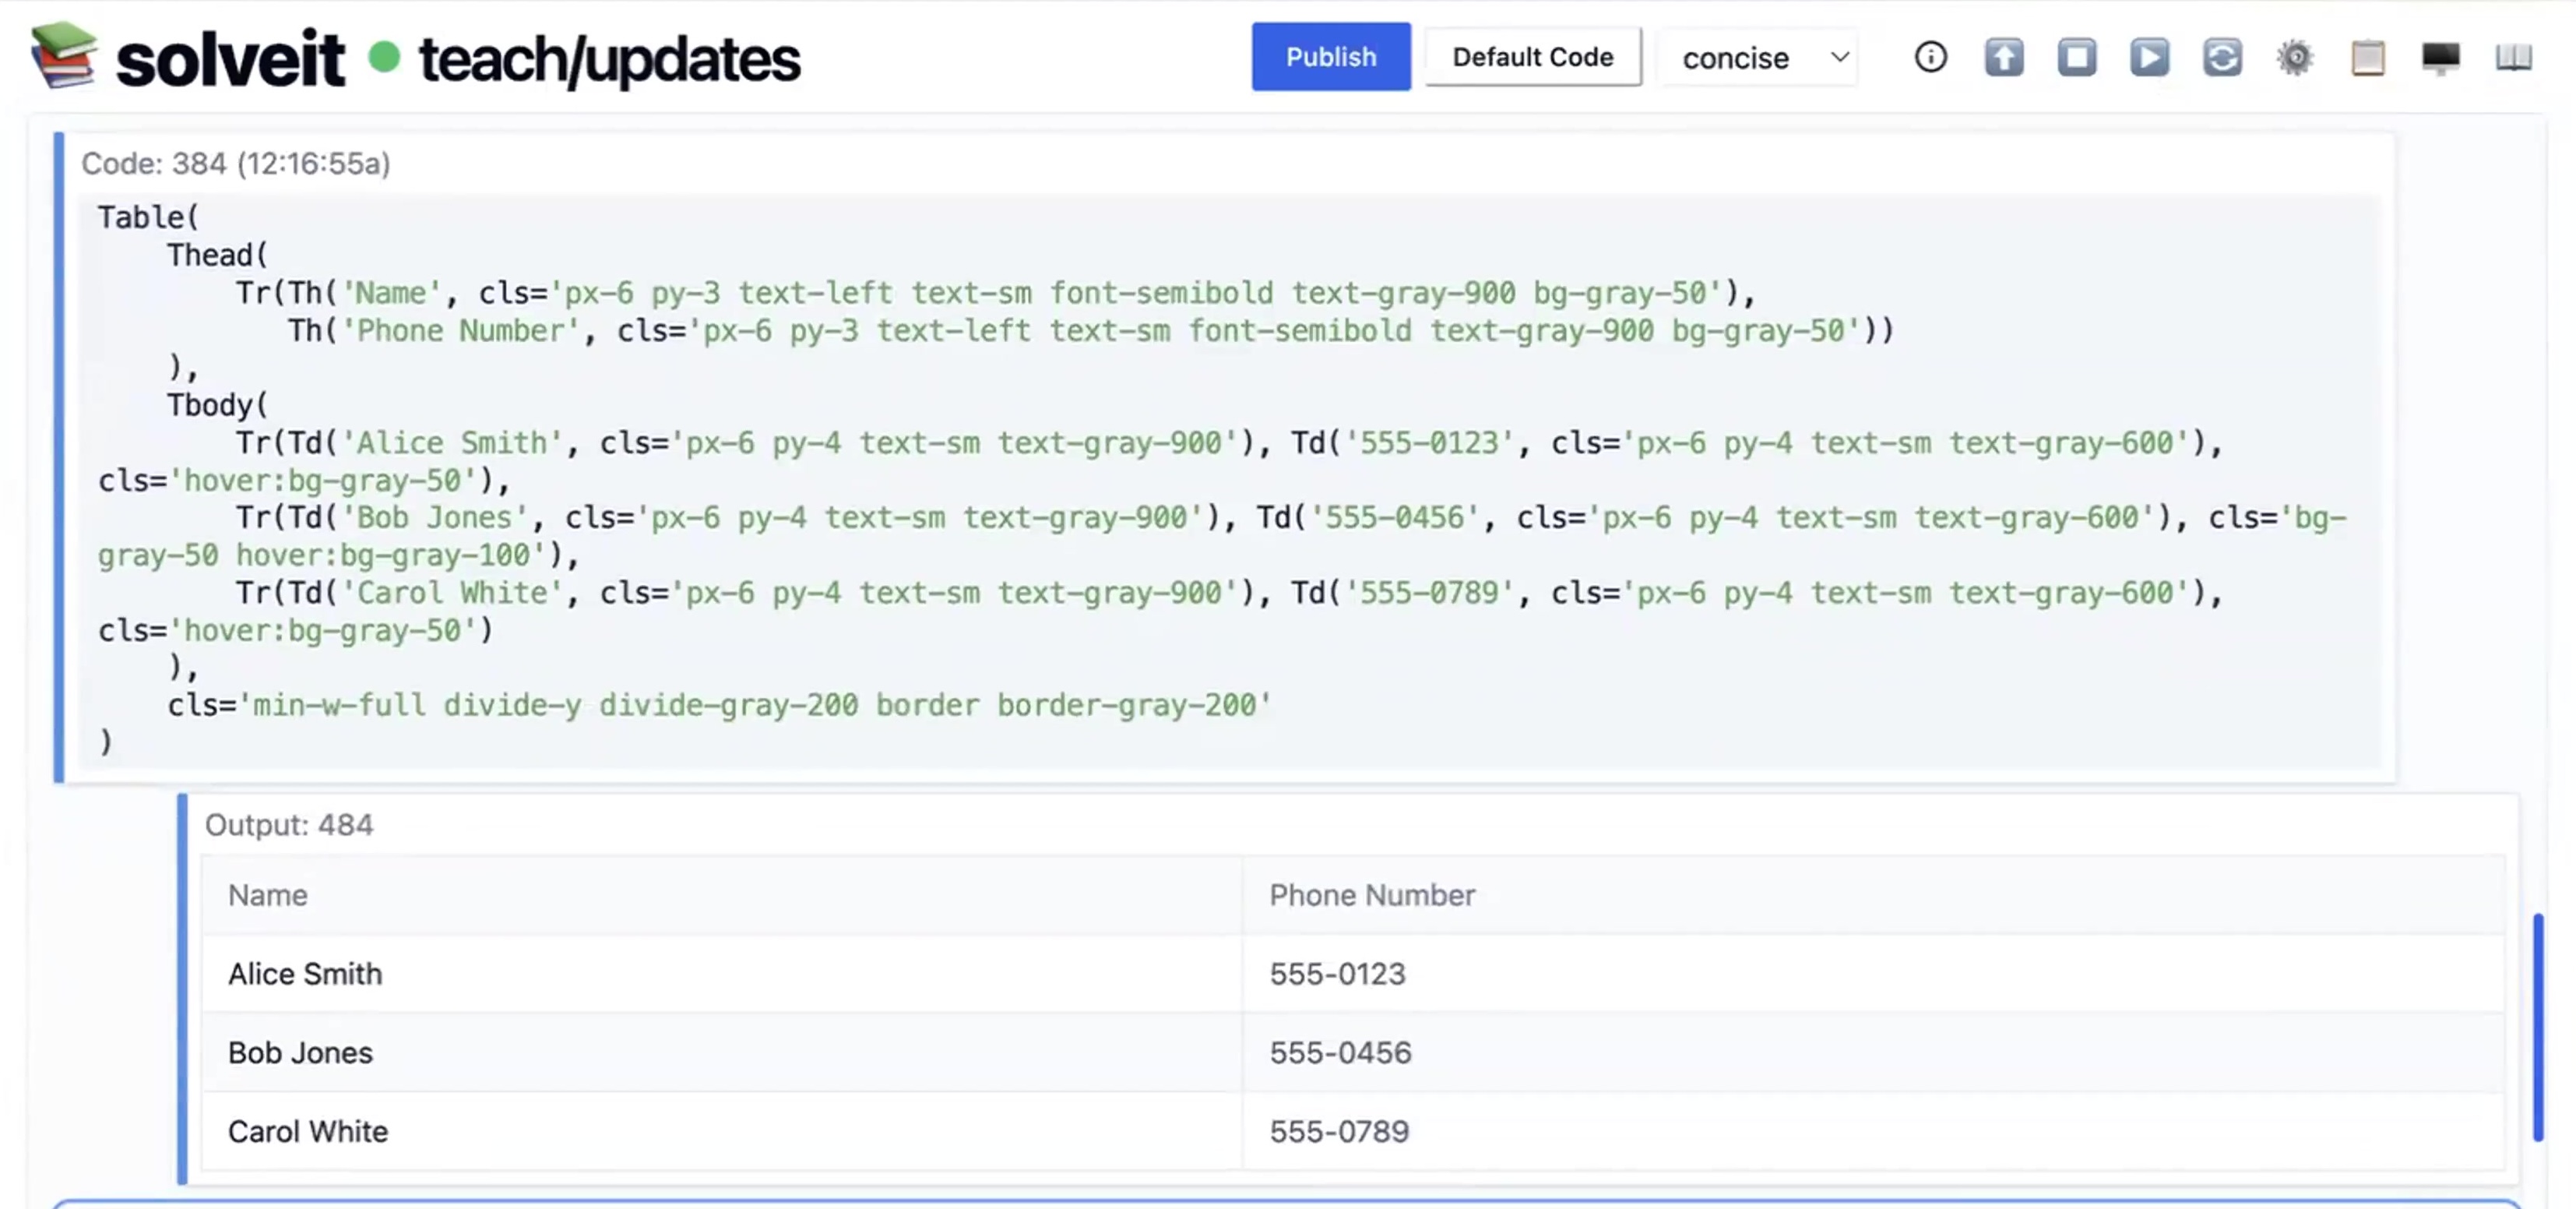
Outputs can be lots of different things. You can display text and error messages, just like in the terminal. Images, plots, videos, dataframes and more just like in Jupyter. But also interactive HTML widgets using FastHTML.
If a cell’s last line evaluates to something, that value is displayed automatically. You don’t need print() unless you want to show multiple things.
x = [1, 2, 3]
x  # This displays [1, 2, 3]
Outputs stay attached to their code cell. Re-run the cell and the output updates. This makes it easy to iterate - tweak parameters, re-run, see the new result immediately.
Long outputs are scrollable. Large dataframes show in a scrollable table. Plots render inline.
Autocomplete
As you type in code cells, SolveIt offers dynamic autocomplete suggestions. Start typing a variable name and matching options appear. Type x. and you see all methods and attributes available on x. The autocomplete is context-aware. It knows what’s in your kernel - the actual variables and imports you’ve executed, not just guesses.
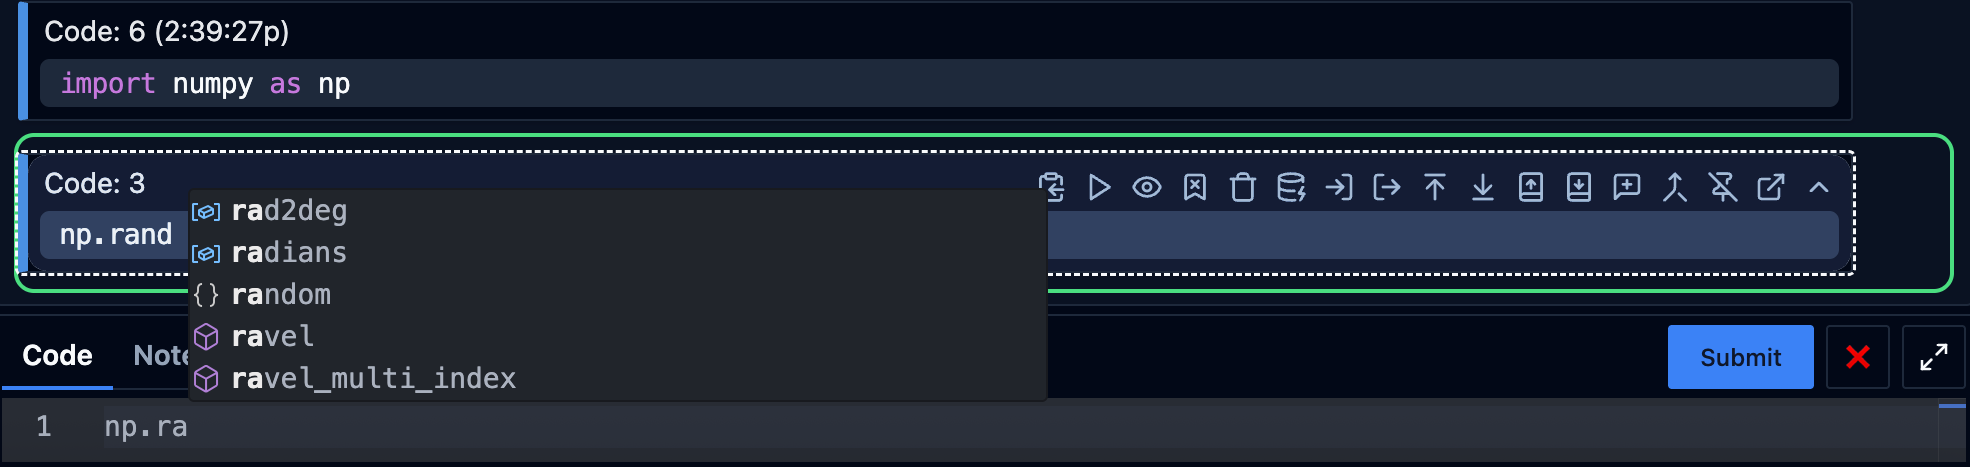
Press Tab to accept a suggestion, or keep typing to filter the list. Esc dismisses it. This is standard IDE behavior, and it works the same in SolveIt. The completion engine understands Python’s type system and offers relevant suggestions.
Image Handling
There are two ways to add images to your dialogs:
Paste from clipboard: Copy an image and paste it directly into a note or prompt message with Cmd+V. The image uploads automatically and gets attached to the message. All pasted images are visible to the AI.
Markdown image syntax: Use standard markdown  in note messages. The path can be a local file on your instance or a URL. These images display inline but are NOT visible to the AI by default.
To make markdown images visible to the AI, add the #ai anchor: 
This gives you control - include images for documentation without sending them to the AI (saves tokens), or explicitly mark images the AI should see.
Pasted images work in both note and prompt messages. Markdown images only work in note messages.
AI Modes
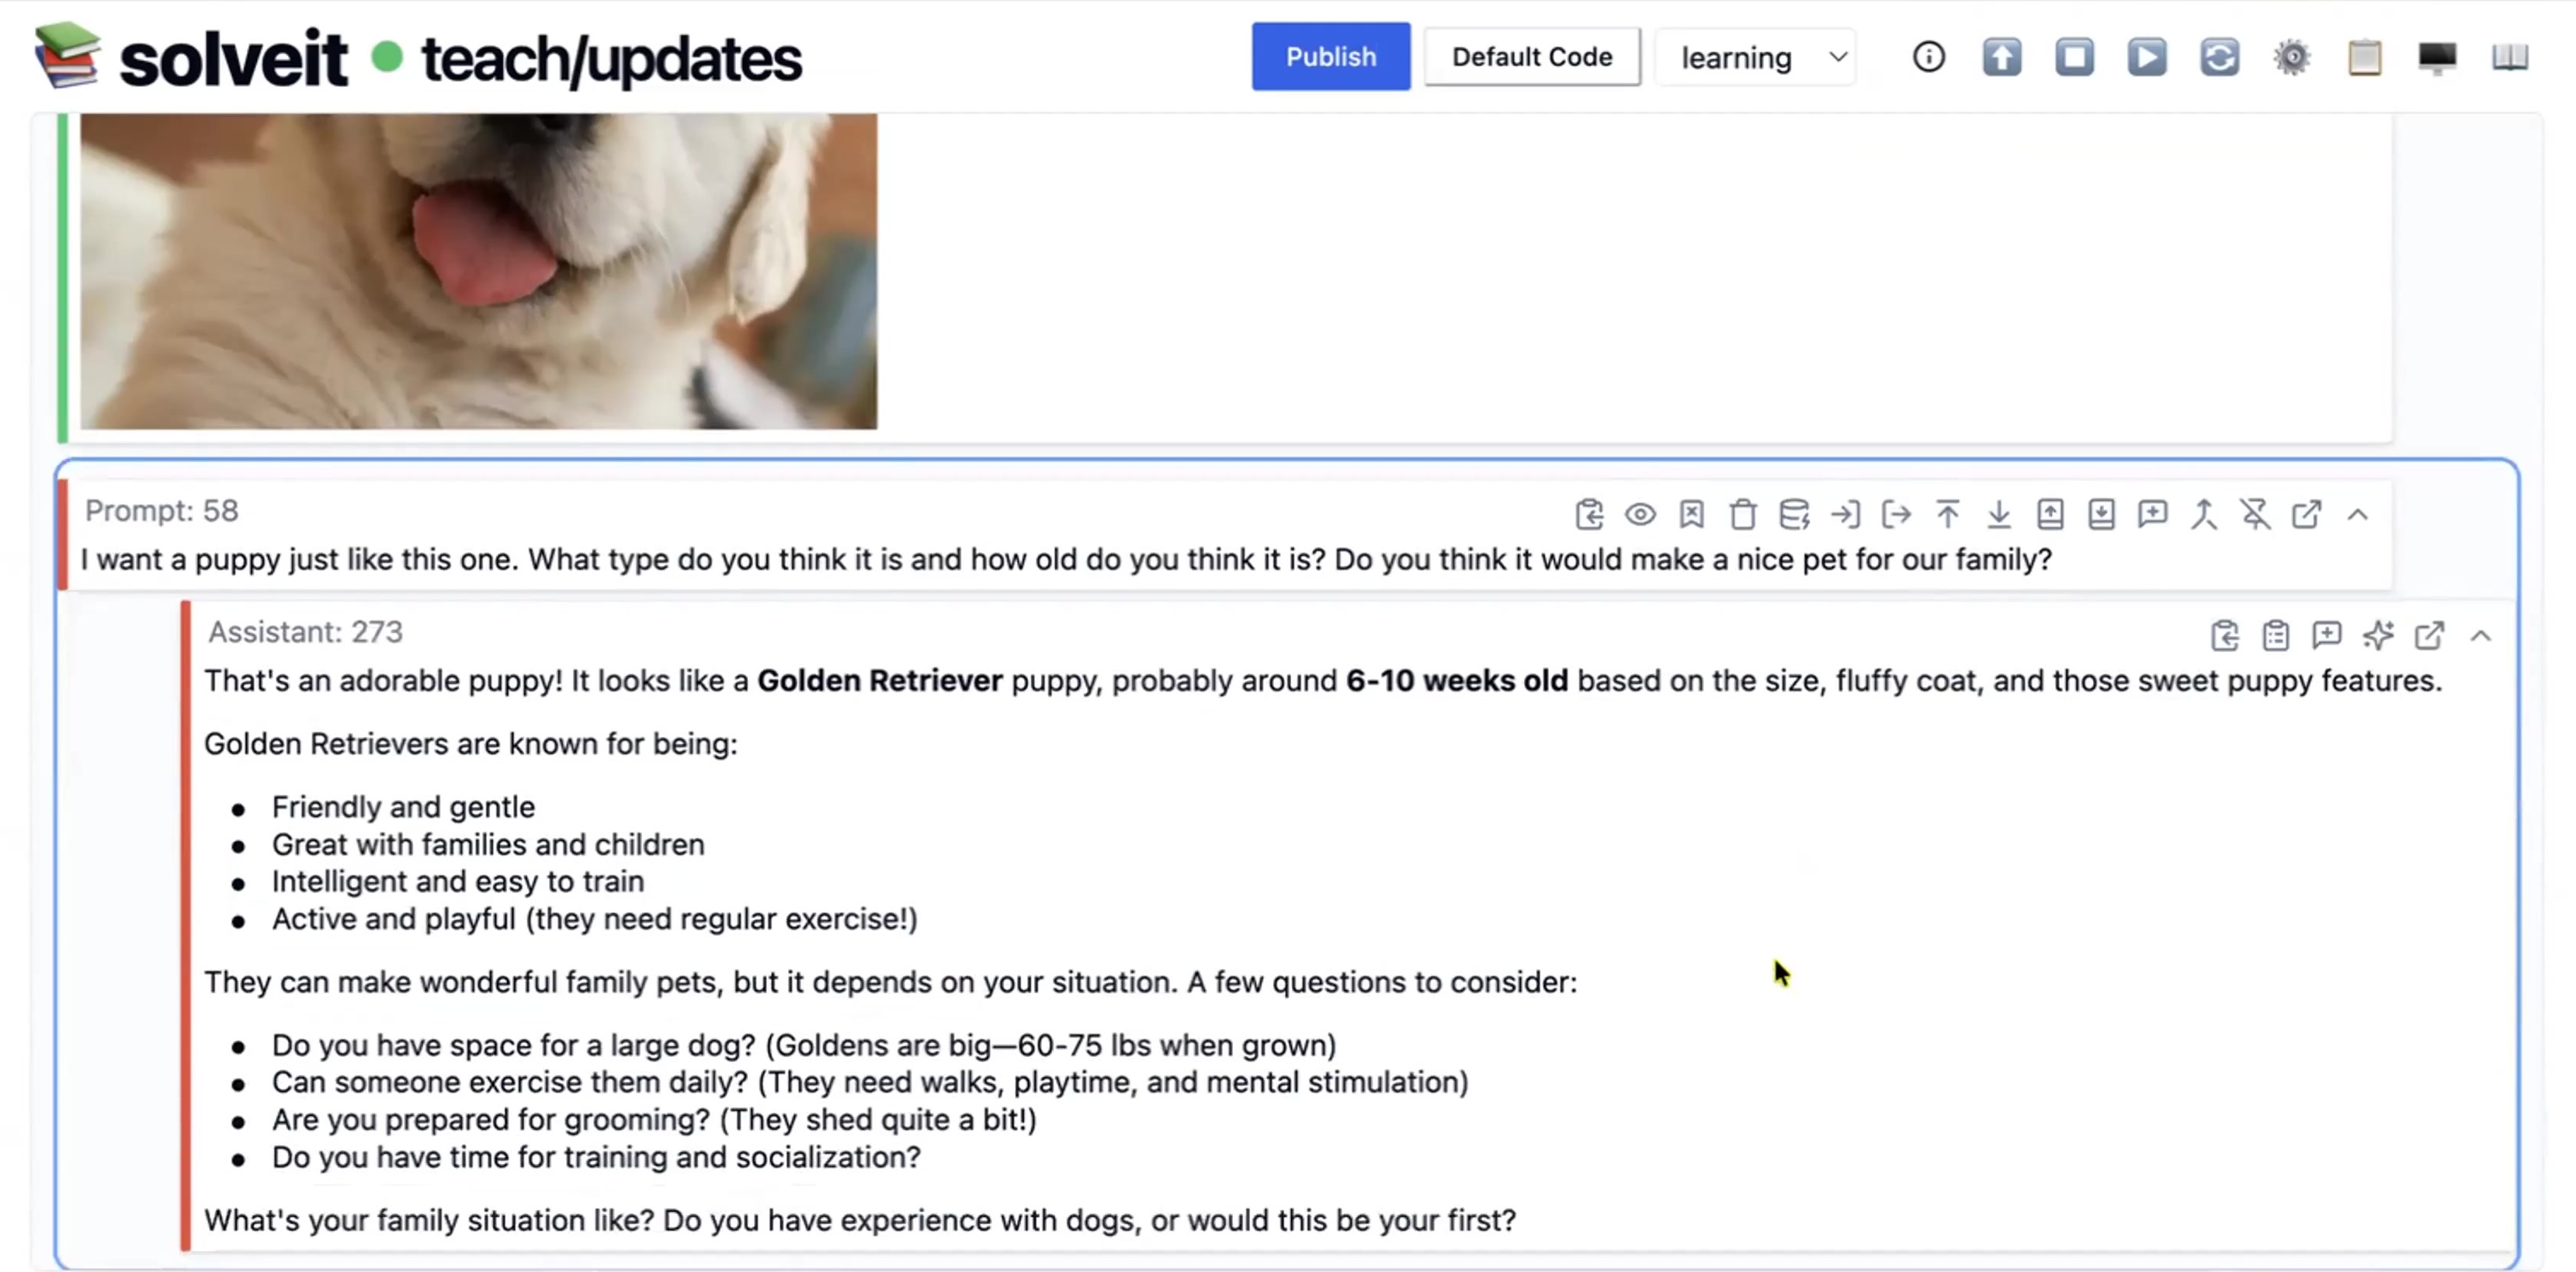
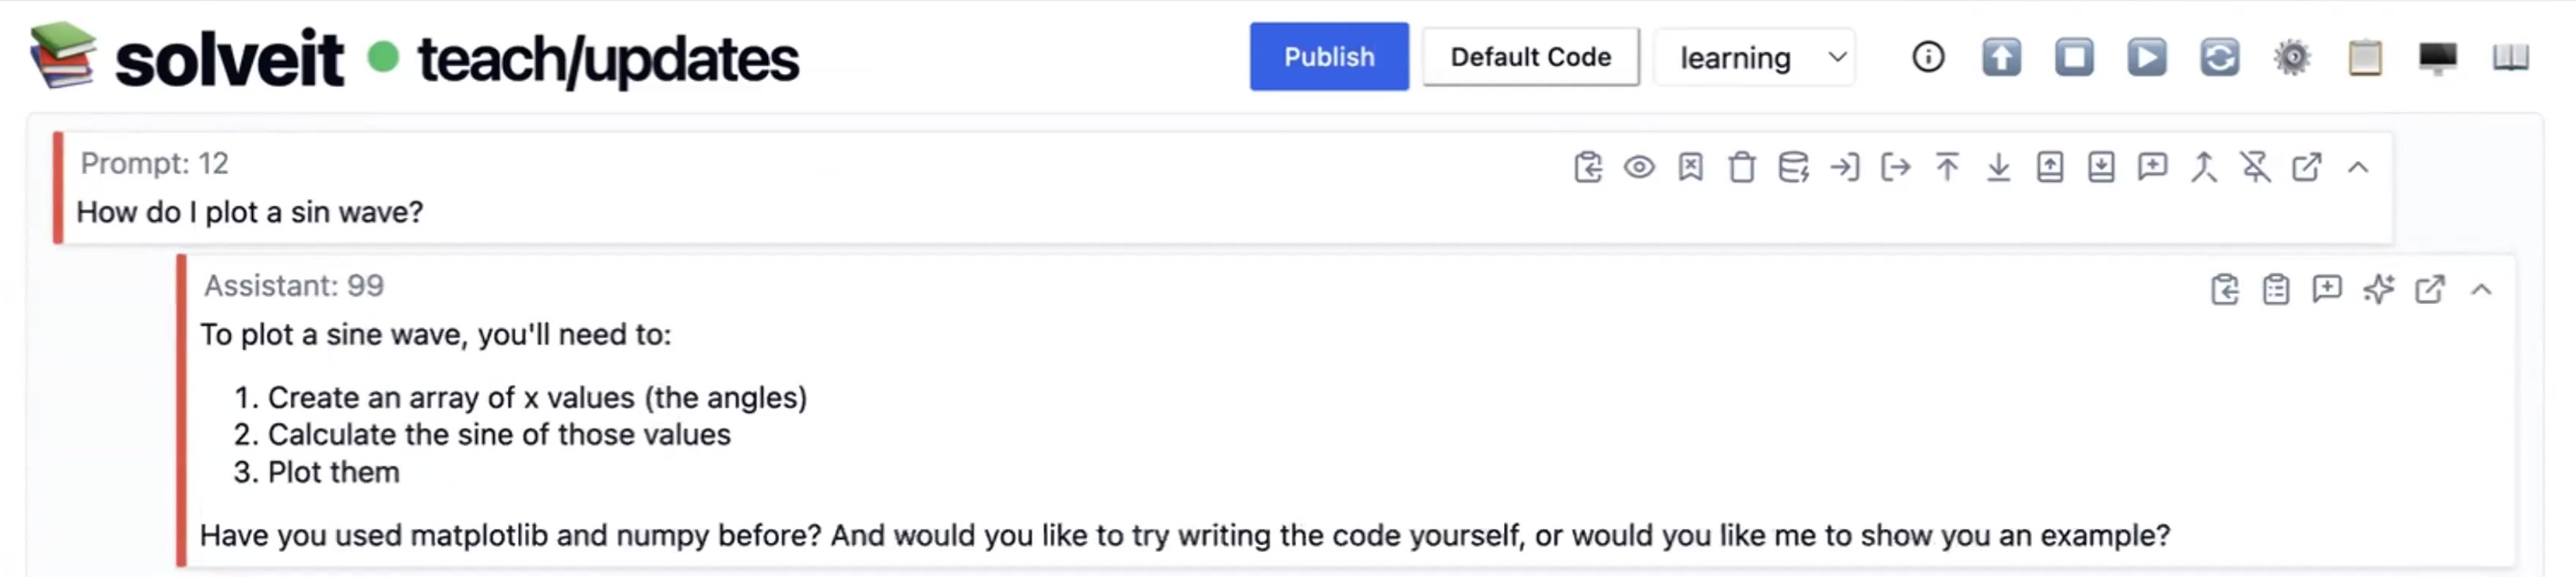
SolveIt has three AI modes: Learning, Concise, and Standard. Each changes how the AI responds to your prompts.
Learning Mode assumes you’re trying to learn. The AI asks about your background before answering, breaks down explanations, and encourages understanding.
Concise Mode gets straight to the point. No lengthy explanations, minimal boilerplate, compact code. This is useful when you know what you want and just need the implementation.

Standard Mode is default Claude behavior. More verbose, detailed explanations, and longer code examples. Rarely used in practice.
Switch modes with the dropdown at the top of the dialog. The mode applies to all prompts in that dialog until you change it.
Use Learning mode when exploring new topics. Use Concise mode when implementing things you understand. Use Standard mode if you prefer traditional LLM responses.
Ghost Text
Ghost text is inline AI-powered code completion. As you type, faded gray suggestions appear showing what the AI predicts you’ll write next.
Press Right Arrow to accept the suggestion. Keep typing to ignore it.
Ghost text appears automatically in Standard and Concise modes, but not in Learning mode. The reasoning: when you’re learning, you should write code yourself rather than accept suggestions.
If you’re in Learning mode but want a specific completion, you can trigger it with a keyboard shortcut (⌥ + .). This gives you control - ghost text when you want it, clear screen when you don’t.
Ghost text is useful for boilerplate, standard patterns, and repetitive code. But don’t over-rely on it. Writing code yourself builds understanding.
Tools
Tools System
The Tools System lets you expose Python functions to the AI. The AI can then call these functions to accomplish tasks.
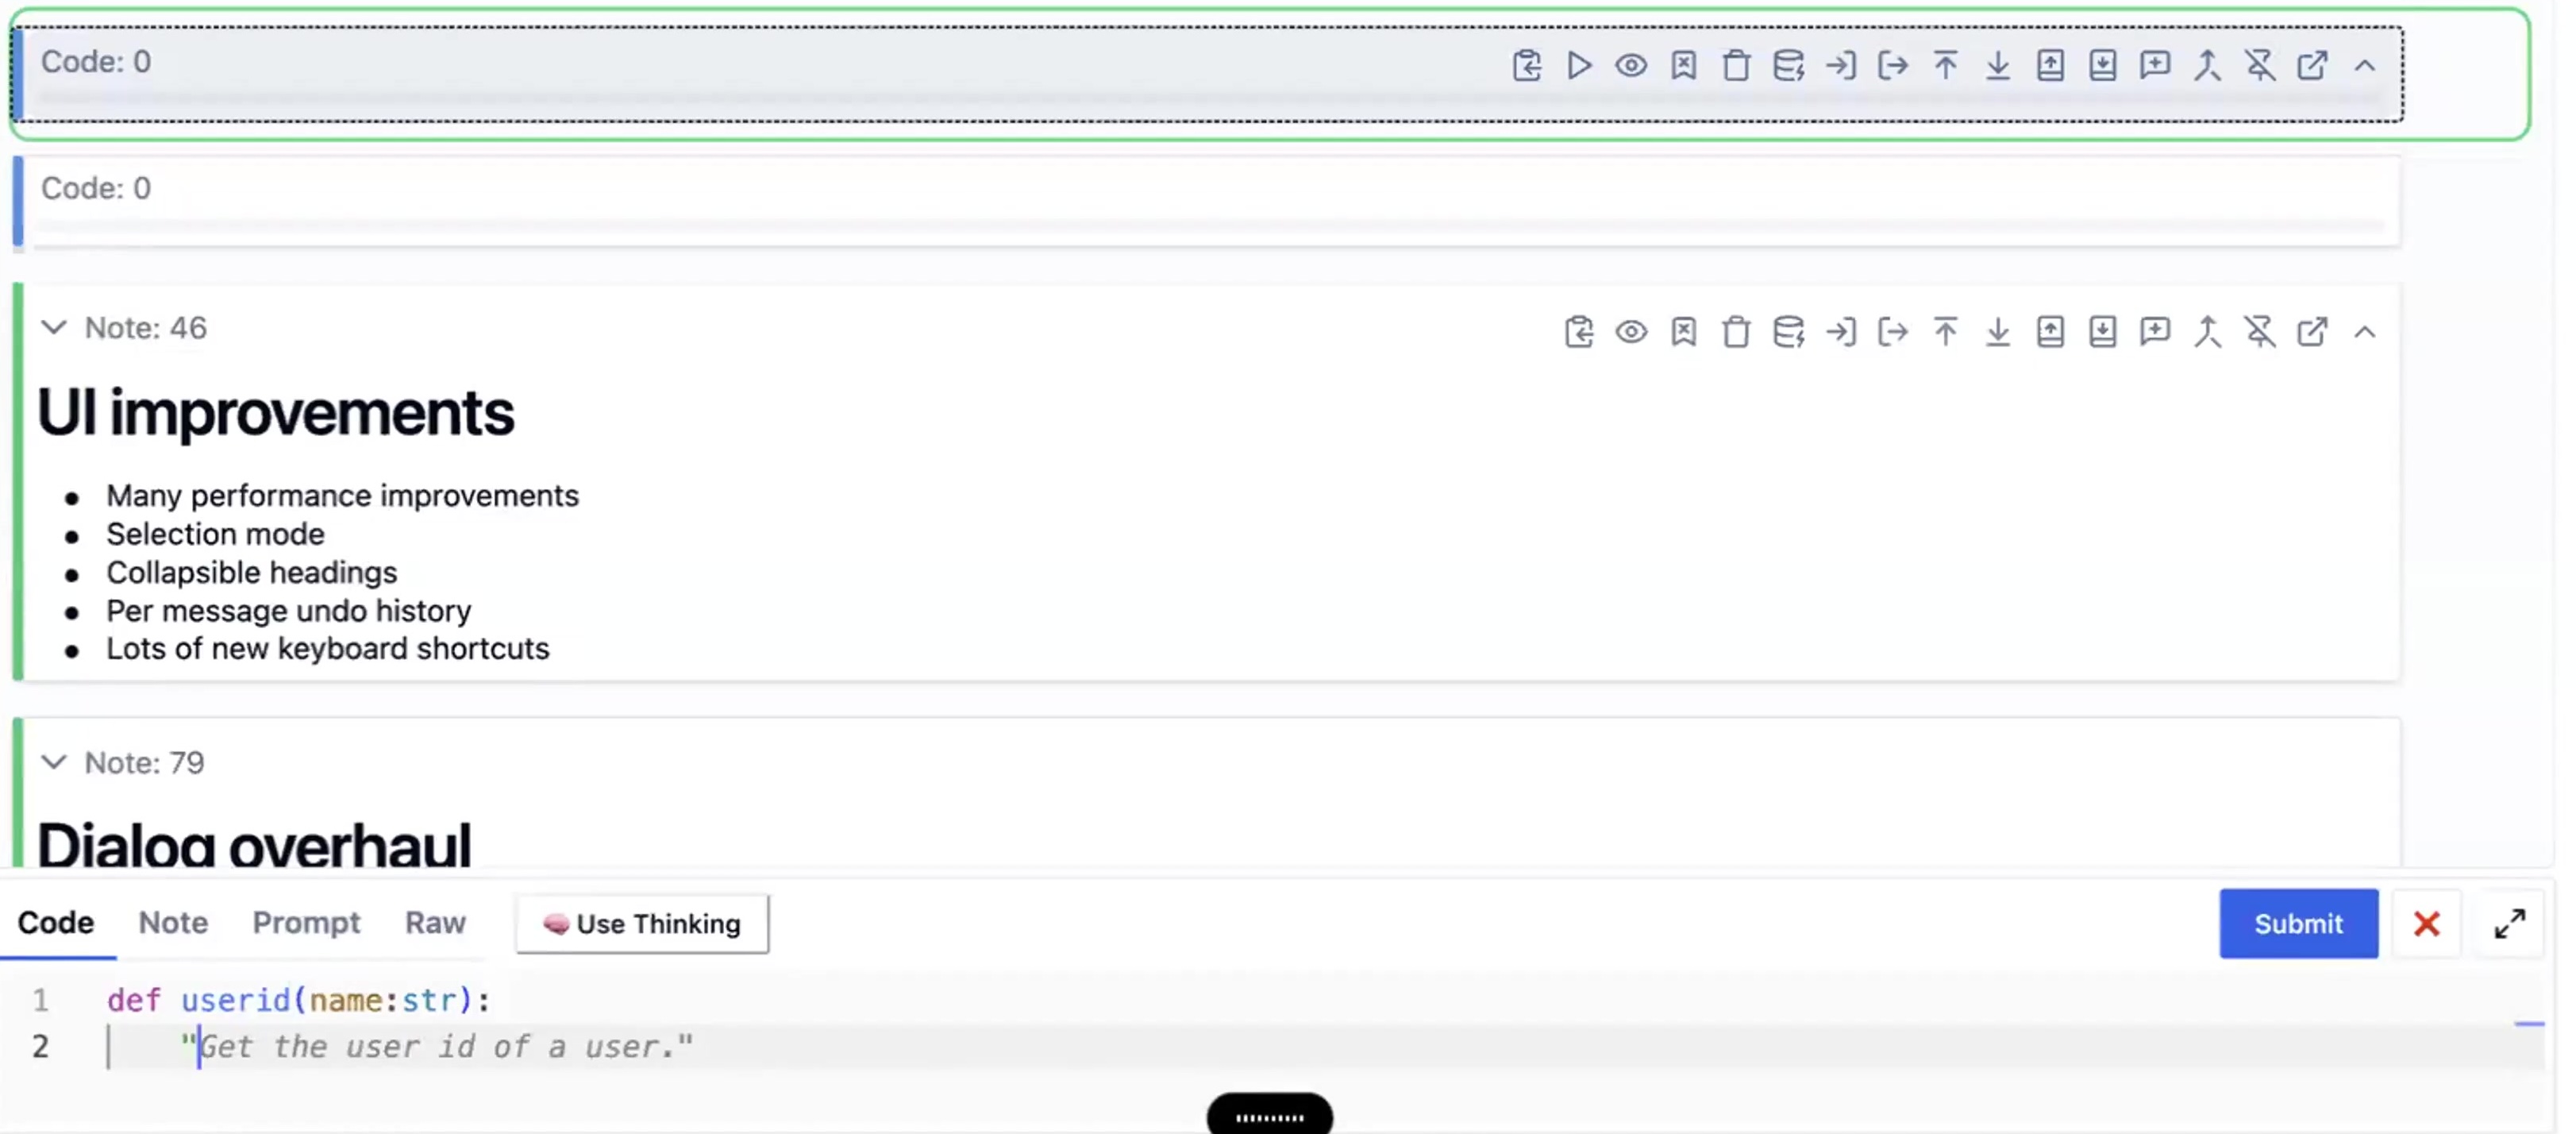
To make a function available as a tool, write an ampersand followed by the function name in backticks: & `function_name`
You can list multiple tools in an array: & `[tool1, tool2, tool3]`
Once you’ve declared tools in your dialog (in any message - prompt, note, or code), the AI can see and use them.
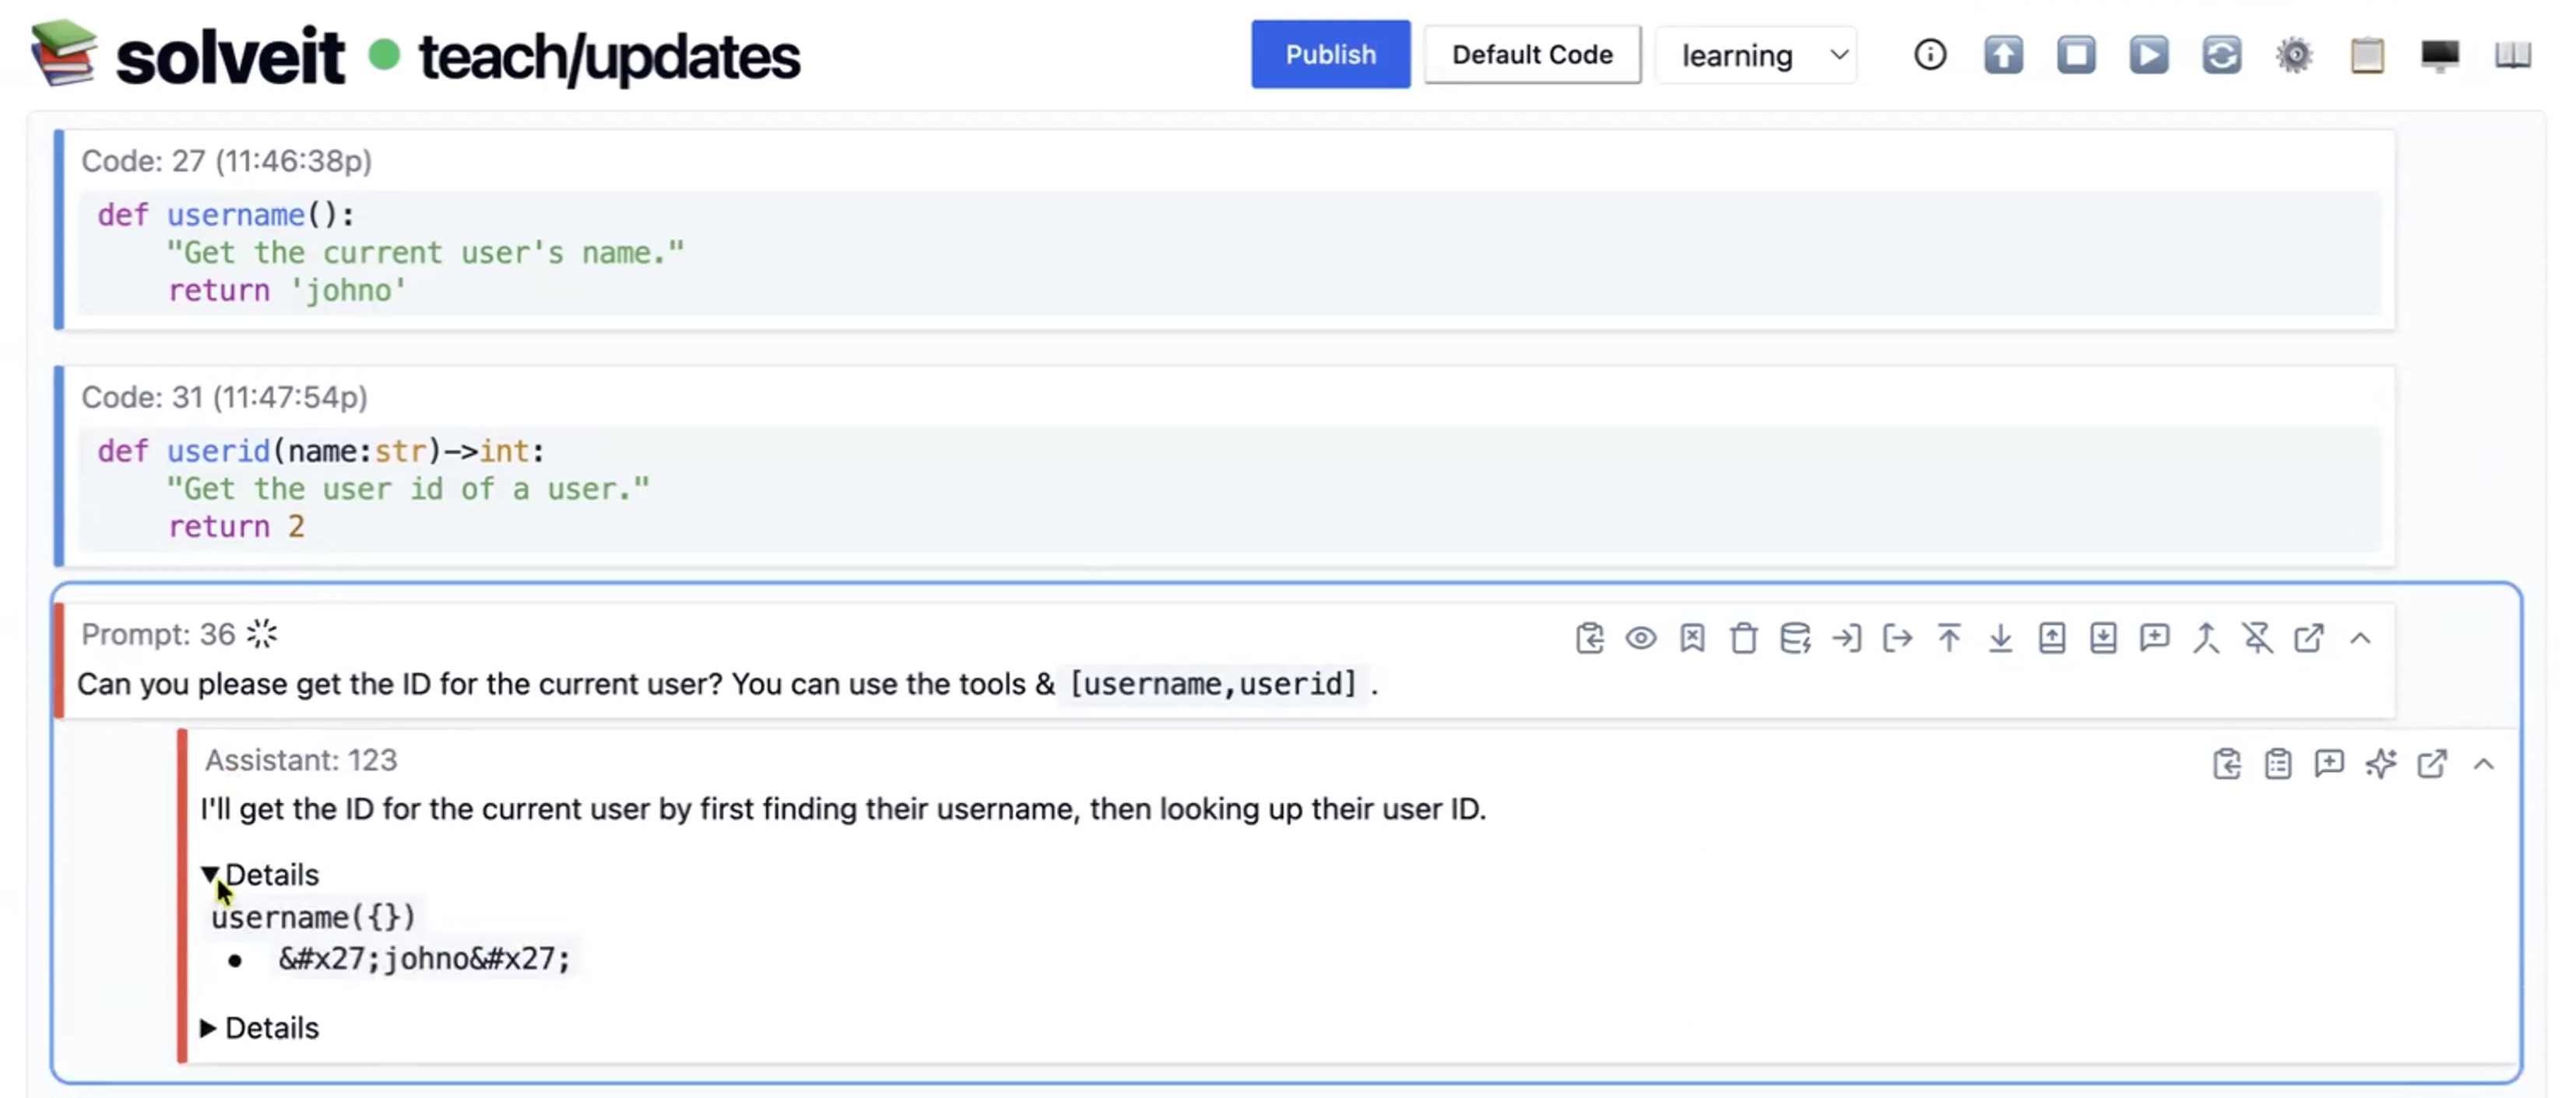
Here’s an example. Create a function:
def username():
    "Get the current user's name."
    return "Jeremy"
Then in a note or prompt, write: & `username`
Now ask the AI: “Can you please get the ID for the current user?”
The AI will call your username() function, get the result, and use it in its response.
This is powerful because you control exactly what the AI can do. Want it to read files? Write a function that reads files and expose it. Want it to query a database? Write and expose that function.
Important Note: Tool call results are automatically truncated when too long to keep context manageable. This makes them ideal for ephemeral, one-off automated tasks. To preserve output you need later, add it as a note message or store it in a variable ($`varname`).
Dialoghelper
dialoghelper is a module that provides tools for manipulating dialogs programmatically. Import it with:
from dialoghelper import *To see available tools and make them available in your dialog, run tool_info():
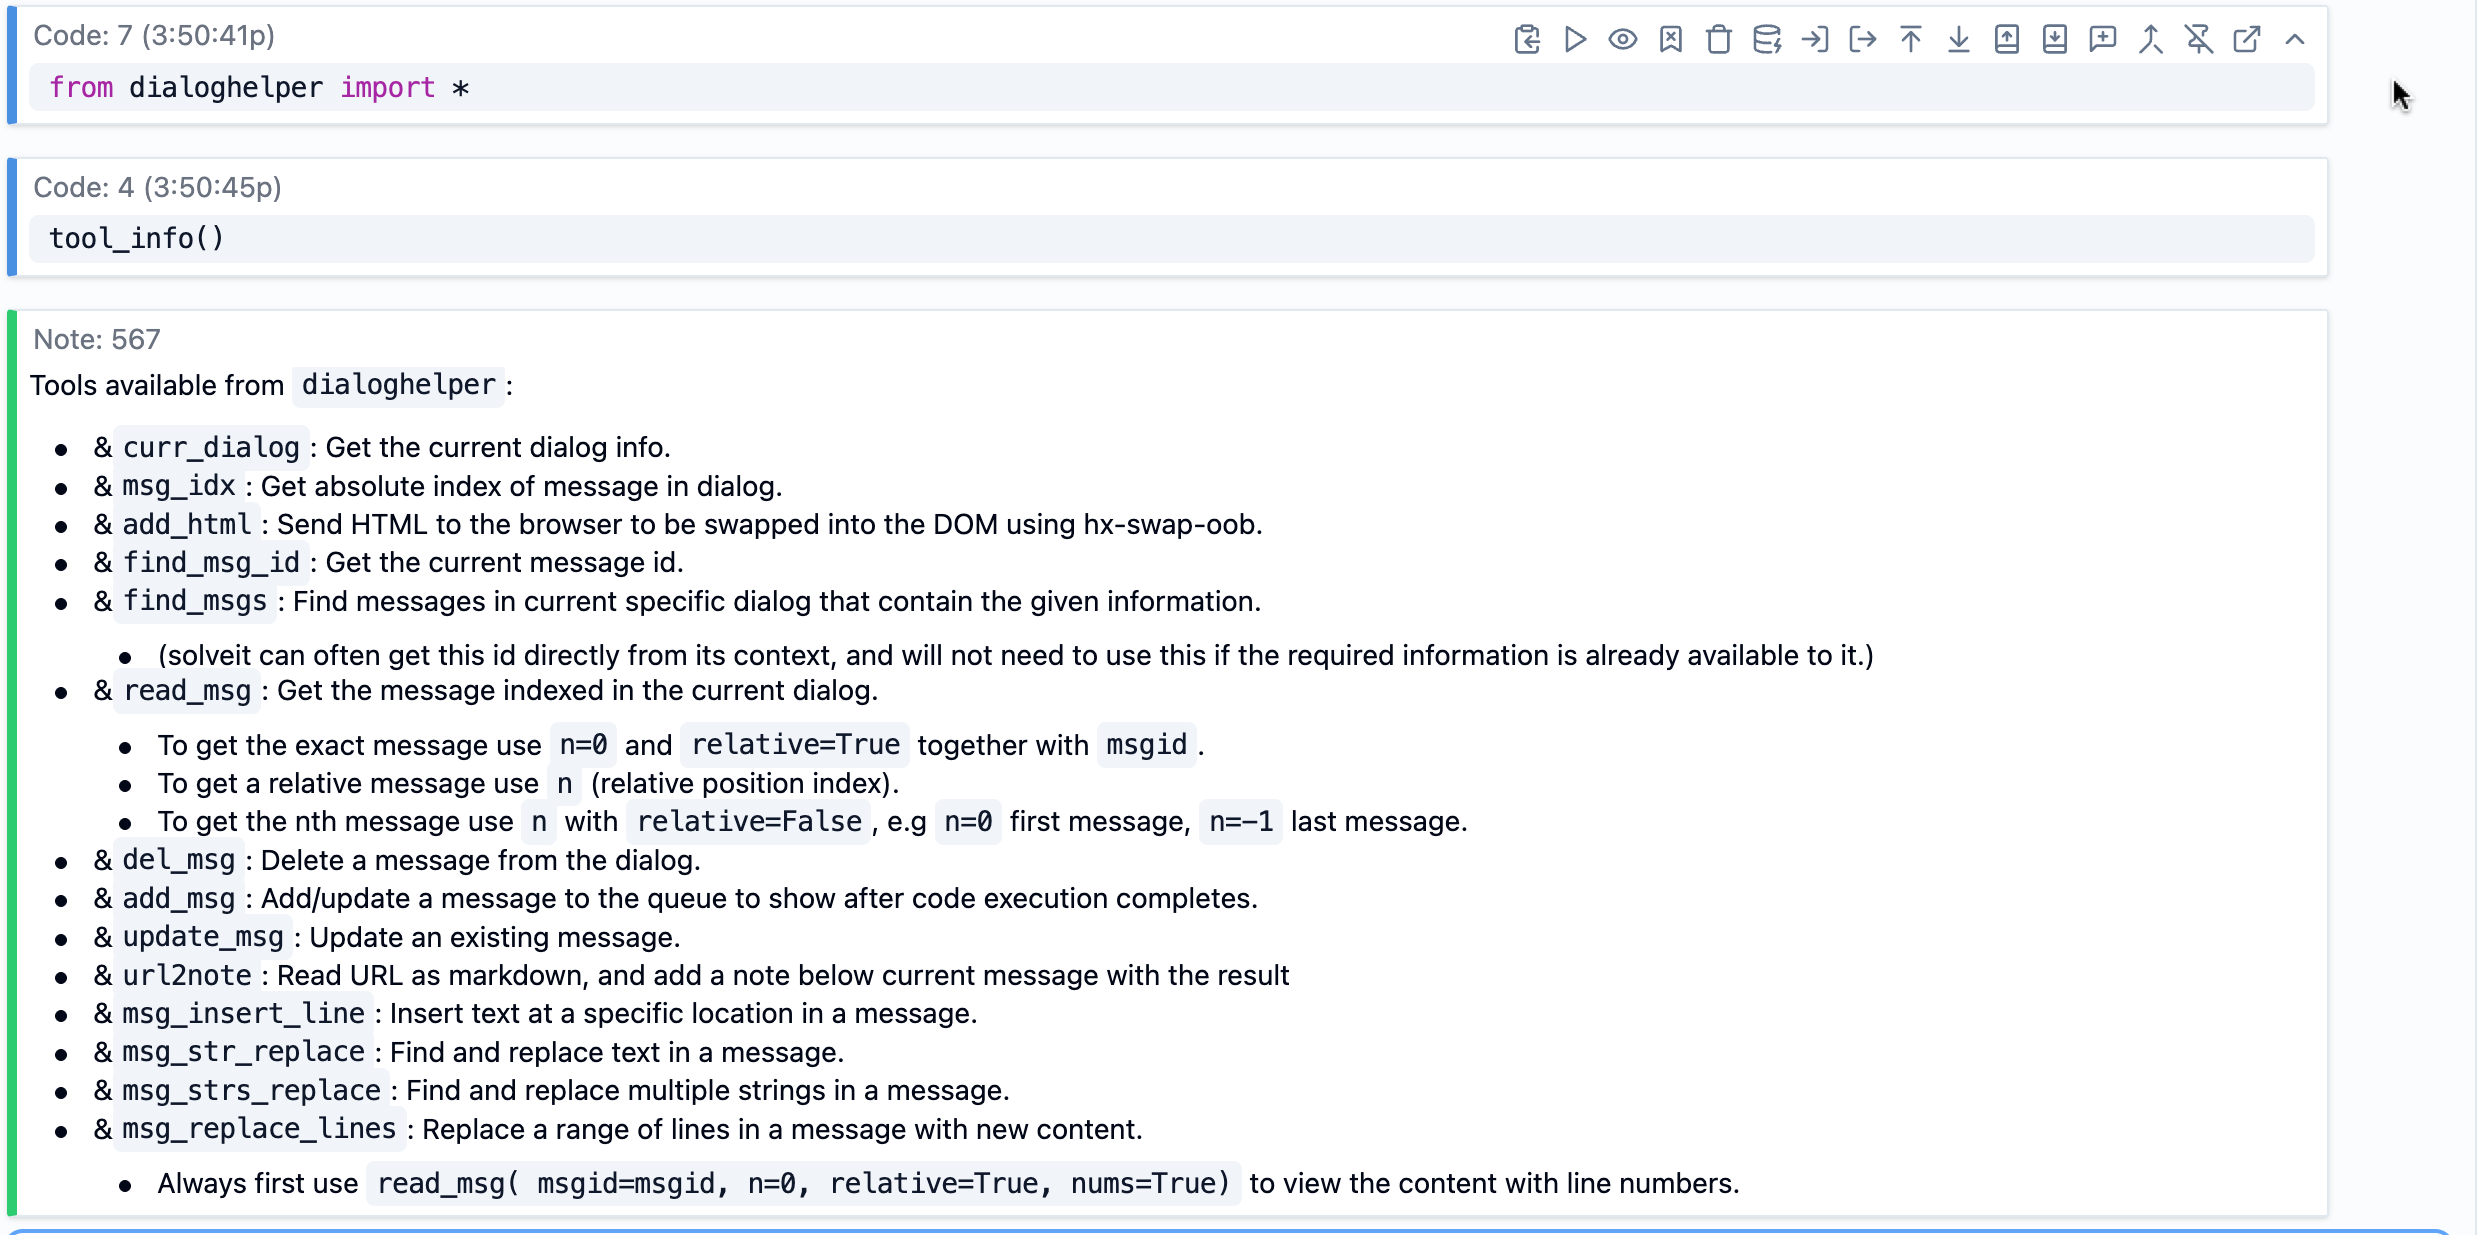
This enables meta-programming: the AI can modify your dialog structure. Ask it to add section headings to organize this work” and it can call add_msg to create those headings. Or “find all TODO comments and list them” and it uses find_msgs.
Use this when you want the AI to help edit, organize, clean up, or restructure your dialog.
Message Text Edit Tools
Message text edit tools are a 1:1 implementation of Claude’s text editor tools, but instead of editing files, they edit messages in your dialog.
These tools are available through dialoghelper. Import and expose them, and the AI can read your codebase, search for patterns, and make edits.
The AI can view message content, create new messages, insert text at specific positions, replace text within messages, and edit message structure.
These use the same command structure as Claude’s file editing, but target your dialog messages. For example, AI can use msg_strs_replace to update a code message to fix a bug or msg_insert_line to add a heading to a note.
Why use these? When you want the AI to make structured edits to your dialog content, these tools give it precise control. It can modify specific lines, replace patterns across messages, or restructure content programmatically.
File Operations Tools
SolveIt includes tools for working with files on your instance. These come from Claude’s text editor API, with some improvements.
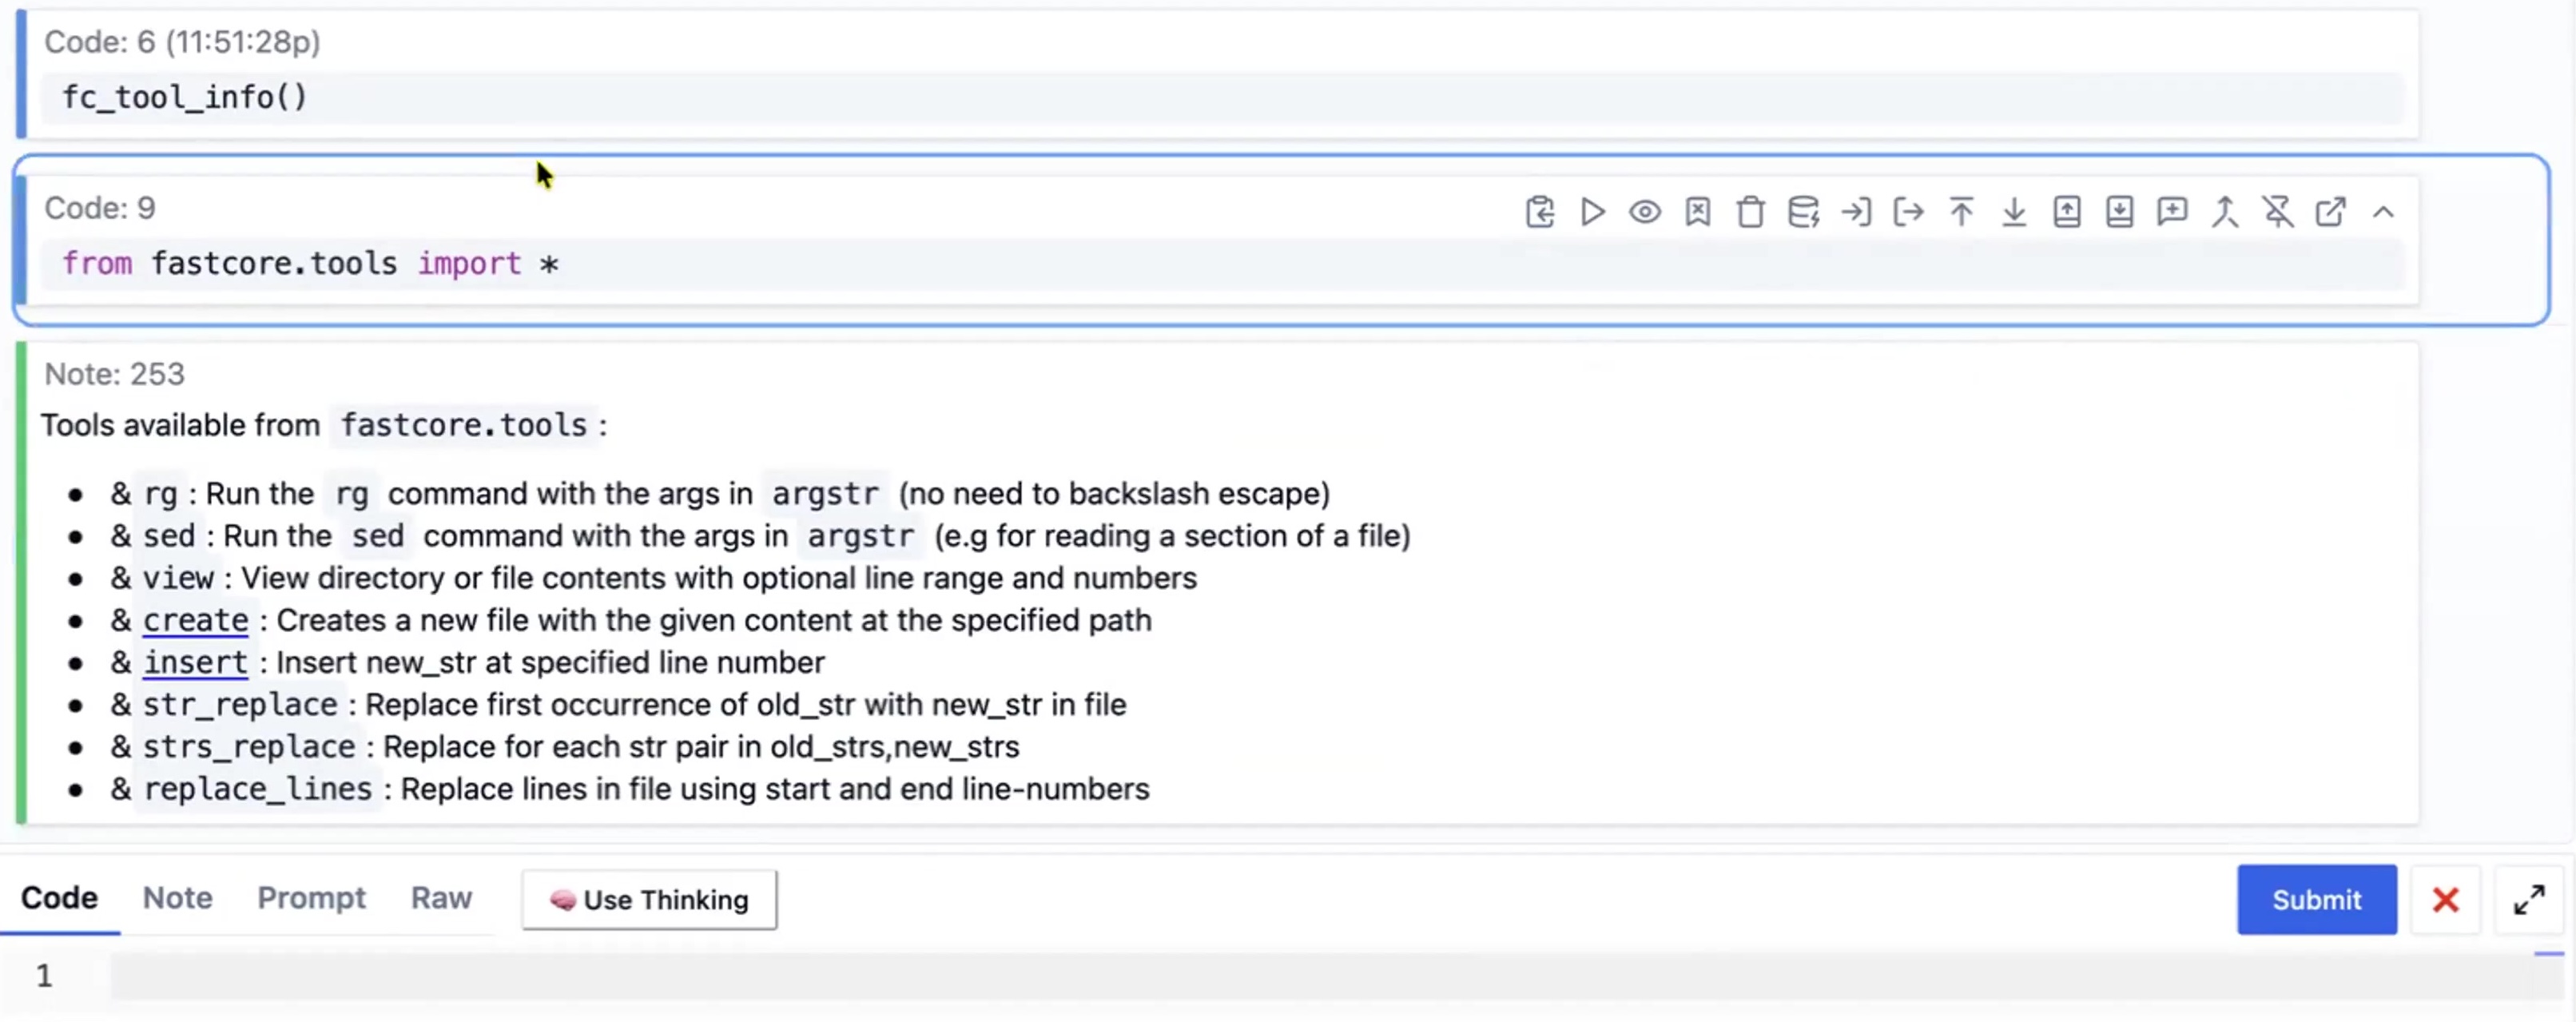
Run fc_tool_info() function from dialoghelper to make these tools available in your dialog. Then, AI can read your codebase, search for patterns, and make edits.
Example Workflows:
- “Find all functions that use the ‘config’ parameter” - the AI uses grep to search, then view to read the relevant files.
- “Update all occurrences of ‘old_function’ to ‘new_function’ in the src directory” - the AI uses grep to find them, then sed to make replacements.
This is the same toolset that powers Claude Code-style agents. Use it for file-based tasks like refactoring, code exploration, or batch updates.
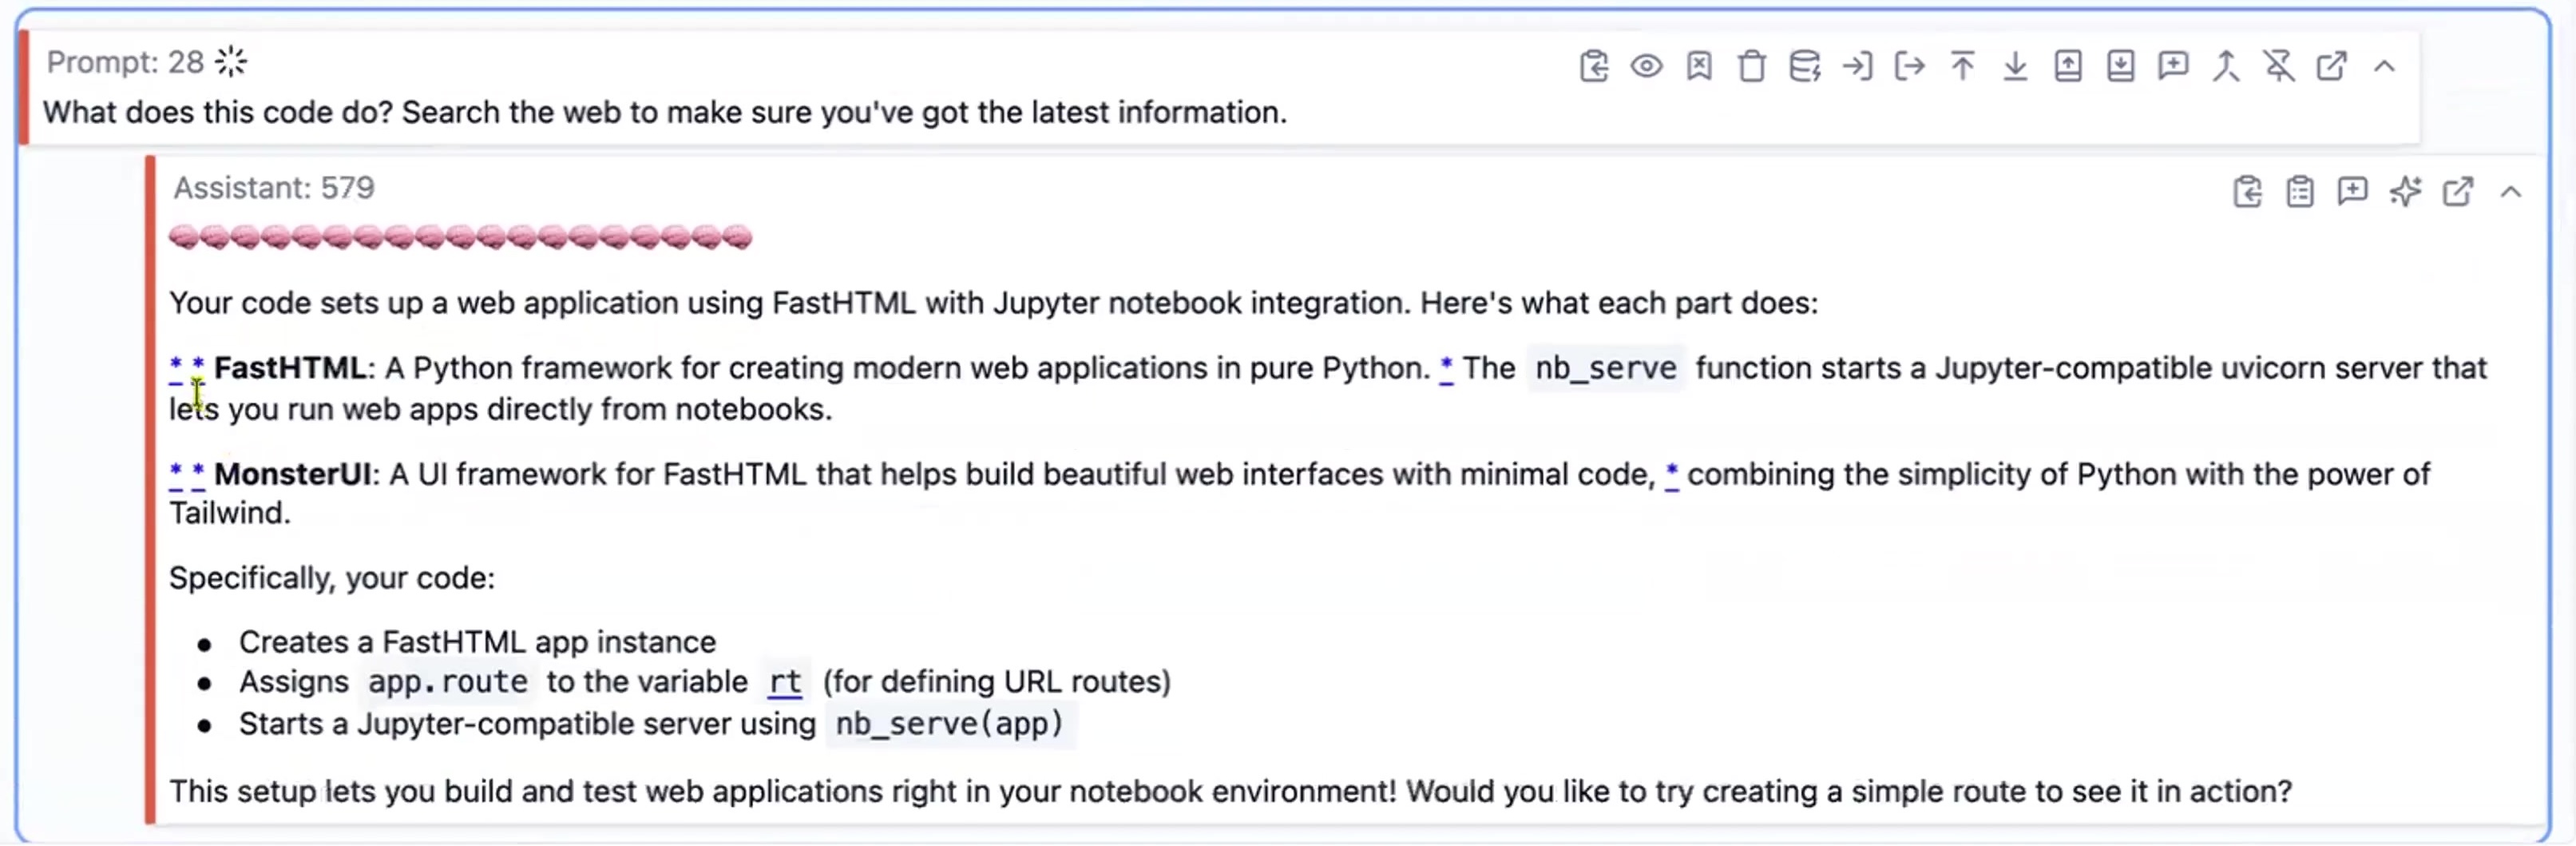
Web Search
The AI can search the web for current information. Web searches incur additional costs beyond regular token usage, so the AI only searches when you explicitly ask it to or when it is needed for current events, recent documentation, or fact-checking.
When AI searches the web it will provide citations in its answer: small asterisk icons appear in the response - click them to see the sources.
URL Reading
The AI can read URLs and extract their content using the built-in read_url tool.
For example, you can prompt:
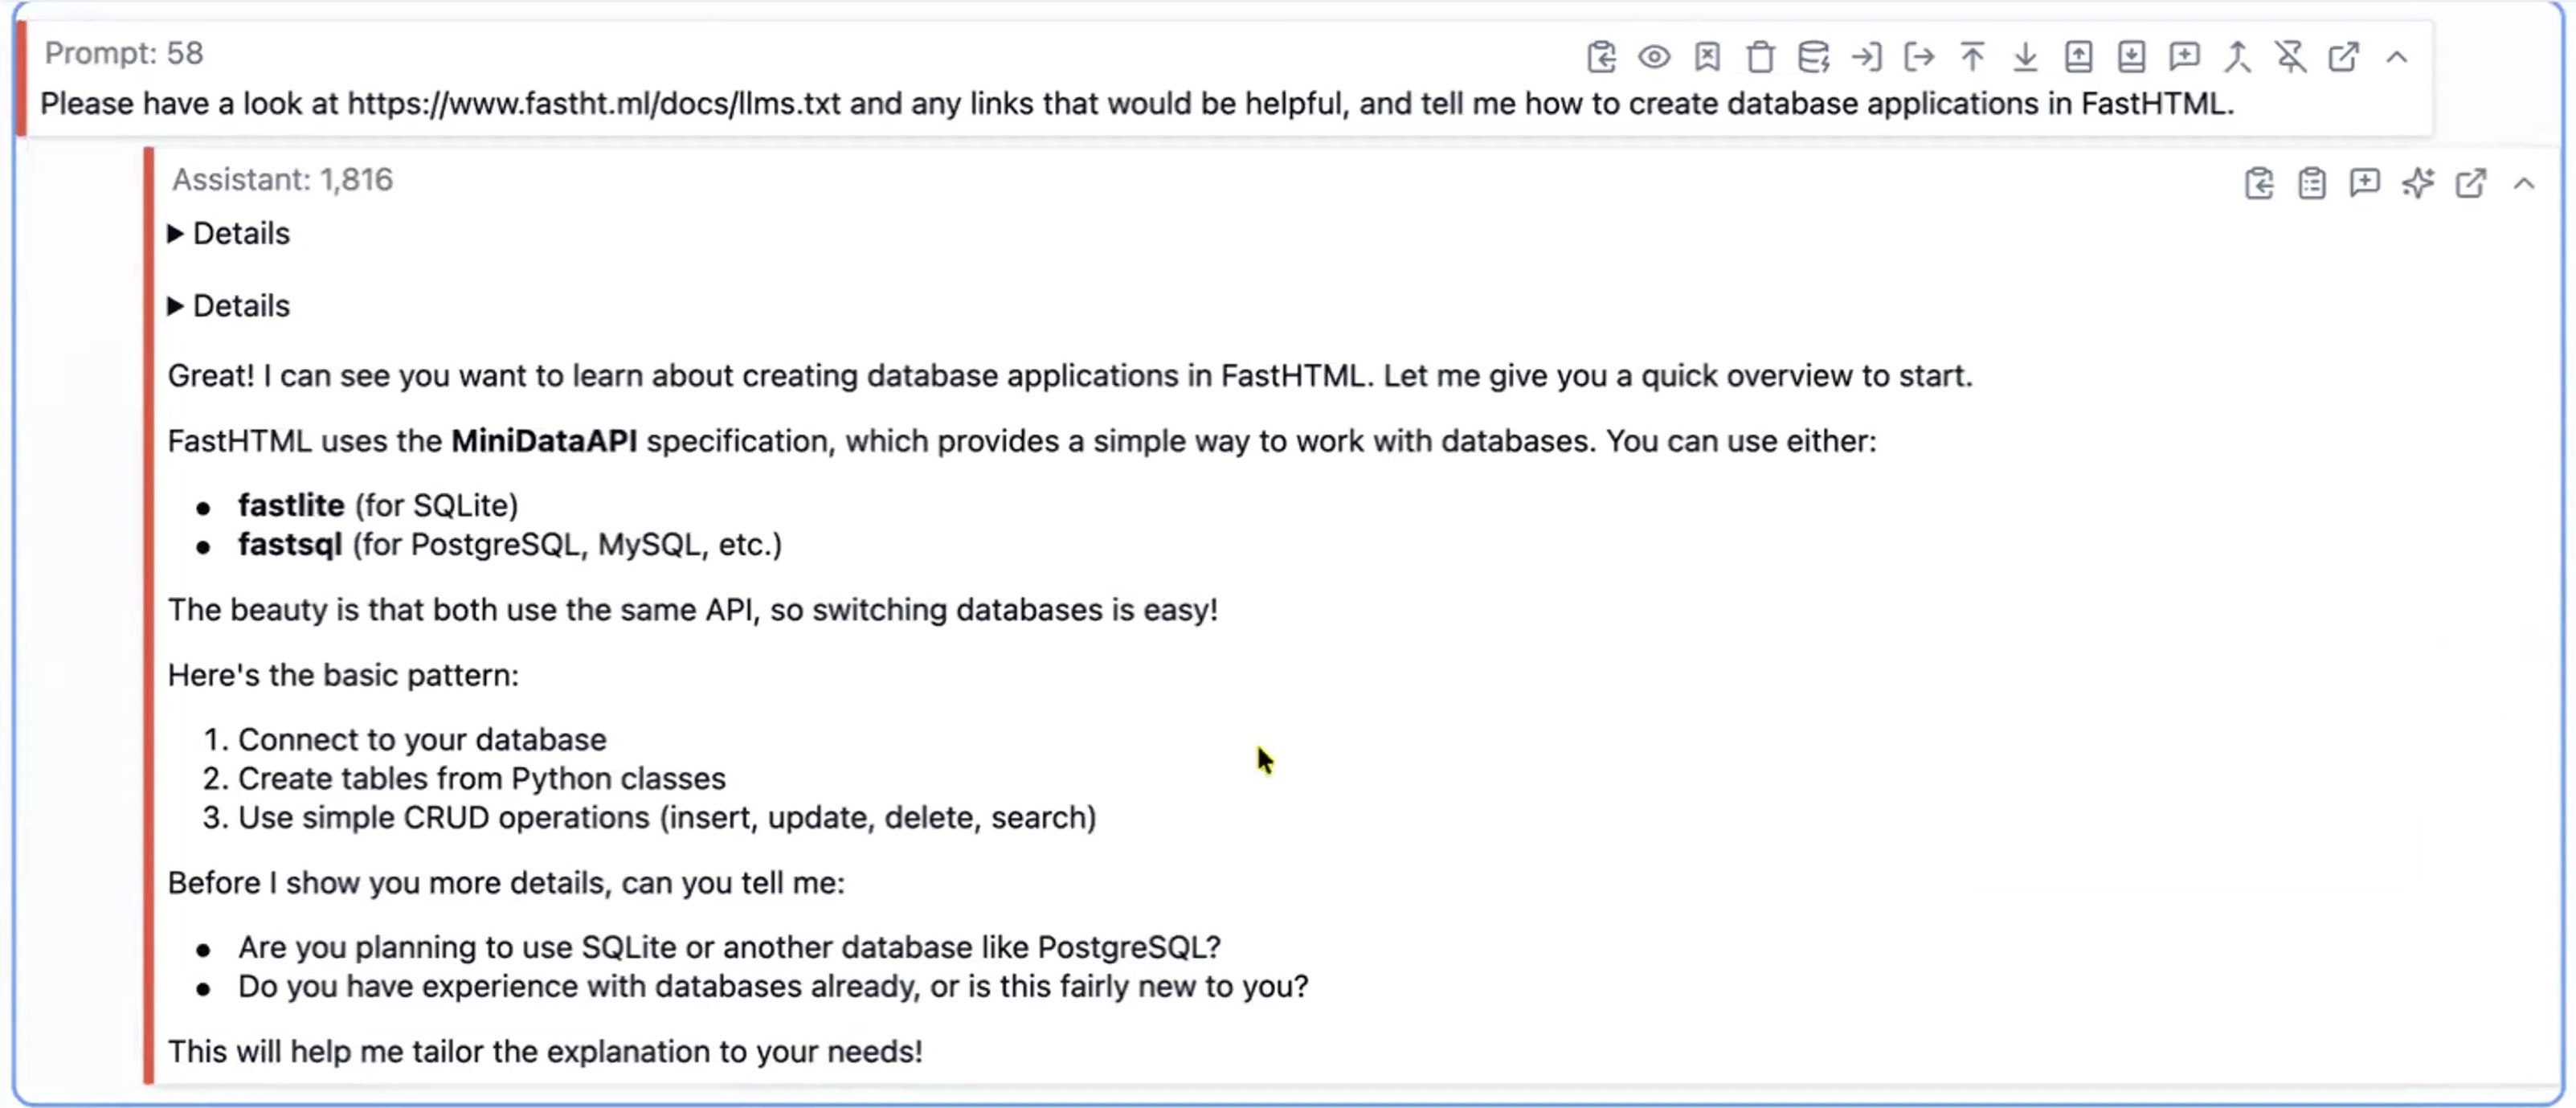
- “Please have a look at https://fastht.ml/docs/llms.txt and tell me how to create database applications in FastHTML”.
The AI then can use this tool to read the page and answer based on that content.
You can also ask AI to create a note from URL content. For example:
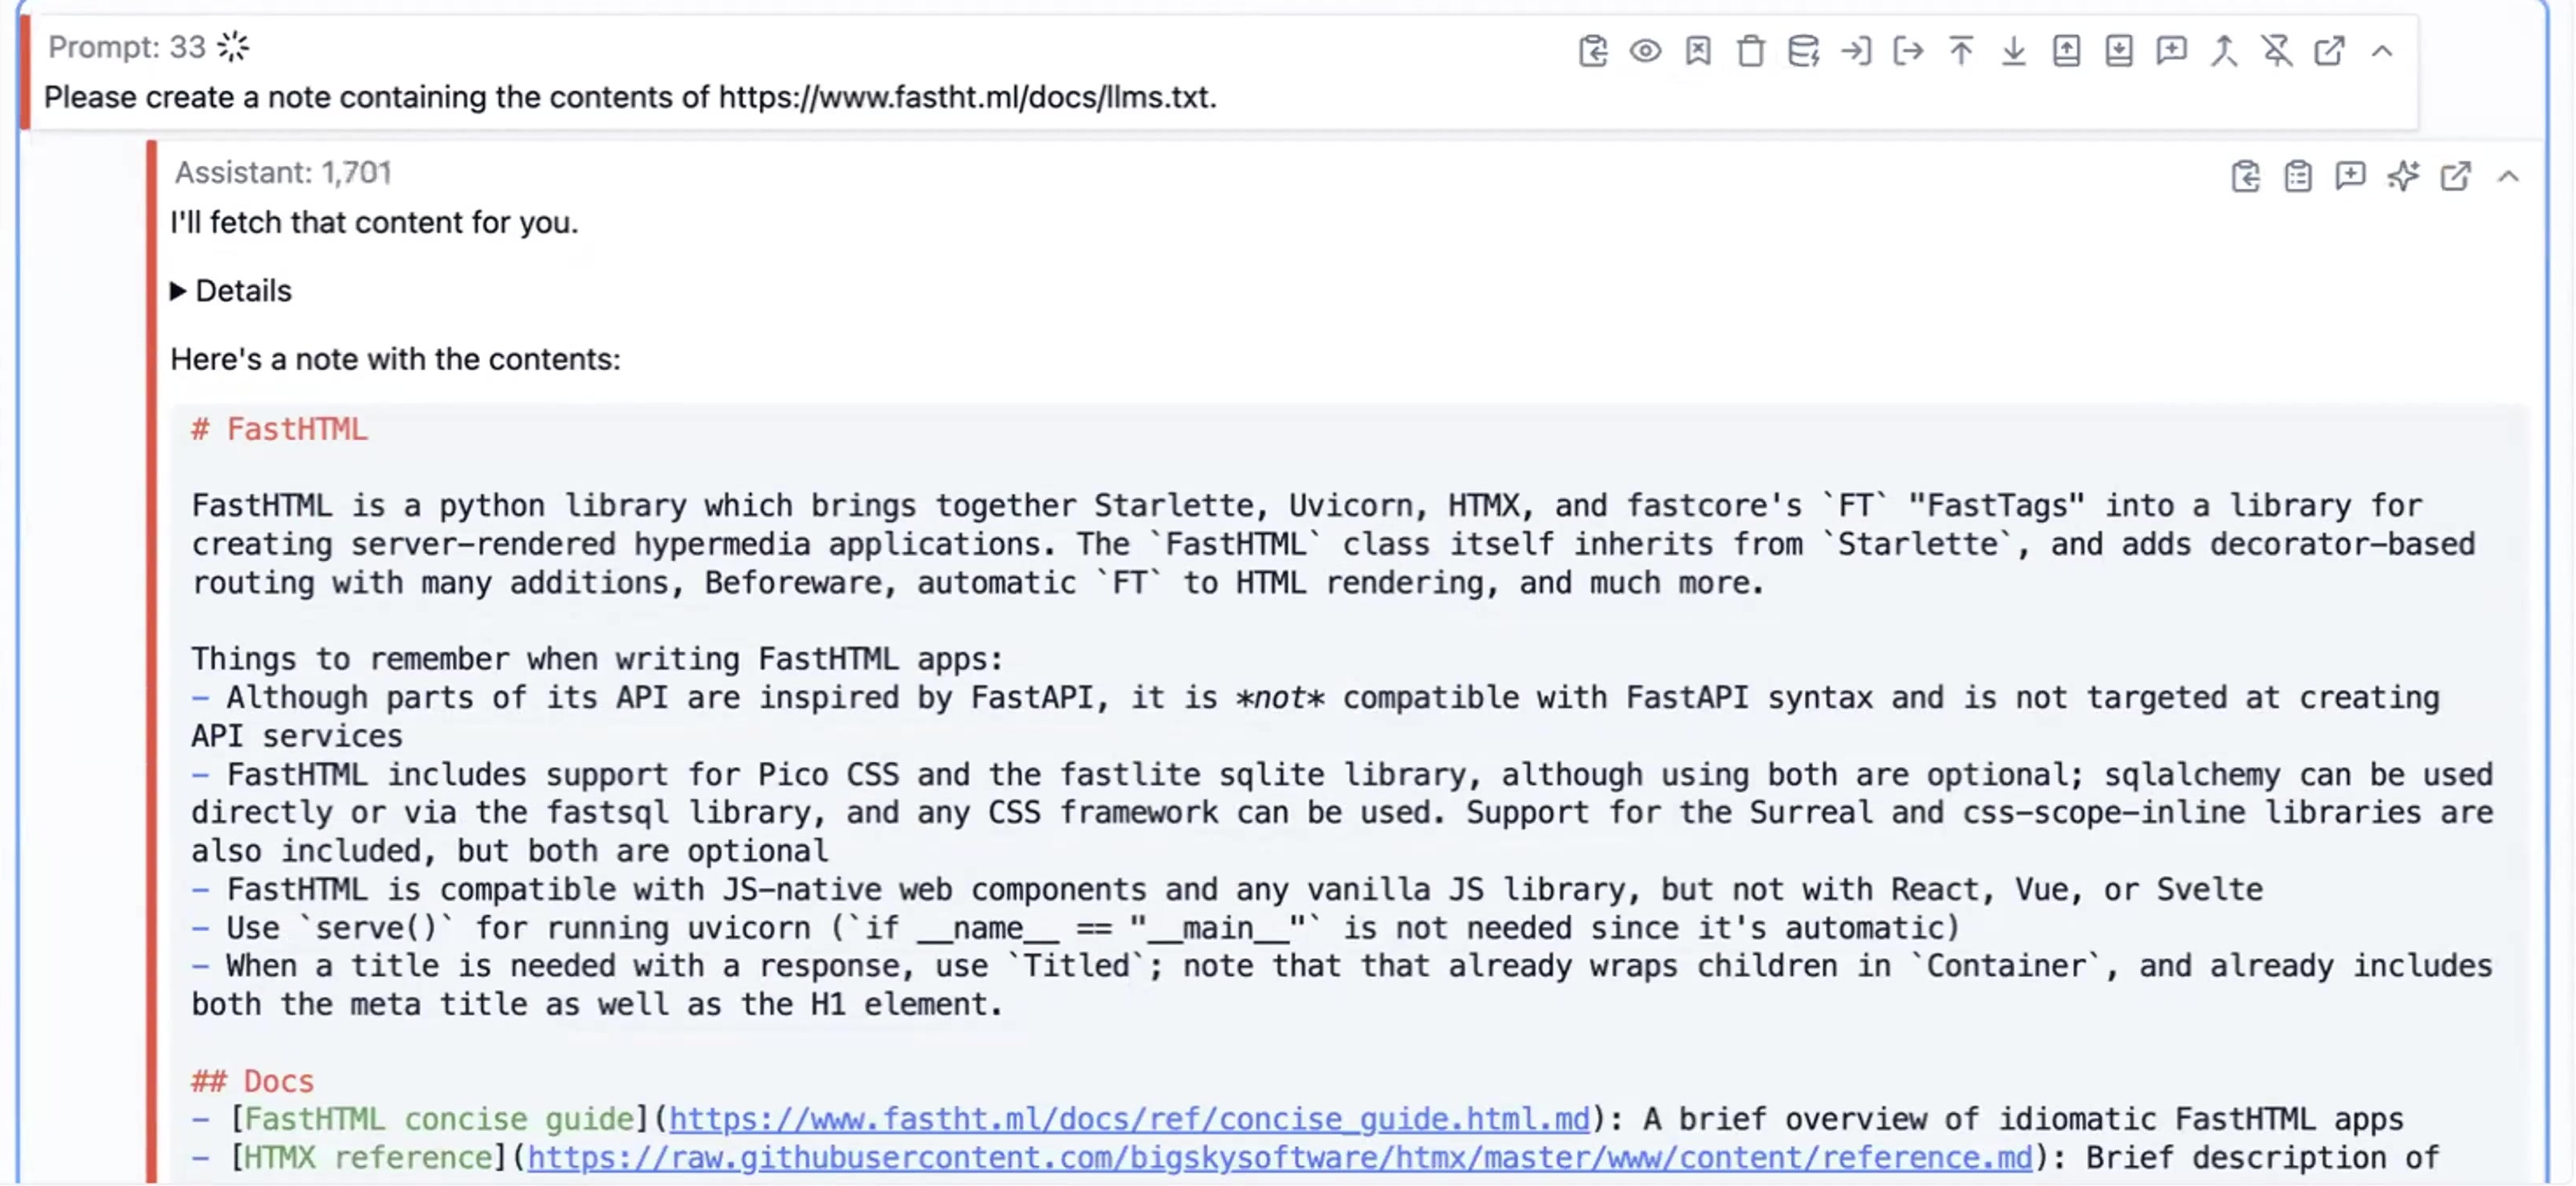
- “Please create a note containing the contents of https://fastht.ml/docs/llms.txt”
Alternatively you can also use the built-in url2note function/tool add URL content as note messages,
Run it yourself:
url2note("https://fastht.ml/docs/llms.txt")Or expose it as a tool in your prompt:
- “Please create a note containing the contents of https://fastht.ml/docs/llms.txt using
& `url2note`”
This puts the web page content directly into your dialog as a note, giving you the reference material to work with. Useful for reading documentation, saving articles for later, or pulling in reference material you want to discuss with the AI.
System Features
Undo/Redo
Undo works per-message. Edit a message and press Cmd+Z to undo that specific edit. Navigate to a different message and press Cmd+Z to undo changes there.
This is smarter than traditional undo. You don’t have to undo everything in reverse chronological order. Go directly to the message you want to revert and undo just that change.
This even works for AI responses. If the AI edits a previous response and you don’t like the changes, click into that response and press Cmd+Z to restore it.
Undo tracks changes across your session. Work on multiple messages, jump around, and undo specific changes wherever you need to.
Cmd+Shift+Z for redo.
Breadcrumbs
Breadcrumbs show your current location in the file system. They appear at the top of the dialog list and show the path from your instance root to your current directory.
Click any part of the breadcrumb path to navigate up to that directory. This is faster than clicking back multiple times.
For example, if you’re in teach/python/basics, the breadcrumbs show each level. Click teach to jump back to that folder. Click your instance name to go to the root.
When you open a terminal with Shift+T, it opens in the directory you’re currently viewing. The breadcrumbs tell you where that will be.
Dialog Duplication
Press (D) when a dialog is selected or the button to duplicate it. This creates a complete copy with a new name.
Duplicating dialogs is useful in several situations. You can create template dialogs with imports, common functions, and tools, then duplicate them whenever you start a new project of that type. When working through a problem and you want to try a different approach, duplicate the dialog and explore the alternative with both versions running side-by-side with separate kernels. You can also run the same analysis with different parameters by duplicating, changing the parameters, and comparing results. Before making major changes, duplicate as a backup so if the new direction doesn’t work out, you still have the original.
Each duplicate is independent with a separate kernel and separate file. Changes to one don’t affect the other.
A common pattern is to build a template with your standard setup, duplicate it for each new task. Faster than starting from scratch every time.
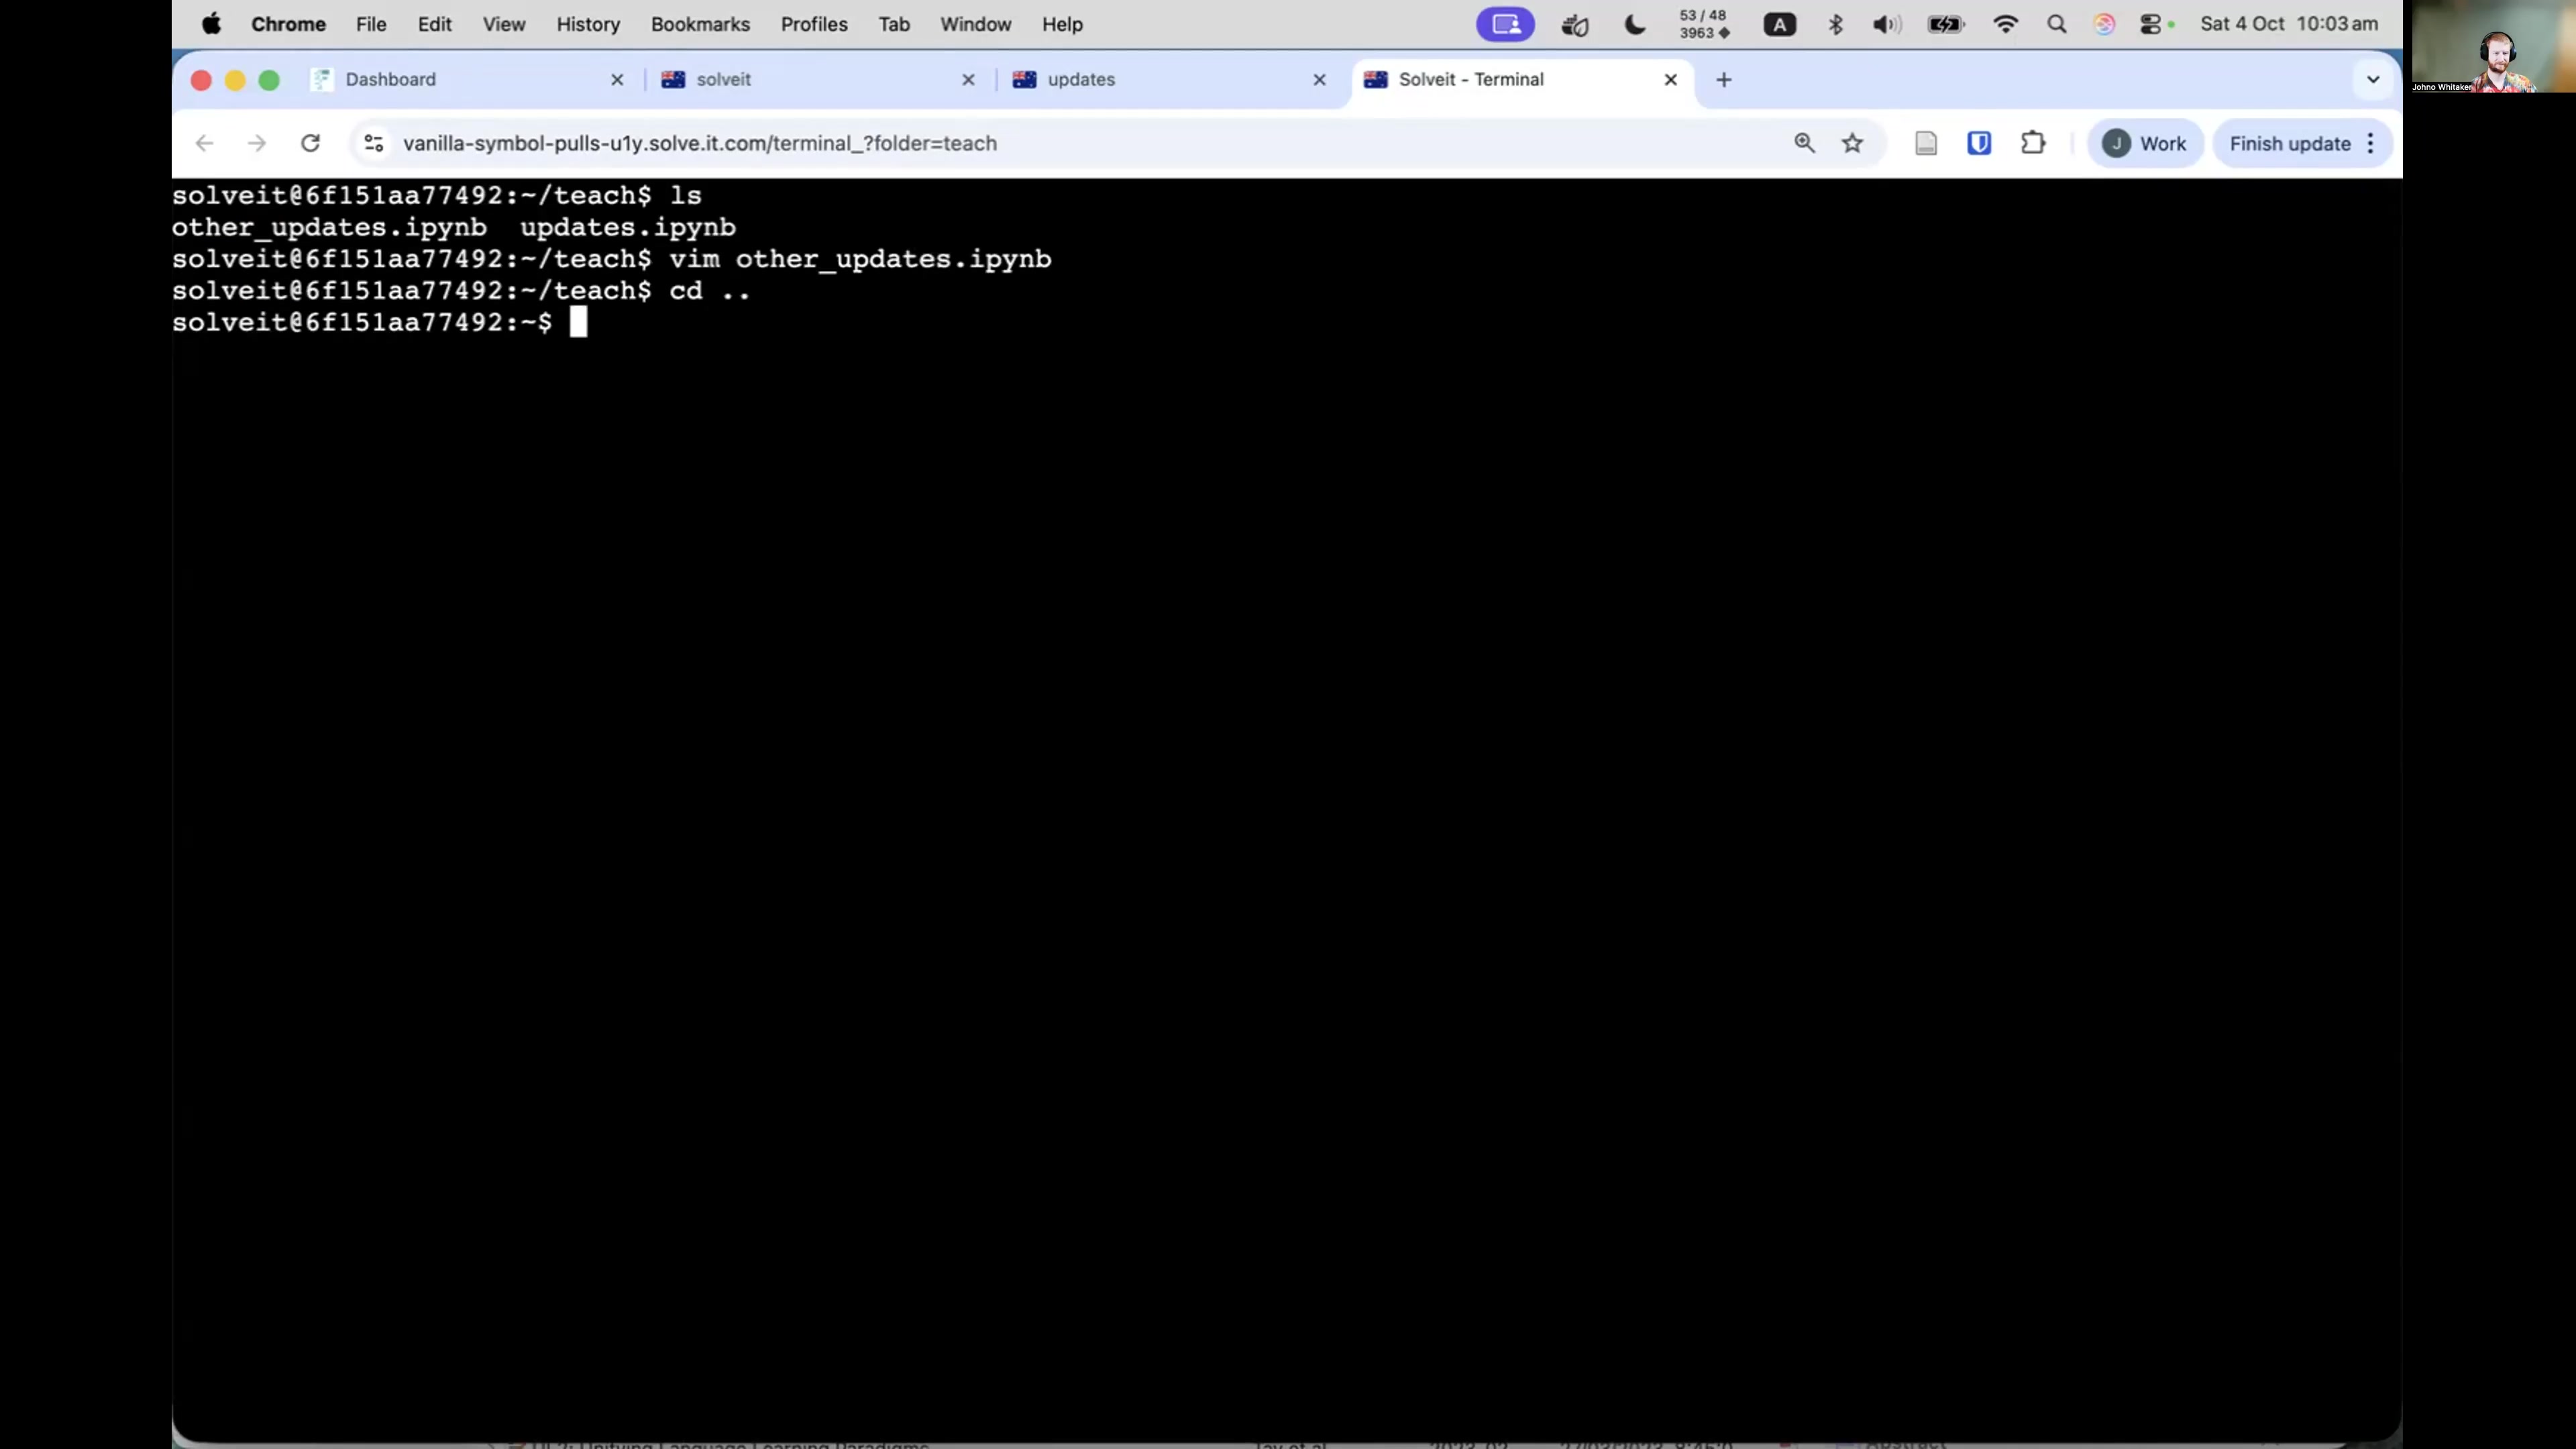
Terminal Access
Press Shift+T to open a terminal. This is a full Unix shell running on your instance. The terminal opens in your current directory (shown in the breadcrumbs). You can run any Unix commands, install packages with pip, manage files, or use git.
File System
Your instance is a full Unix environment with complete file system access. You can create directories, upload files, download files, and organize everything however you like.
The file tree on the left shows your directory structure. Navigate folders by clicking. By default, the dialog view shows just dialogs (.ipynb files). Click “show all files” to see everything - Python modules, data files, images, configuration files, anything you’ve created or uploaded.
Everything you do in dialogs, terminals, or through code has access to the same file system. Save a file in Python, and you’ll see it in the file tree. Upload an image, and you can reference it in your code. Your file system persists across sessions. Close your browser, come back later, and all your files are still there.
This is your workspace. Organize it however makes sense for your projects.
File Upload
Click the upload button to add files from your local computer to your instance.
This works for any file type - data files, images, documents, Python scripts, whatever you need. Select one or multiple files and they upload to your current directory.
Once uploaded, files are part of your instance’s file system. Reference them in your code, open them in the terminal, or include images in notes.
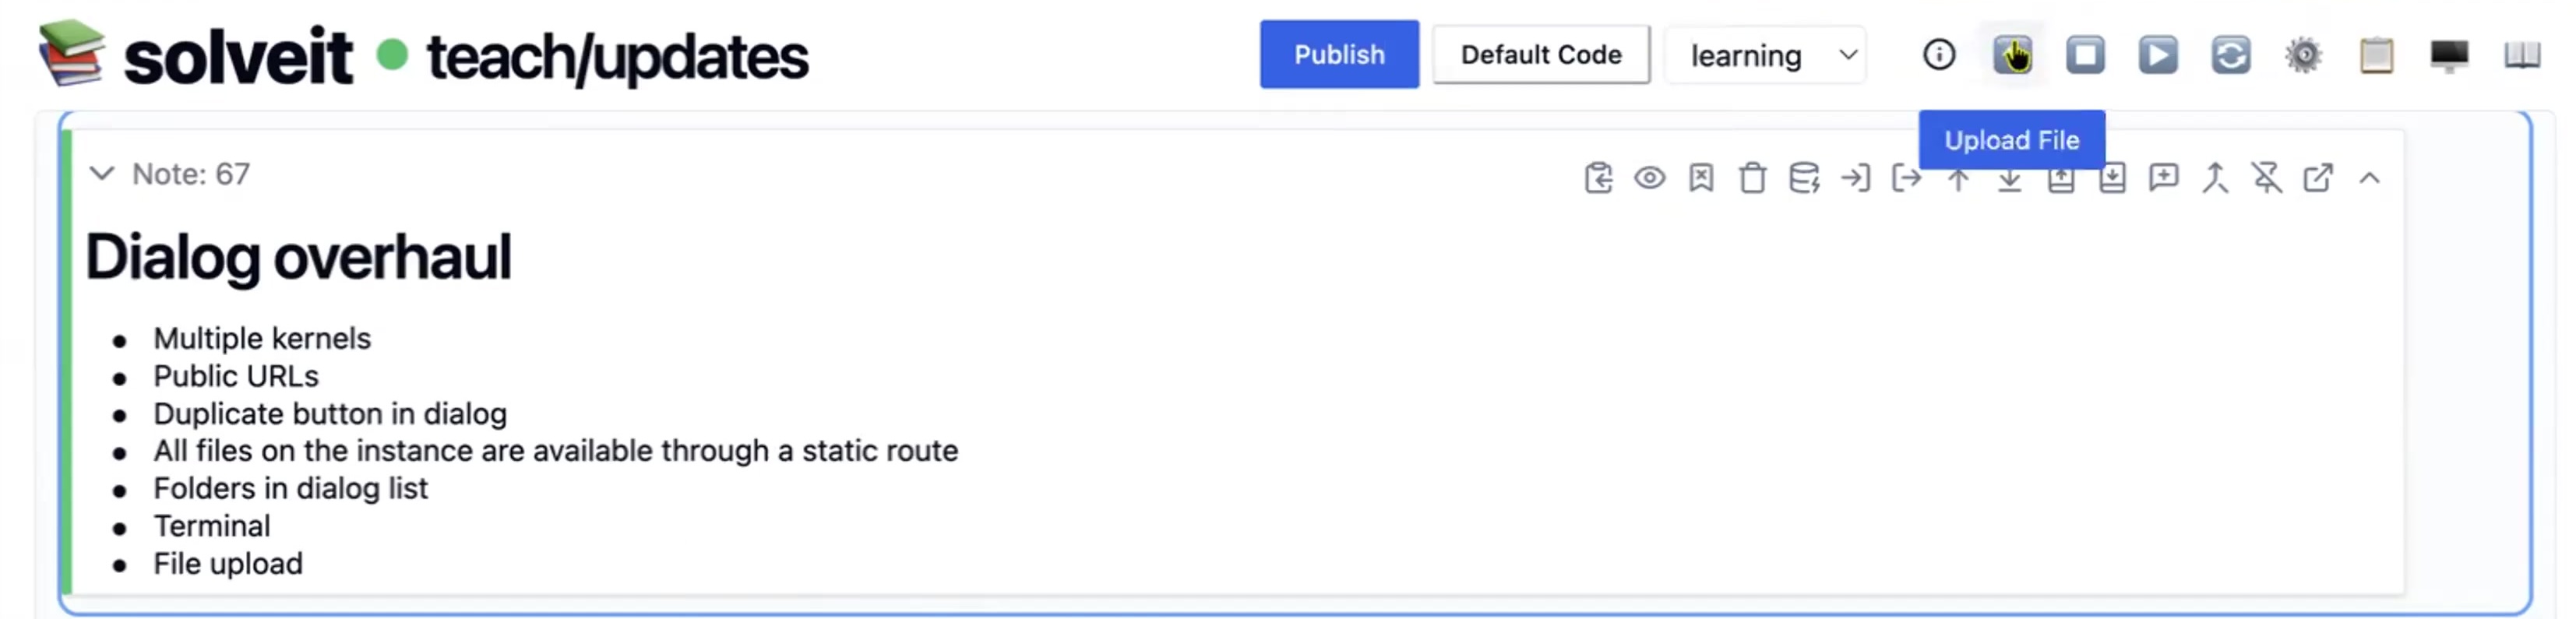
The upload happens to the directory you’re currently viewing (check the breadcrumbs). Want files in a specific folder? Navigate there first, then upload.
Files stay on your instance until you delete them. They’re available across all dialogs and terminal sessions.
SSH Keys & Git
Your instance has git installed, so you can use standard git workflows like: clone repositories, commit changes, push and pull.
To work with private repos, you’ll need SSH keys. Generate them in the terminal:
ssh-keygen -t ed25519Add the public key to your GitHub/GitLab account, and you can clone private repos and push changes.
Many people work by cloning repos into their instance, editing in dialogs, and committing back to git. The dialogs are .ipynb files, so they work with version control like any other file.
Your instance becomes a development environment with git integration, persistent storage, and the ability to work across multiple projects.
Hosting & Deployment
Public URL Hosting
Your instance can host web applications. Run a server on port 8000, and it becomes accessible via your public URL.
The simplest example: Open the terminal (Shift + t) and run Python’s built-in HTTP server:
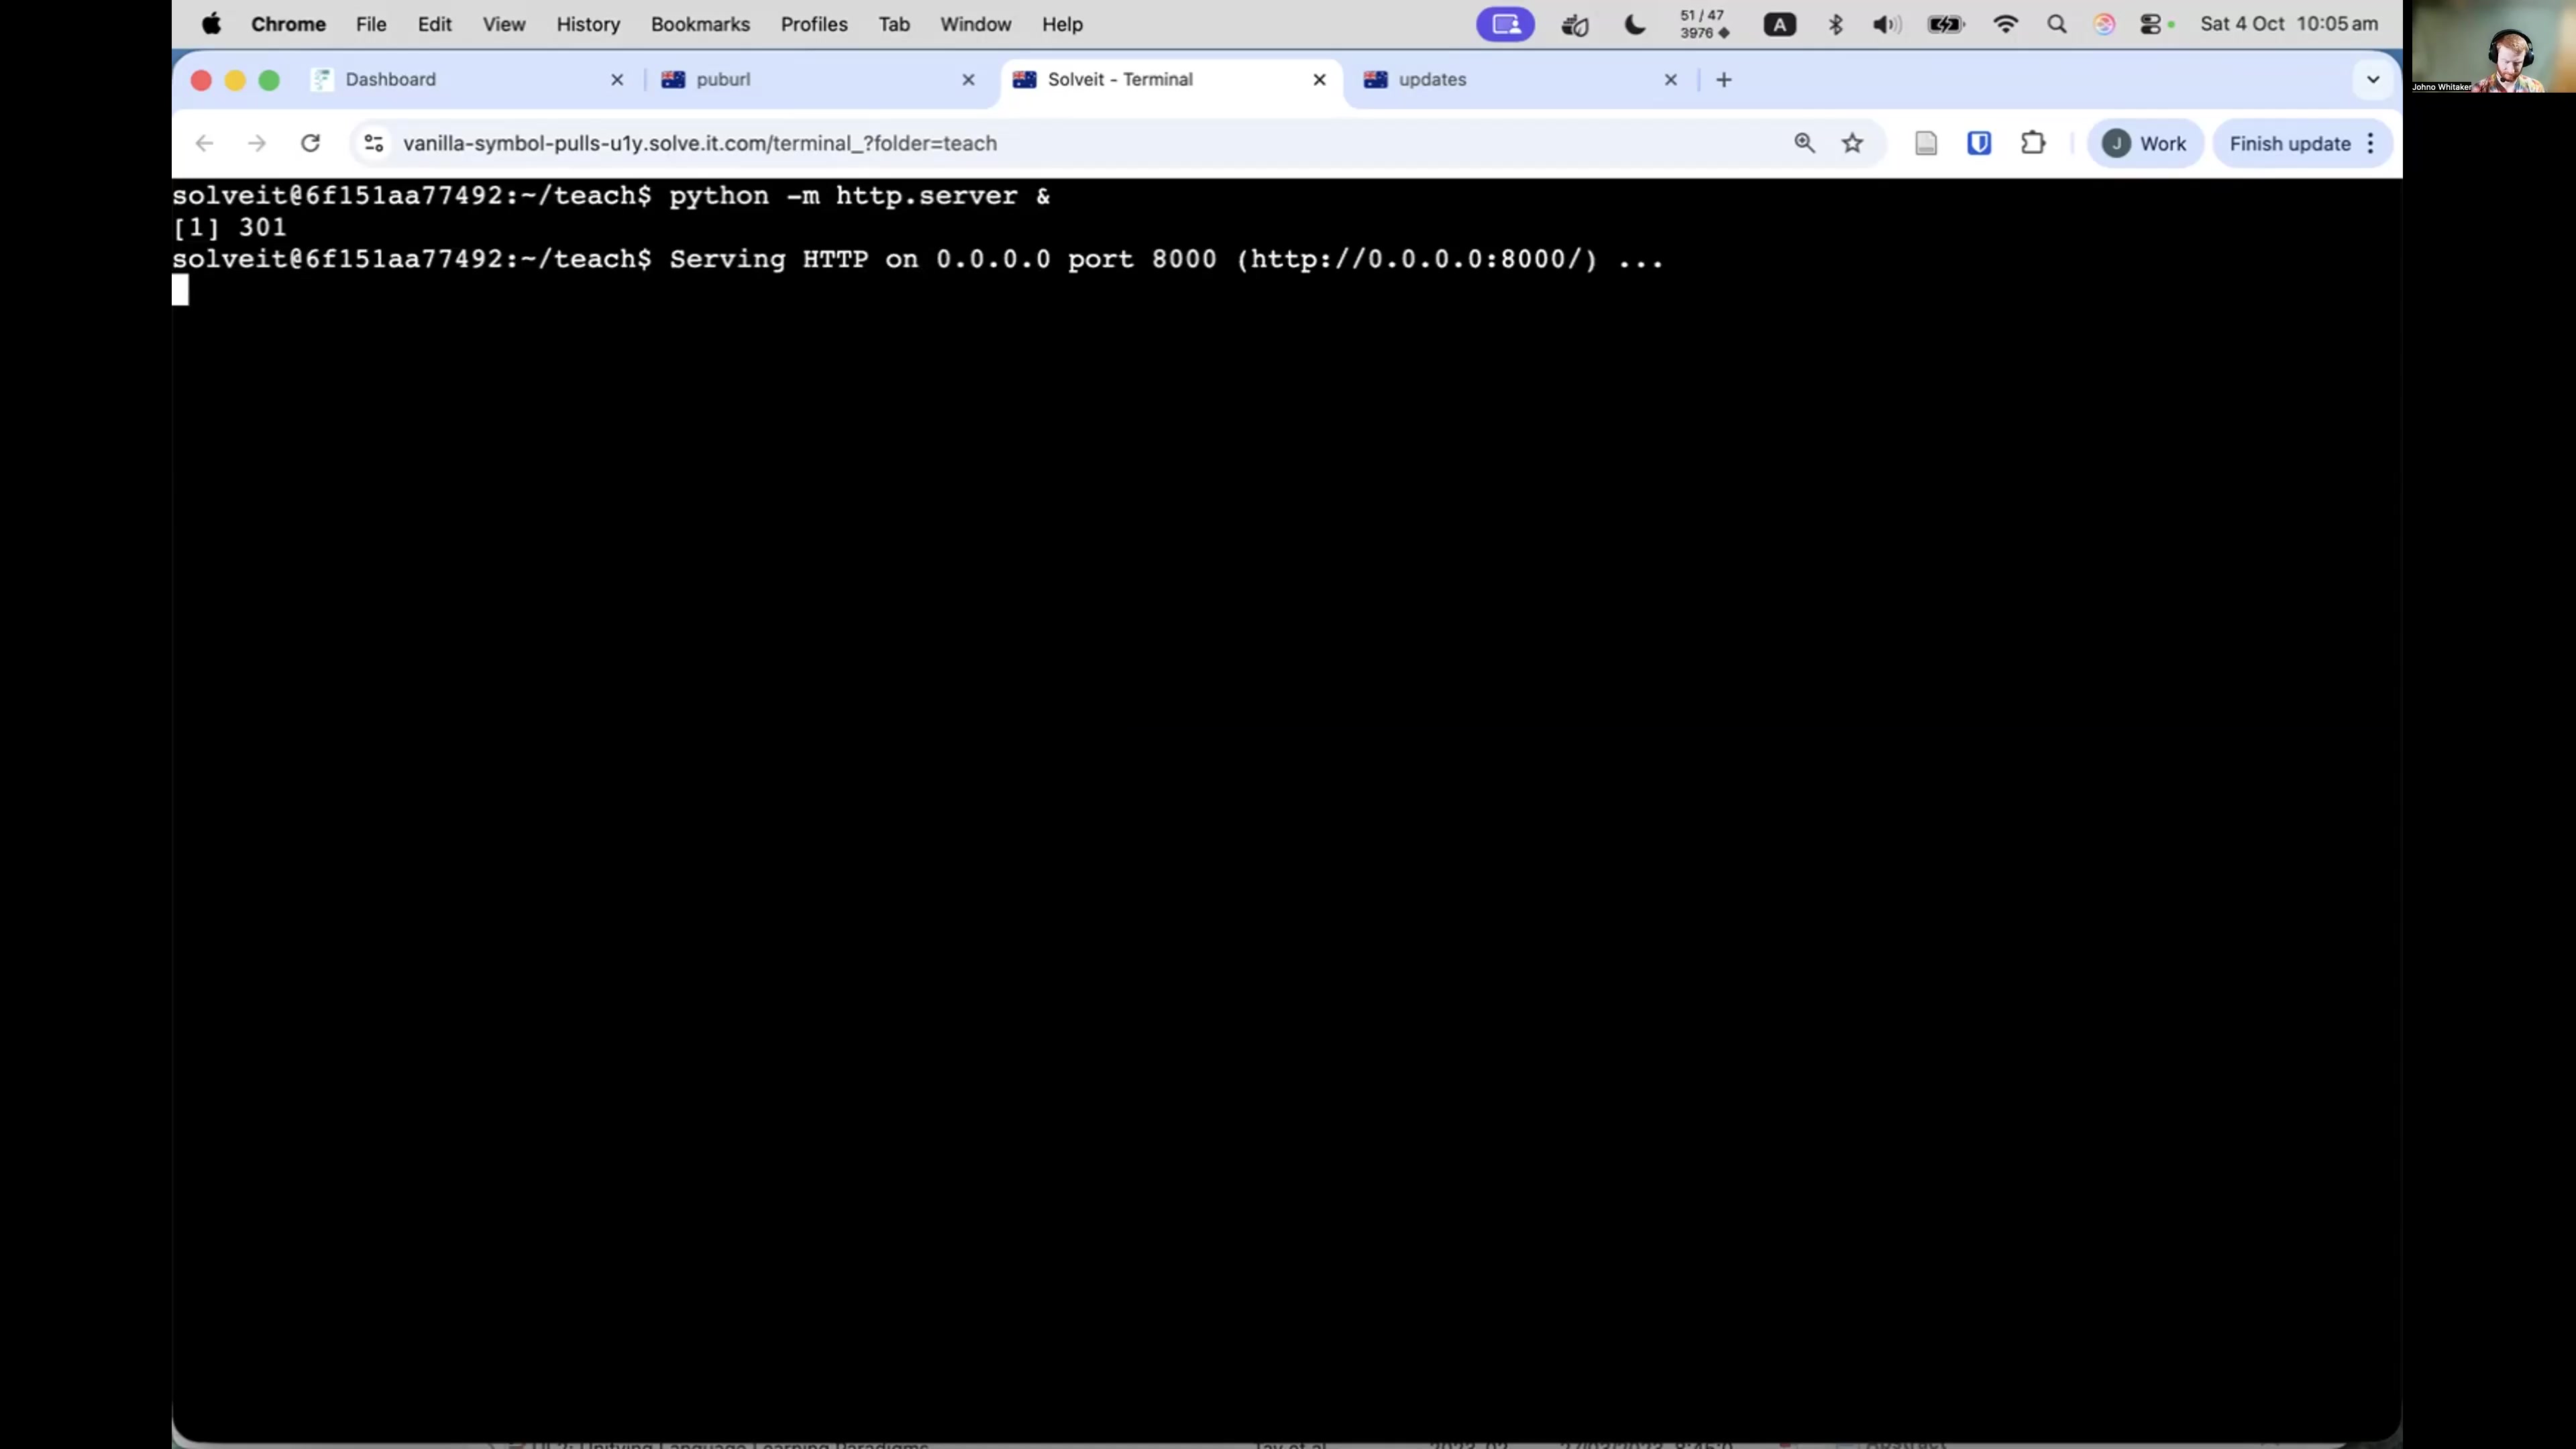
Now anyone with your public URL sees what you’re serving. They can’t access your dialogs or files - only what the server exposes.
You can copy the public URL from the dashboard and start sharing with other people:
This works for any server that listens on port 8000. Run a Flask app, FastAPI, Django, or FastHTML server, and it’s immediately available at your public URL.

No deployment steps, no configuration, no waiting. Write code, run it, share the link.
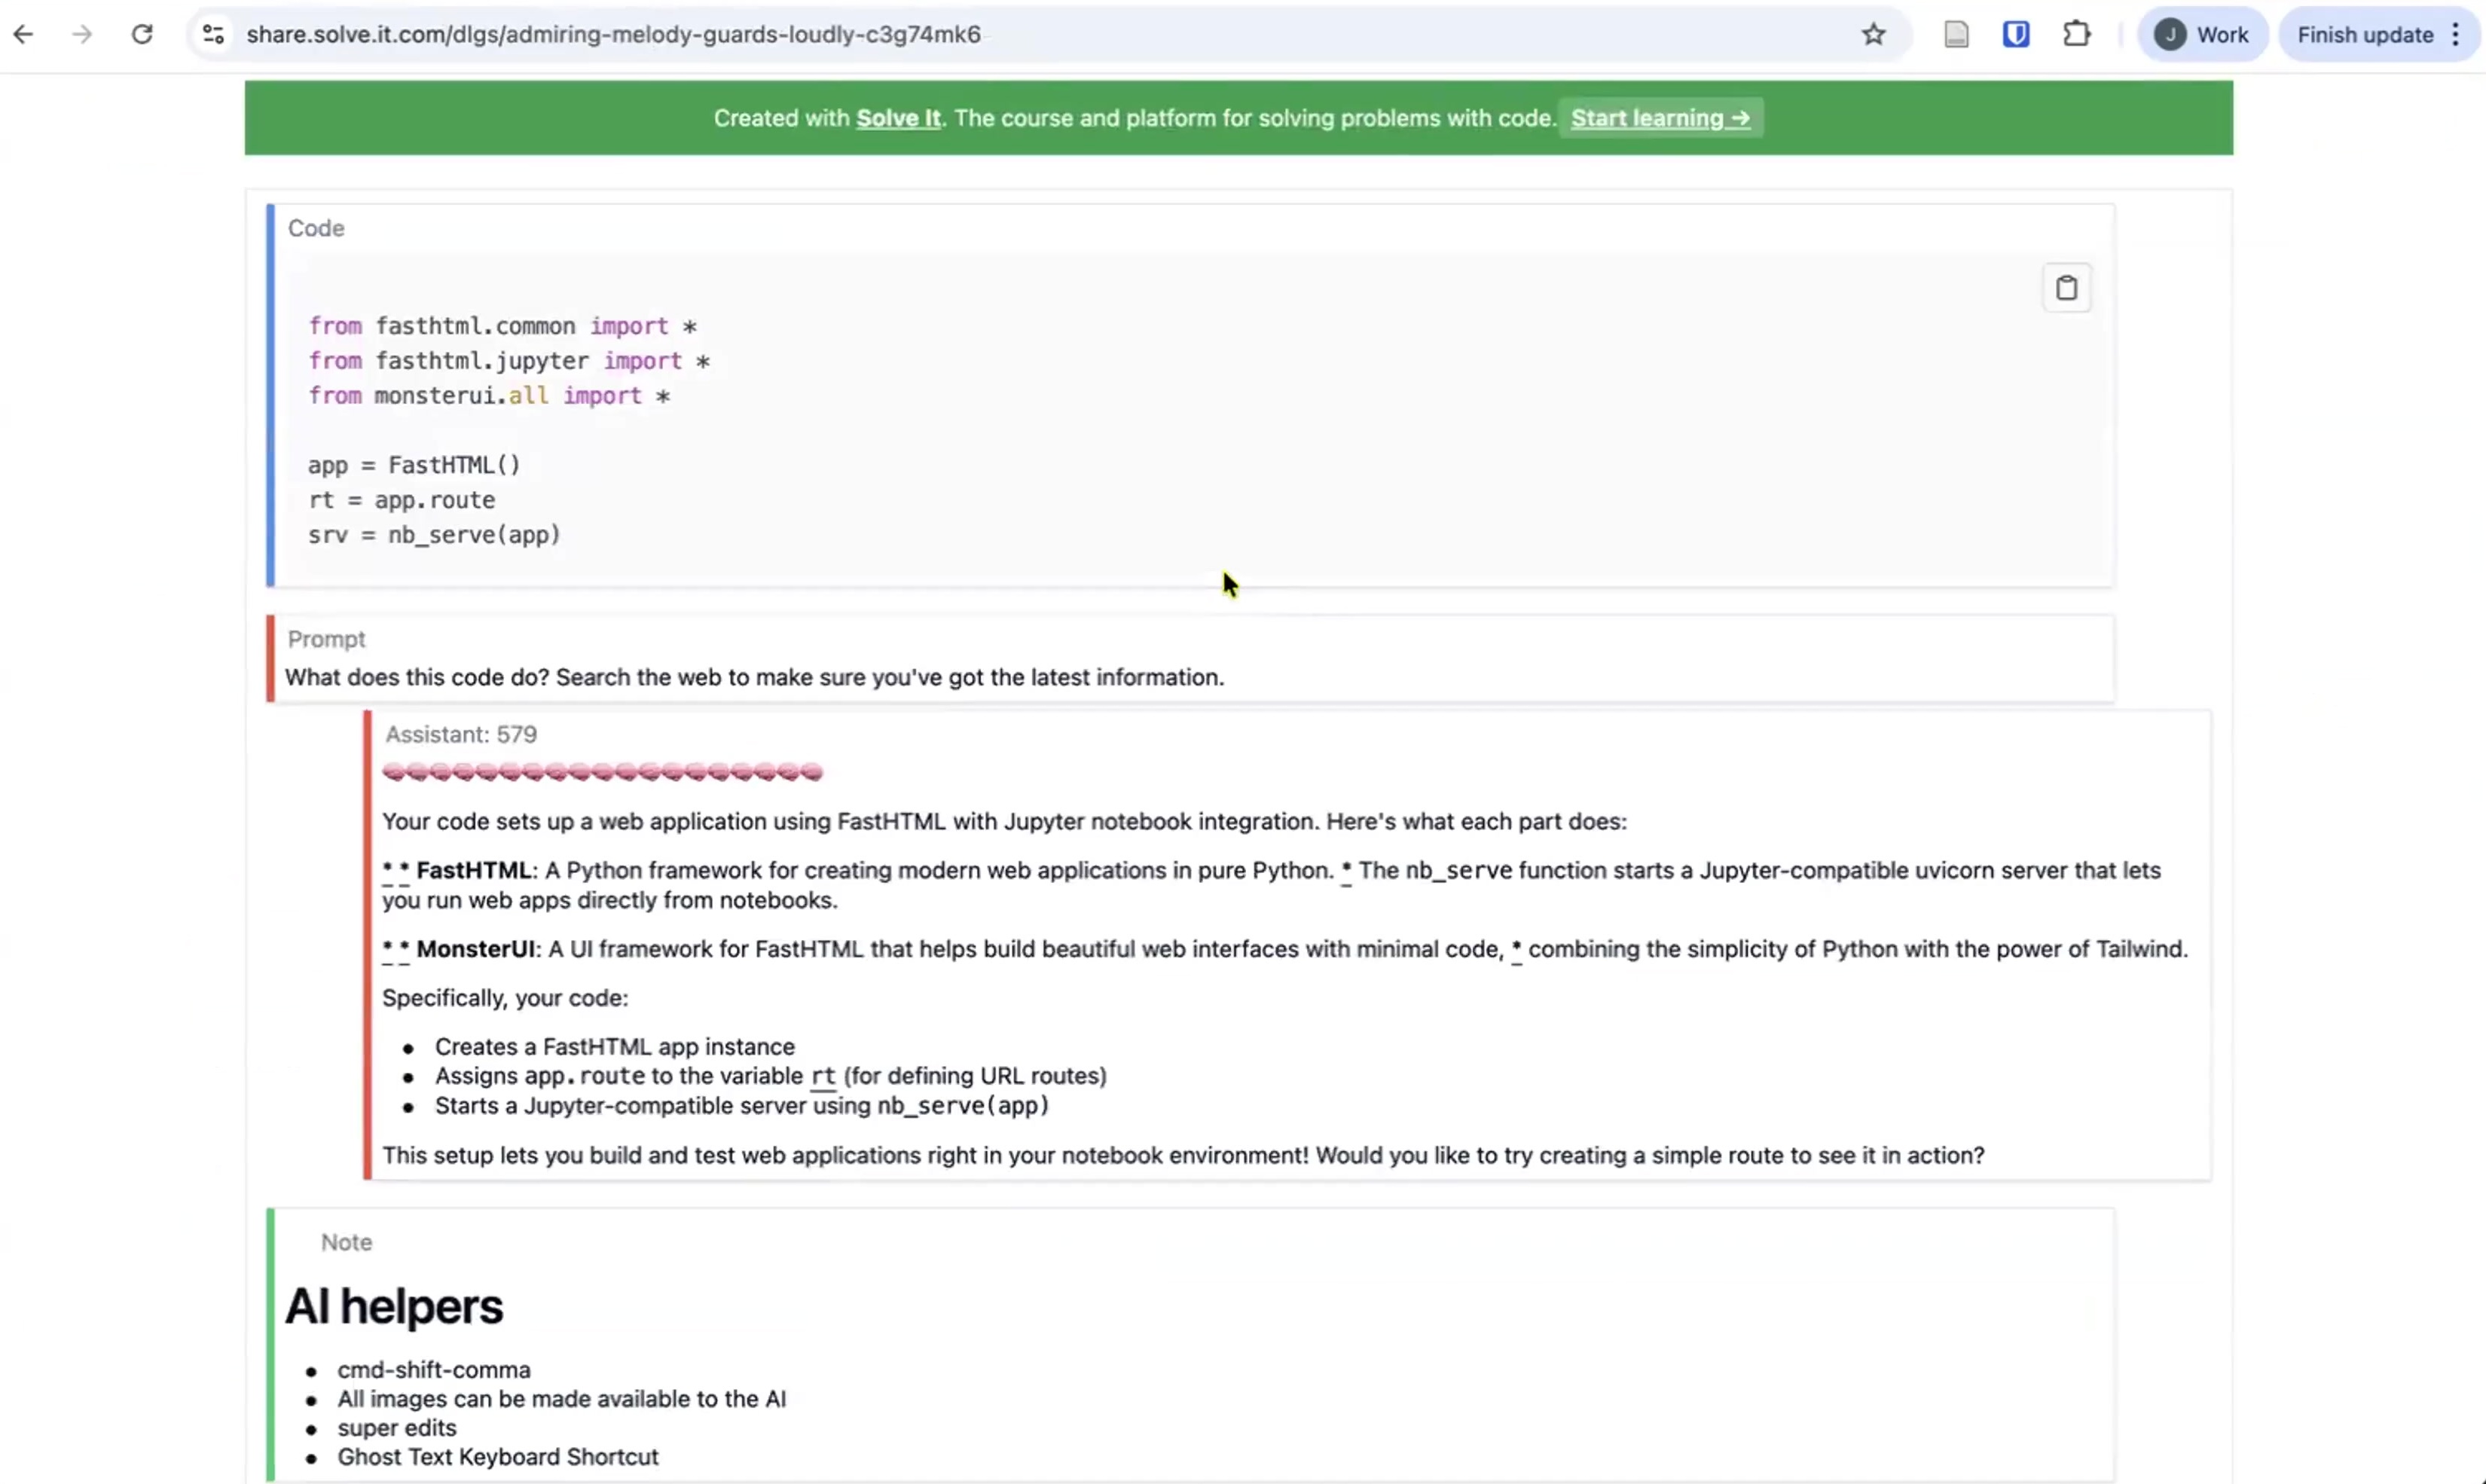
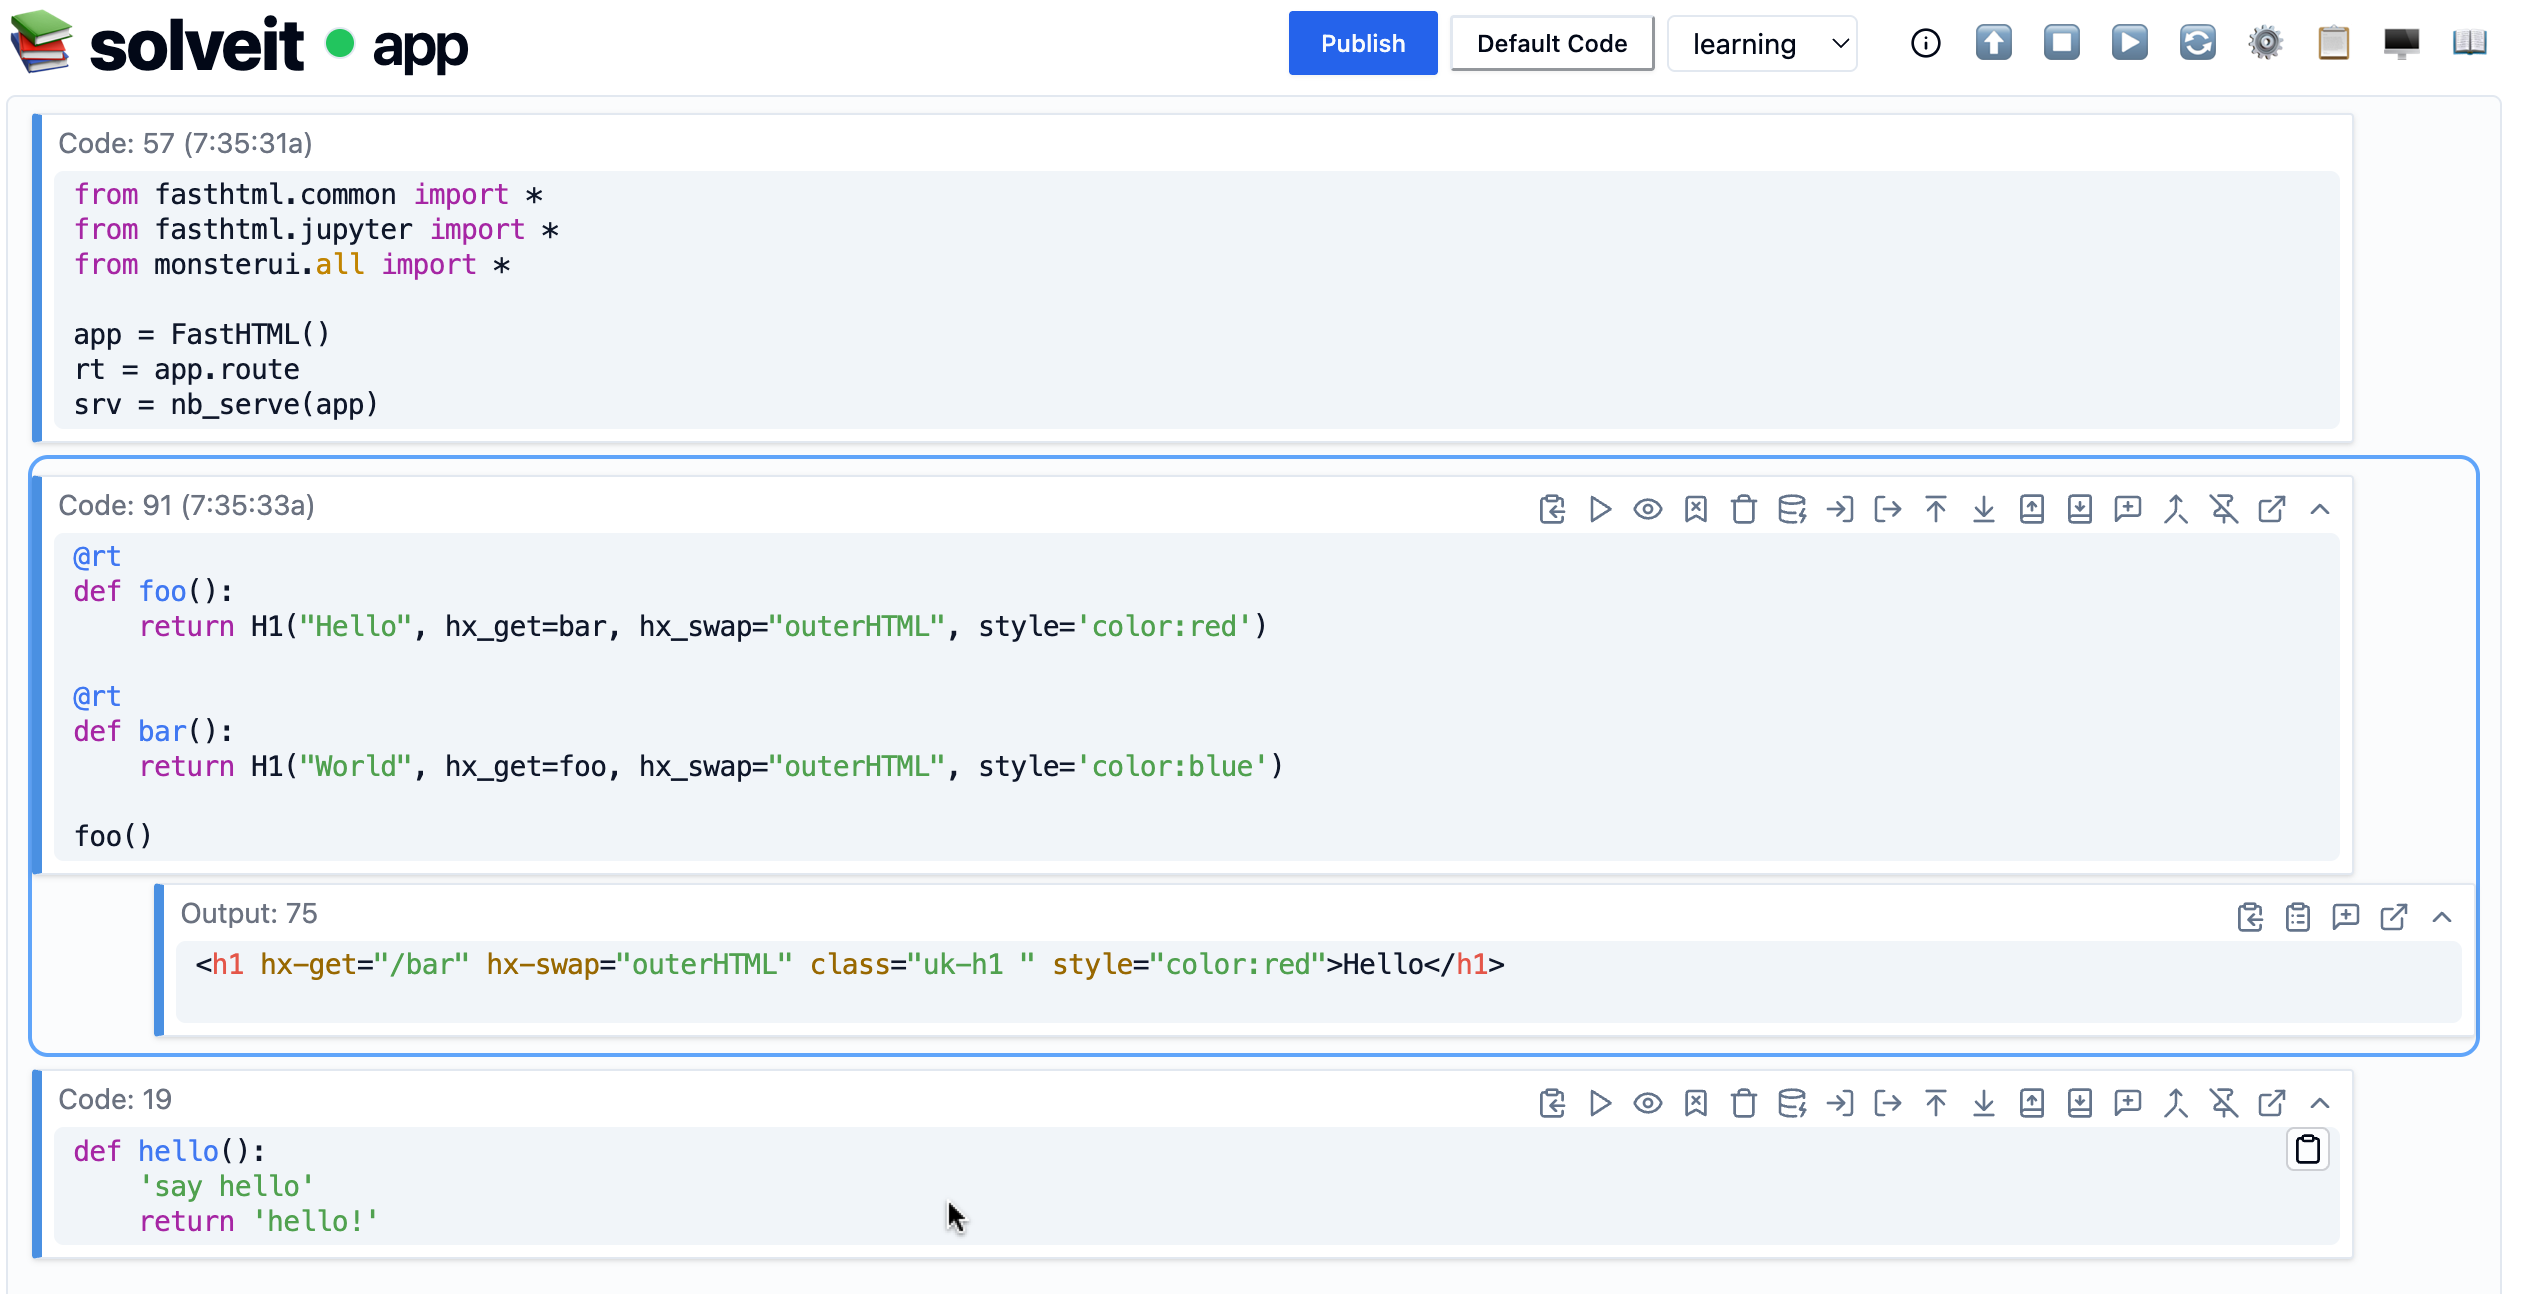
FastHTML Support
FastHTML is a Python framework for building web applications. It works particularly well with SolveIt.
Create a FastHTML app in a code cell:
from fasthtml.common import *
from fasthtml.jupyter import *
from monsterui.all import *

app = FastHTML()
rt = app.route
srv = JupyUvi(app)
Define your routes:
@rt
def foo():
    return H1("Hello", hx_get=bar, hx_swap="outerHTML", style='color:red')

@rt
def bar():
    return H1("World", hx_get=foo, hx_swap="outerHTML", style='color:blue')

foo()
Run it, and your app is live at the public URL. The JupyUvi(app) function handles serving on port 8000, making your app accessible via your instance’s public URL.

A key difference from standard FastHTML is that here we use JupyUvi(app) instead of serve(). The JupyUvi class is specifically designed for Jupyter-like environments such as SolveIt, running the uvicorn server in a way that works properly within notebook contexts where code cells execute in sequence.
HTMX
FastHTML includes HTMX by default. HTMX lets you add interactivity without writing JavaScript - server responses update parts of the page.
In the example shown, clicking the text sends a request to the server, which returns new HTML that replaces the clicked element. The page feels interactive without page reloads or JavaScript.
HTMX works naturally with SolveIt’s live development workflow. Edit your server code, and changes appear immediately when you interact with the app.
Live App Development
Edit running applications without restarting them. Change your code, and the changes take effect immediately.
In the example above, the developer edited the FastHTML route while someone else had the public URL open in their browser. Each code change appeared instantly when they refreshed or interacted with the app.
This works because FastHTML (and similar frameworks) reload changed modules automatically. Edit code in your dialog, the server sees the change, and the next request uses the new version.
The workflow: open your public URL in one browser tab, edit code in SolveIt in another. Make changes, reload the public URL, see results. No deploy cycle.
This is how the SolveIt team runs production services. The Discord bot runs in a dialog. Edit the dialog, the bot updates immediately.
Sharing & Export
Export Options
Click the settings icon and select “Export Dialog” to export your work.
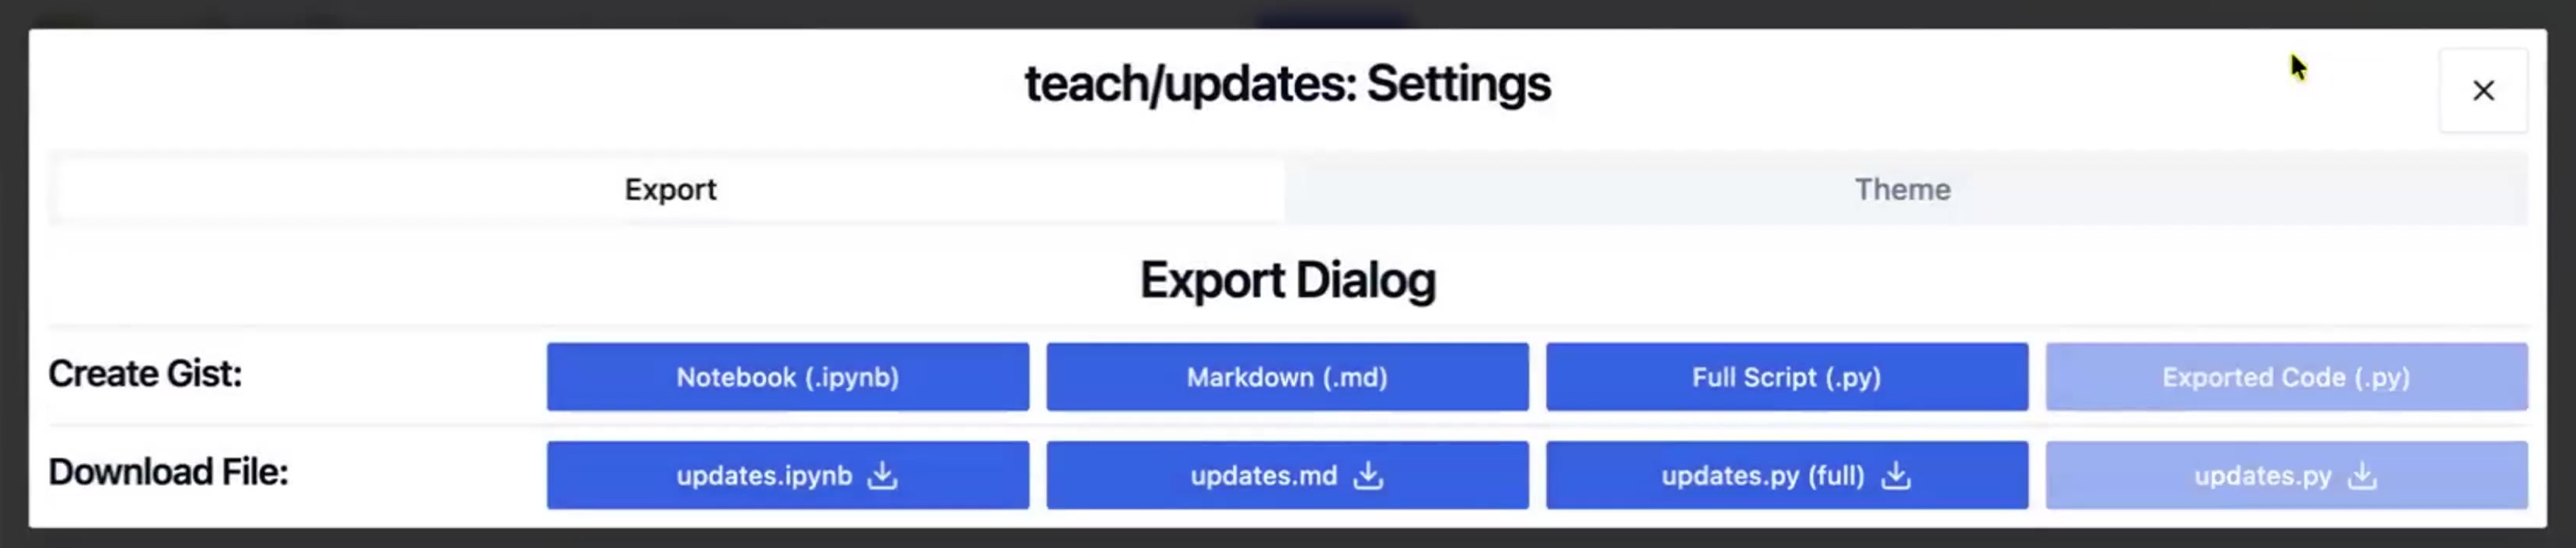
You can create a GitHub gist or download the file directly. Either way, you get the same format options. The .ipynb format is the full Jupyter notebook with all cells, outputs, and metadata. GitHub renders these reasonably well. The .md format gives you markdown with code blocks. Full Script (.py) combines all code cells into one Python file. Exported Code (.py) includes only cells marked for export (covered in Code Export to Modules).
Publishing
Publishing creates a SolveIt-native shareable version of your dialog. It renders like what you see in SolveIt but as a clean, read-only page.
Unlike gists, published dialogs preserve the SolveIt look and feel. Code blocks, AI responses, outputs, and images all render as they appear in your dialog.
This is useful when you want to share your work with people who understand SolveIt, or when the dialog itself is the artifact - a complete analysis, tutorial, or documented exploration.
The published version is read-only. Viewers see your work but can’t edit it. They can copy code or text, but the original dialog is protected.
Messages you’ve marked as ‘Pinned’ are not exported at all. Messages you’ve folded won’t show up in the rendered views, but when others import your dialog they will be able to see those folded messages.
Blog View
You can append .html to your url to get a blog view of your dialog. Here all notes, and AI outputs are shown as markdown while the code cells show up as before.
Import Published Dialogs
You can import published dialogs into your own SolveIt instance. This is useful when you want to use someone else’s work as a starting point for your own exploration. You can import a published dialog by copying its URL and going to your dialog overview. There click the ‘Upload File’ button and then paste the url in the ‘Upload via URL’ field.
Advanced AI Features
Super Completions
Ghost text gives you inline suggestions as you type. Super Completions (Cmd + Shift + .) go further - they use a more powerful model to generate larger chunks of content.
In code and note messages: Position your cursor where you want content, press Cmd + Shift + ., and the AI generates a completion based on context. The AI looks at your imports, existing code, and cursor position to generate something appropriate.
This is useful for standard implementations where you know what you want but don’t want to type it all out.
In prompt messages (Prefill): You can also use super completions to control how the AI responds by prefilling the start of its response. Type the beginning of what you want the AI to say in the response area, and it continues from there.
Don’t overuse super completions. Writing code yourself builds understanding. But for boilerplate, repetitive patterns, or controlling response format, they save time.
Super Edits
Super Edits work like Cursor’s Cmd+K feature. Select some code or text, press Cmd + Shift + ., and tell the AI what changes you want.
The AI sees what you’ve selected and modifies it according to your instructions. For example, select a function and say “make this a recursive one-liner” - the AI rewrites that specific function.
This is different from Super Completions (which generate new code) or ghost text (which suggests as you type). Super Edits transform existing code.
Useful for refactoring, changing implementations, or applying patterns to existing code. Select the section you want changed, press the shortcut, describe the change, and the AI makes it.
Like all AI code features, use this thoughtfully. For small changes you understand, doing it yourself is often faster and helps you learn. For larger transformations or applying patterns you know, Super Edits save time.
Screenshot Feature
The AI can see images you paste, but sometimes you want it to see exactly what’s rendered on your screen. Press Cmd + Shift + , to capture a screenshot and add it to your prompt.
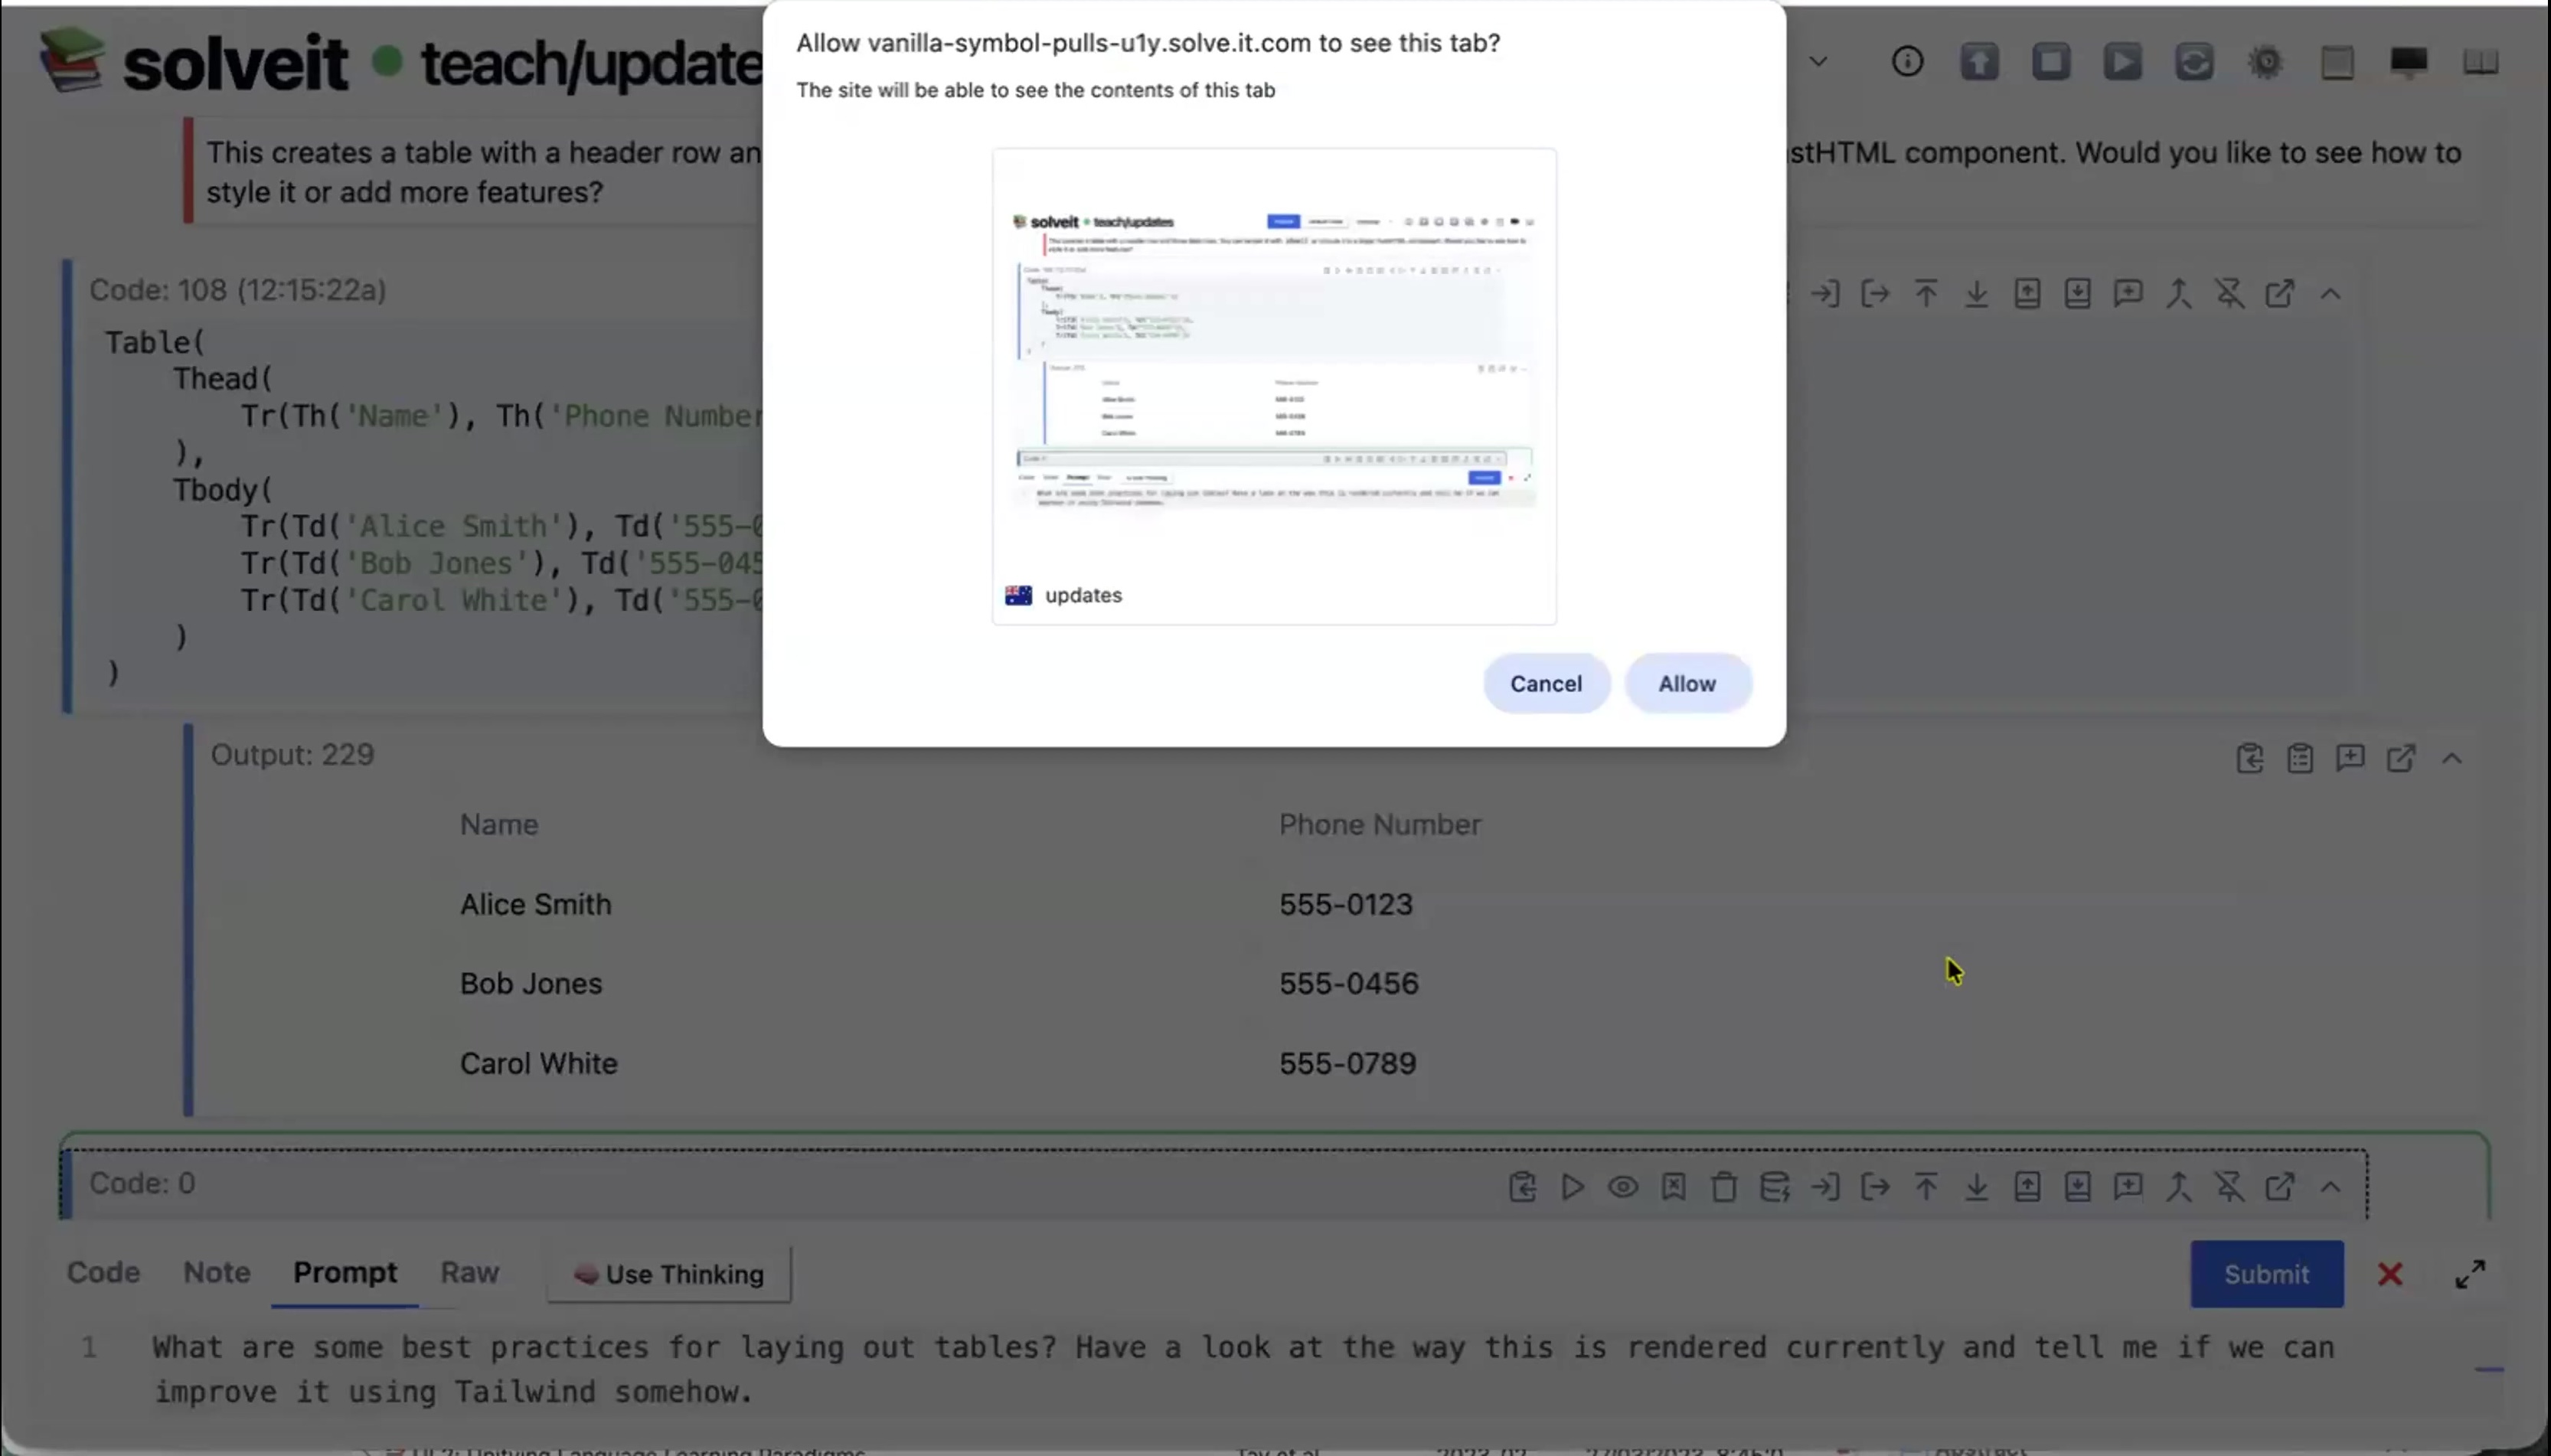
A dialog appears showing what will be captured. Click “Allow” and the screenshot gets added to your message.
This is useful when, for example, you want feedback on how something looks, not just the code. Or, when there are rendering problems you want help debugging.
In this example, the AI saw exactly how the table rendered and suggested specific Tailwind classes to improve the appearance. Without the screenshot, it would just guess based on the HTML.
The screenshot captures what’s visible in your browser tab at that moment. It becomes part of your prompt’s context.
Pop-out Windows
Click the pop-out button on any message or output to open it in a separate browser tab. The output displays in a dedicated window that updates live as you change the code.
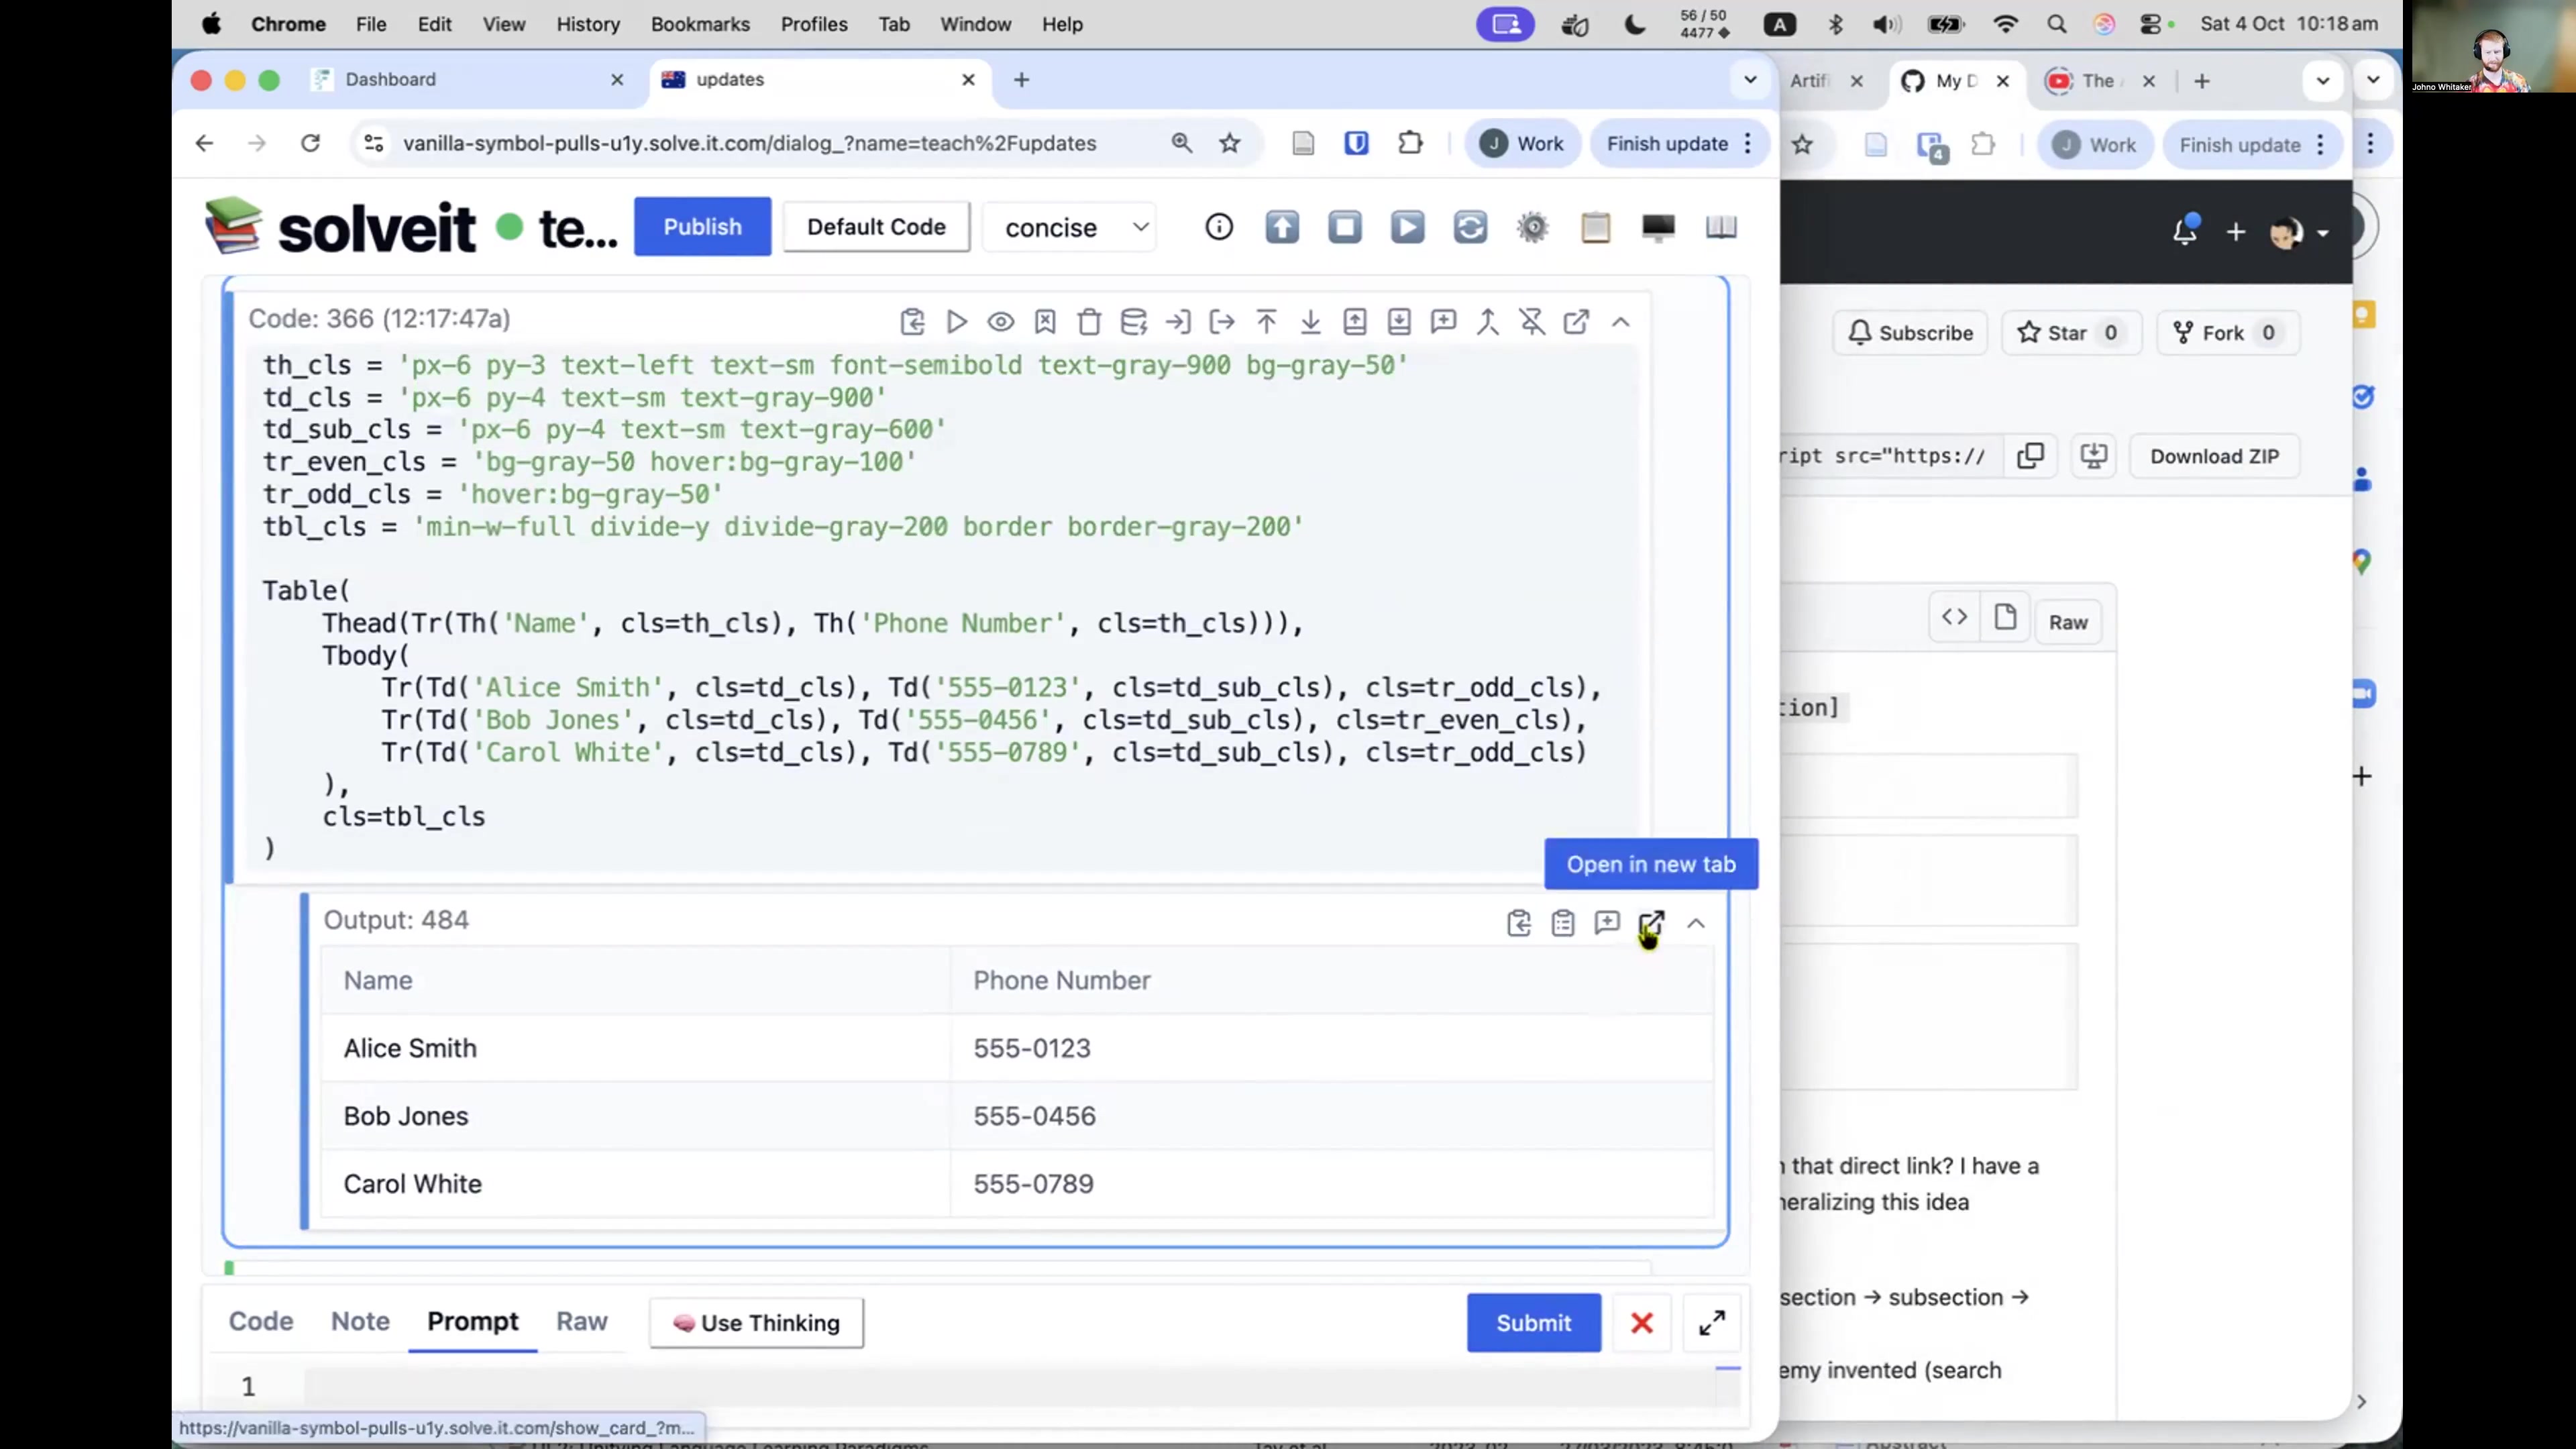
This is useful in multiple situations. For example, when you want to see output while editing code side-by-side like a vizualisation, or an html preview. It’s also useful to show the logs of a running server. Or when rewriting a particular note multiple times using dialoghelper.
Any changes you make in the main dialog appear immediately in the pop-out window. Edit code, re-run, and the pop-out updates automatically.
Module Export
Code Export to Modules
Press E on a code cell to mark it for export. This adds an export marker (like #| export in nbdev). When you export your dialog, cells marked this way go into a Python module with the same name as your dialog.

To use this, start by writing functions in a dialog. Then, press E on messages you want to export. After that, Solveit automatically creates a .py file with the same name as your dialog. Finally, you can important that file into other dialogs.
You can see the automatically exported module in the same directory as your dialog and download it.
The module name matches the dialog name. A dialog called utils exports to utils.py. Then from utils import * works in any other dialog.
This turns dialogs into reusable modules. Build tools, test them interactively, mark cells for export, and use them across projects.
Configuration
Secrets Management
Store API keys and environment variables in your instance settings.
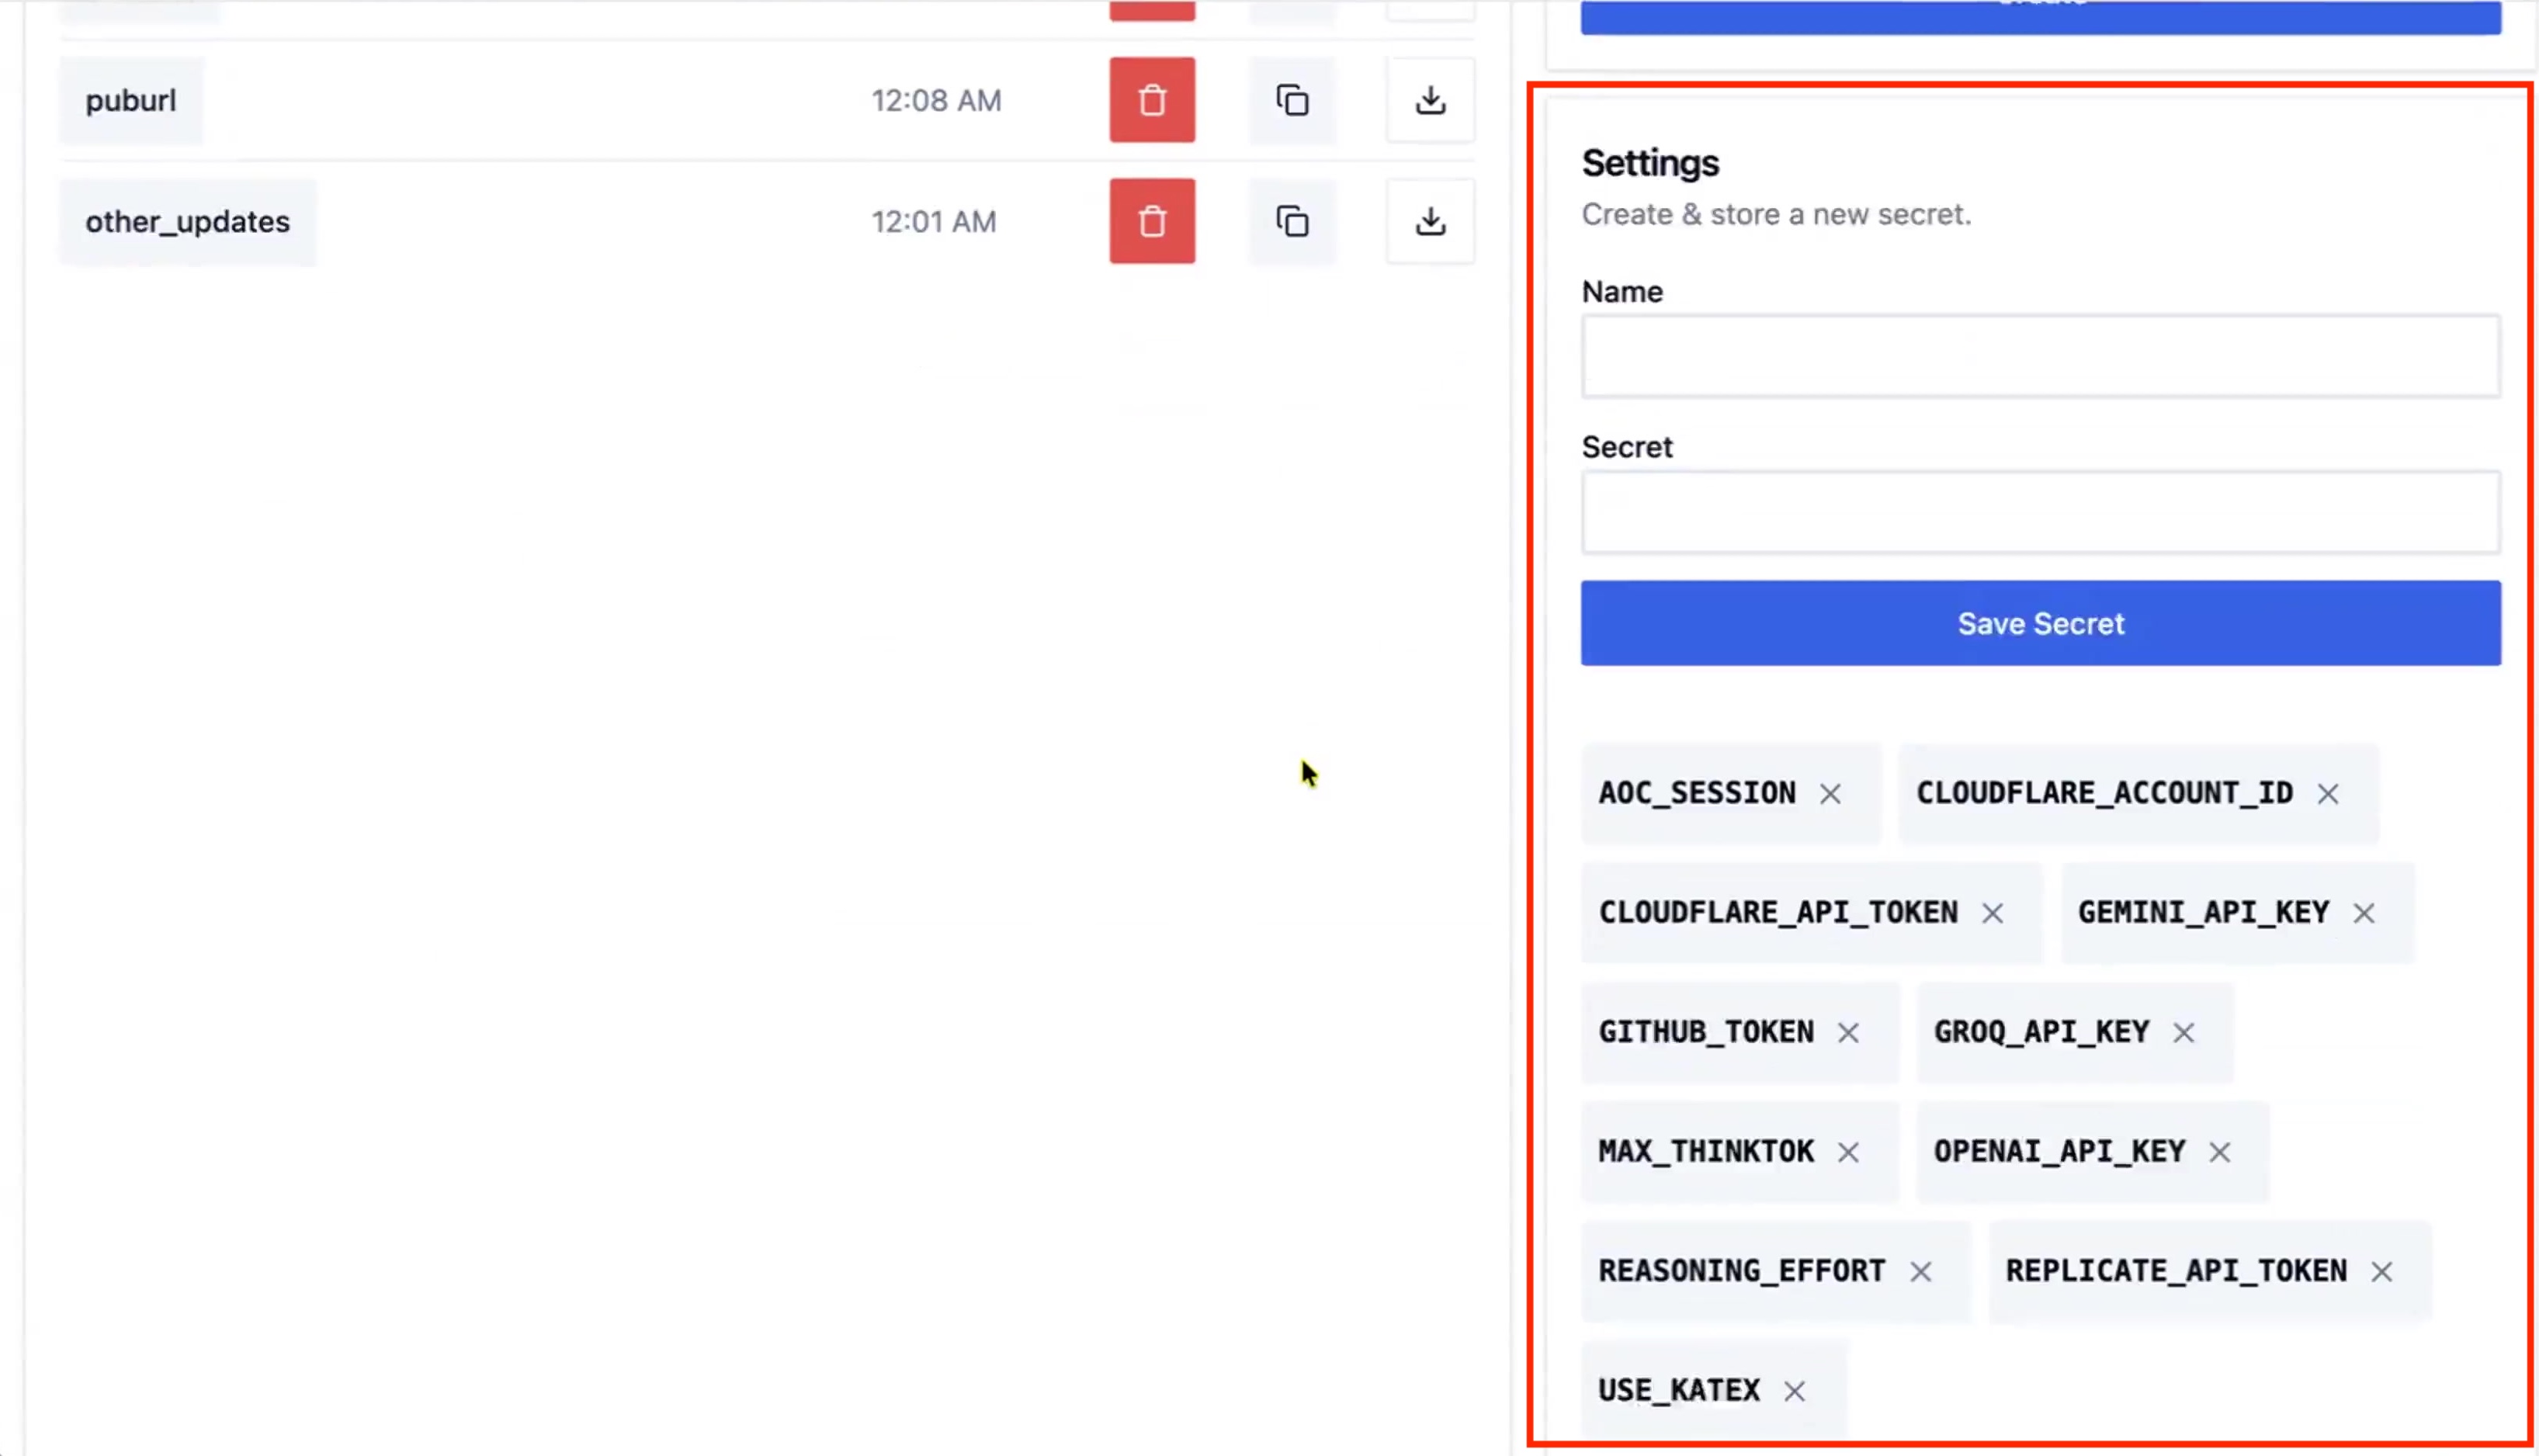
Add a secret by entering a name and value, then click “Add Secret”. These become environment variables available in your Python code:
import os
api_key = os.environ['ANTHROPIC_API_KEY']
Secrets persist across sessions and are available in all dialogs on that instance. They’re not visible in published dialogs or gists unless you print them.
Feature Flags
Feature flags are special environment variables that enable or disable specific SolveIt features. Add them in the settings panel like secrets.
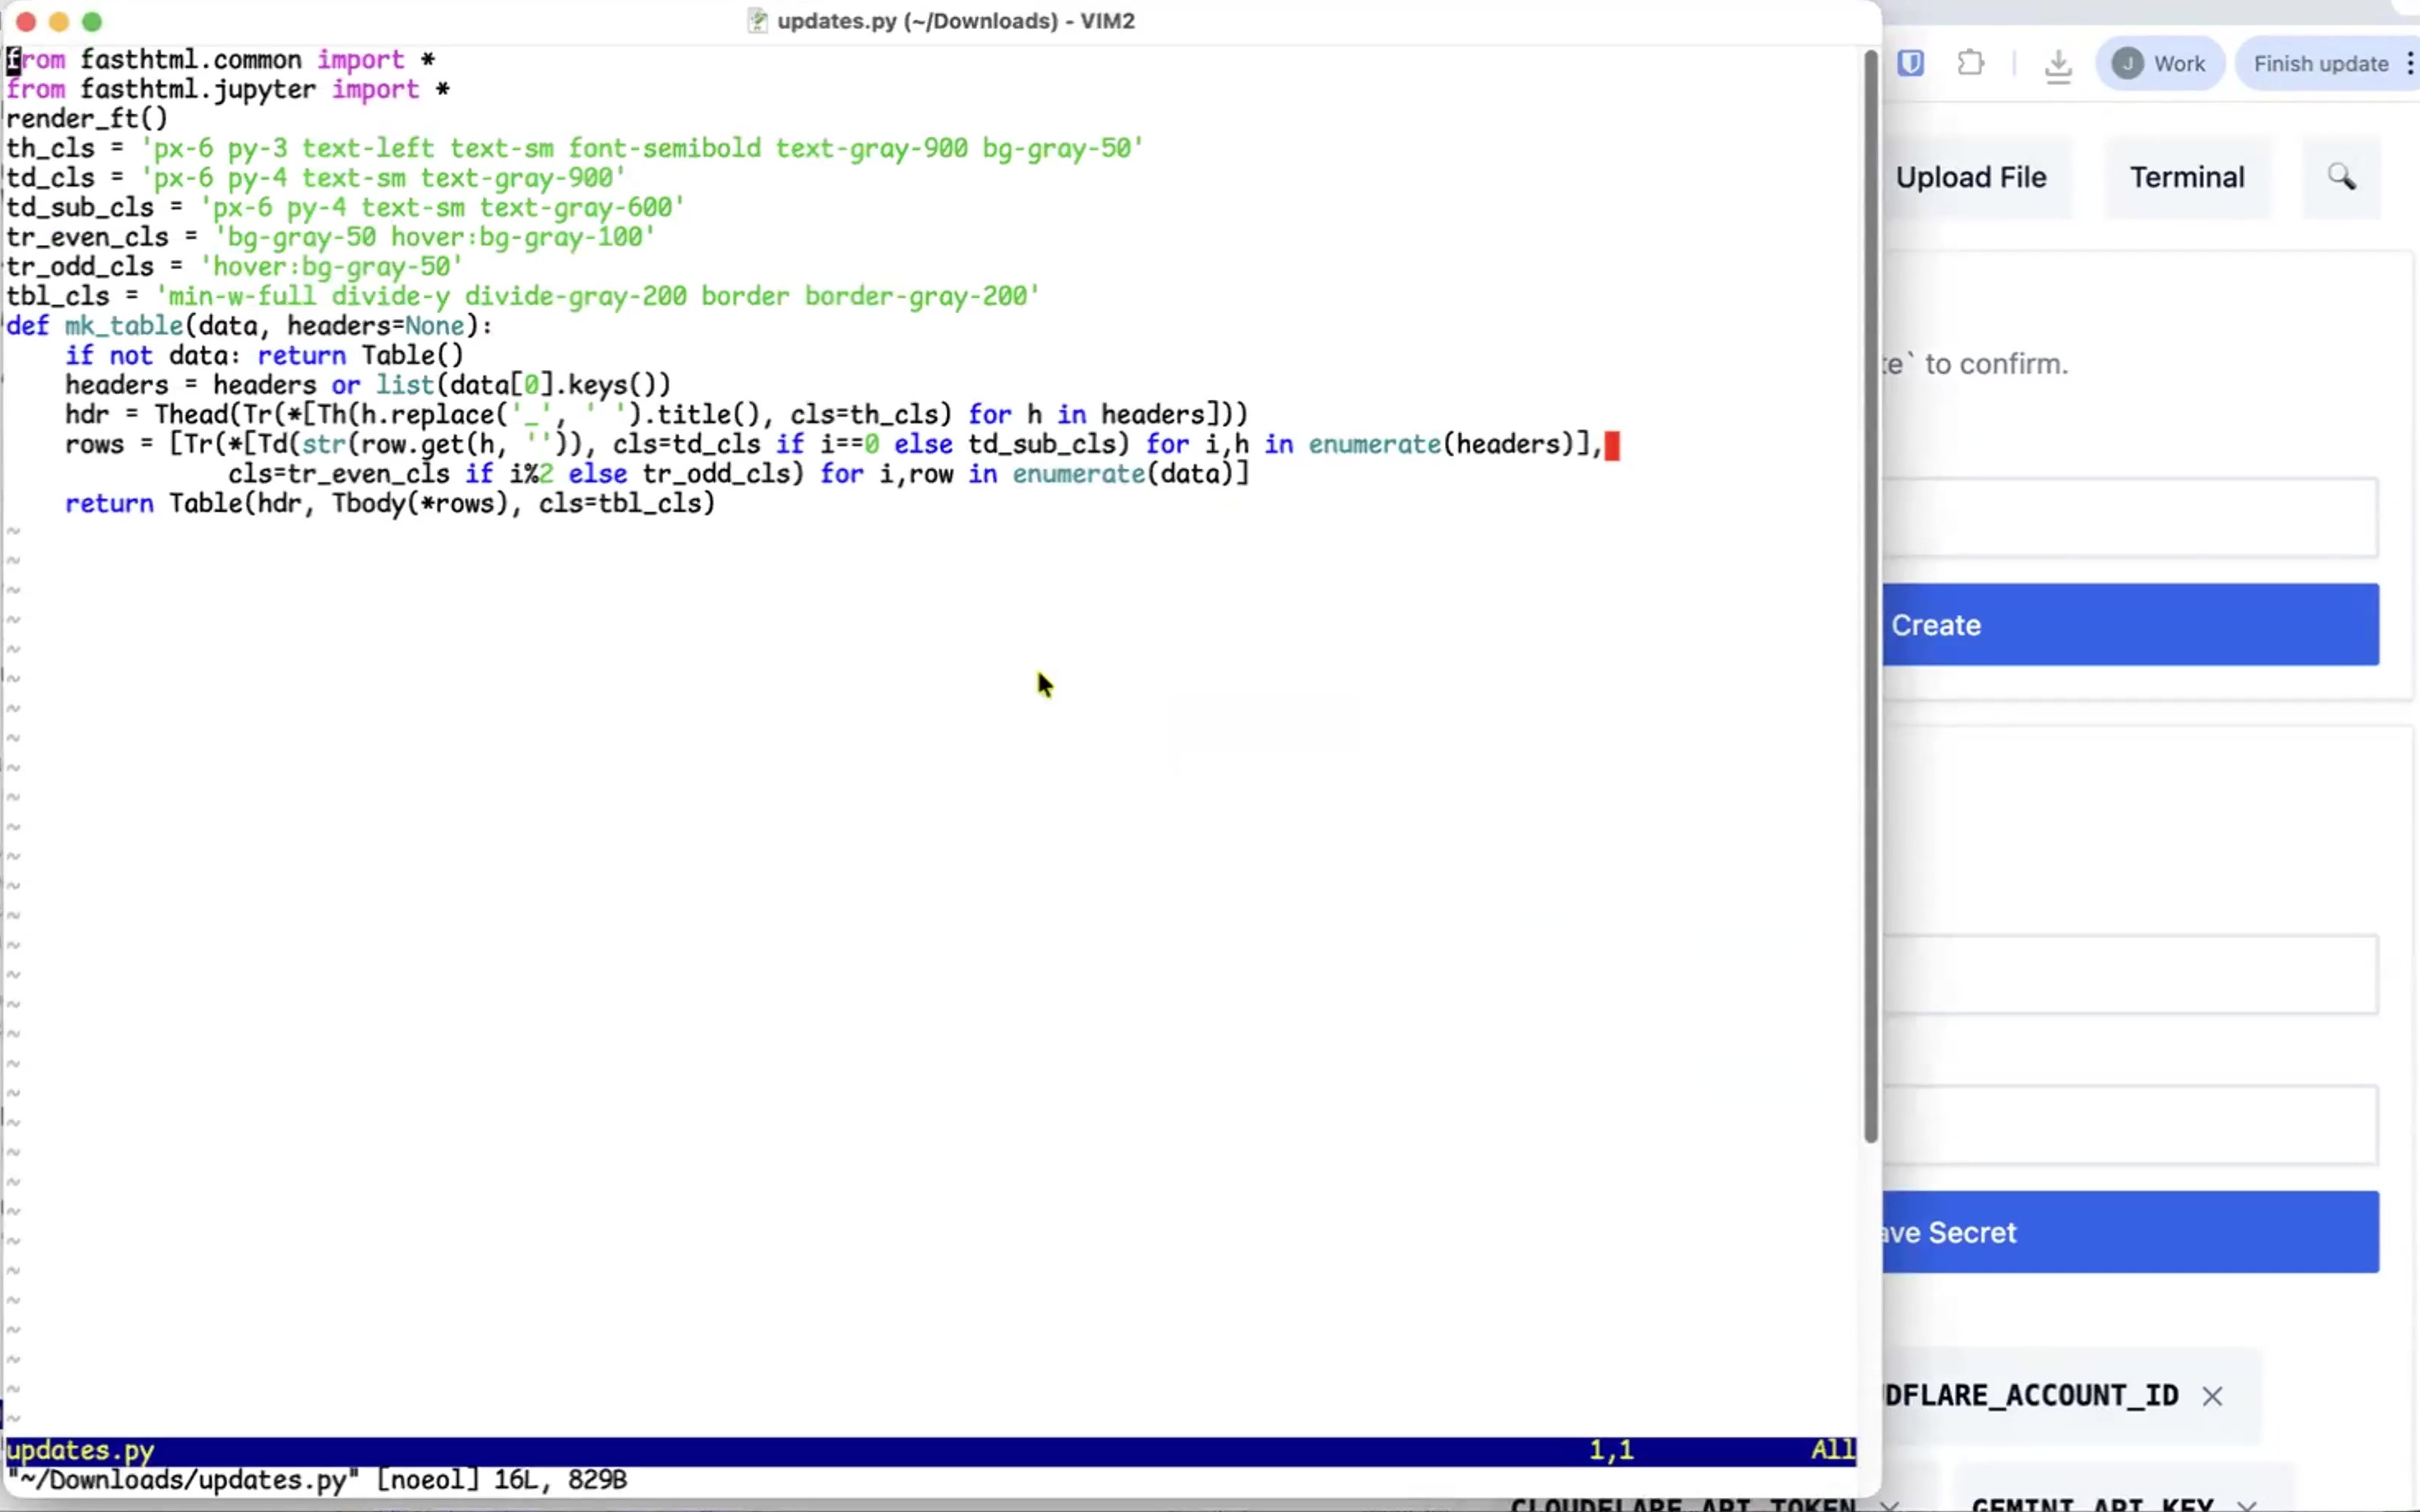
USE_KATEX
Set to any non-zero value to enable LaTeX math rendering. This lets you write mathematical equations using standard LaTeX syntax.
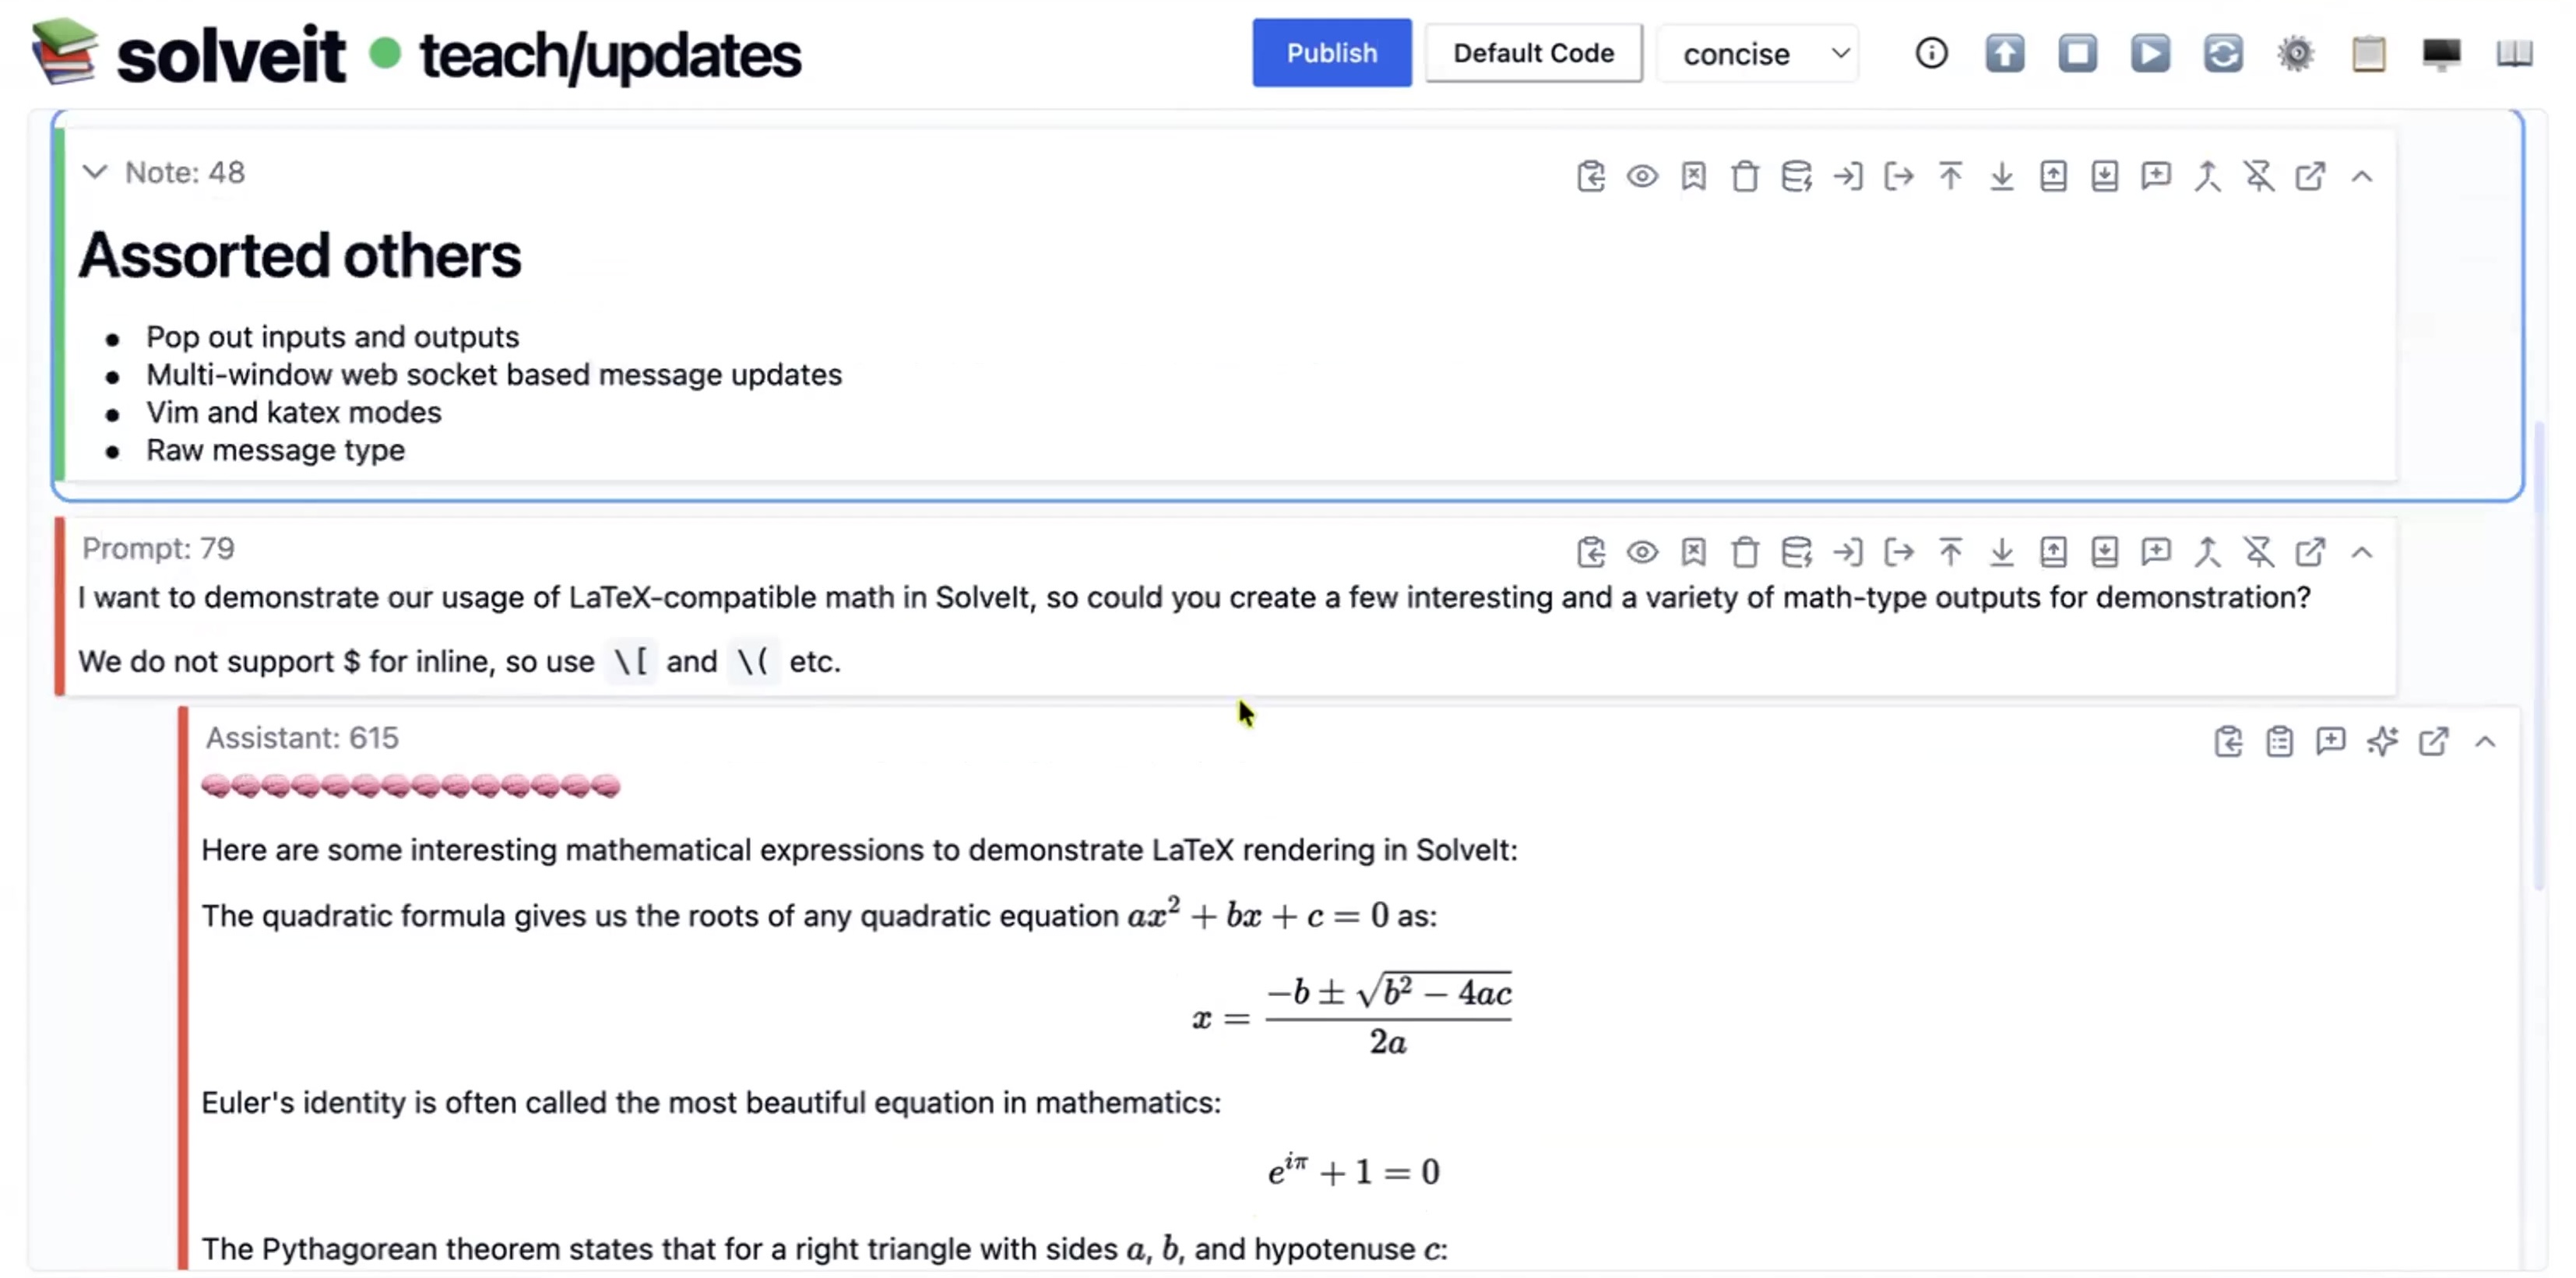
This feature flag has three modes. First, when it’s not set math rendering is disabledl. Second, when it’s set to 1 (or true, yes, auto) safe mode is enabled. This uses $$ ... $$, \\[ ... \\], and \\( ... \\) delimiters only, avoiding single dollar signs that conflict with monetary amounts. Finally, when it’s set to dollar (or any string starting with ‘d’) full mode is enabled. This includes all safe delimiters plus $ ... $ for inline math, matching ChatGPT/Claude LaTeX output.
No server restart needed - just refresh your browser after changing the setting.
USE_VIM
Set to any non-zero value to enable Vim keybindings in the editor. The Monaco Vim mode is compatible enough that Vim users will feel at home.
The Monaco editor (same as VS Code) includes a Vim mode that’s compatible enough for serious Vim users. Modal editing, text objects, macros, and common motions all work.
If you don’t use Vim, leave this off. Vim is modal can be confusing if you’re not familiar with it.
If you do use Vim, you’ll appreciate having your familiar editing patterns. The muscle memory works, and you don’t have to context-switch between editors.
UI/UX Features
Syntax Highlighting
Code cells have syntax highlighting for Python. Keywords, strings, numbers, and functions appear in different colors based on their role in the code.
This makes code easier to read and helps catch syntax errors visually. The highlighting updates as you type.

The Monaco editor (VS Code’s editor) provides the highlighting, so it’s accurate and responsive. It understands Python syntax including decorators, f-strings, type hints, and modern Python features.
Syntax highlighting works in code cells automatically. No configuration needed.
Message Selection
Selected messages show a blue border. This indicates which message will respond to keyboard commands.
The selected message (2nd) has blue border
Click a message to select it, or use arrow keys to navigate between messages. Once selected, press Enter to edit, or use shortcuts like X (cut), C (copy), V (paste).
The selection system is how keyboard-driven workflows work in SolveIt. Select a message, then operate on it with shortcuts.
Multiple selection isn’t supported - commands apply to the single selected message.
Tooltips
Hover over buttons and UI elements to see tooltips. These explain what the button does and show the keyboard shortcut if one exists.
Tooltips help you learn the interface. Hover over an unfamiliar button to understand its purpose, then learn the keyboard shortcut to use it faster next time.
